Here we are just beginning to put together all of our lasercut pieces!
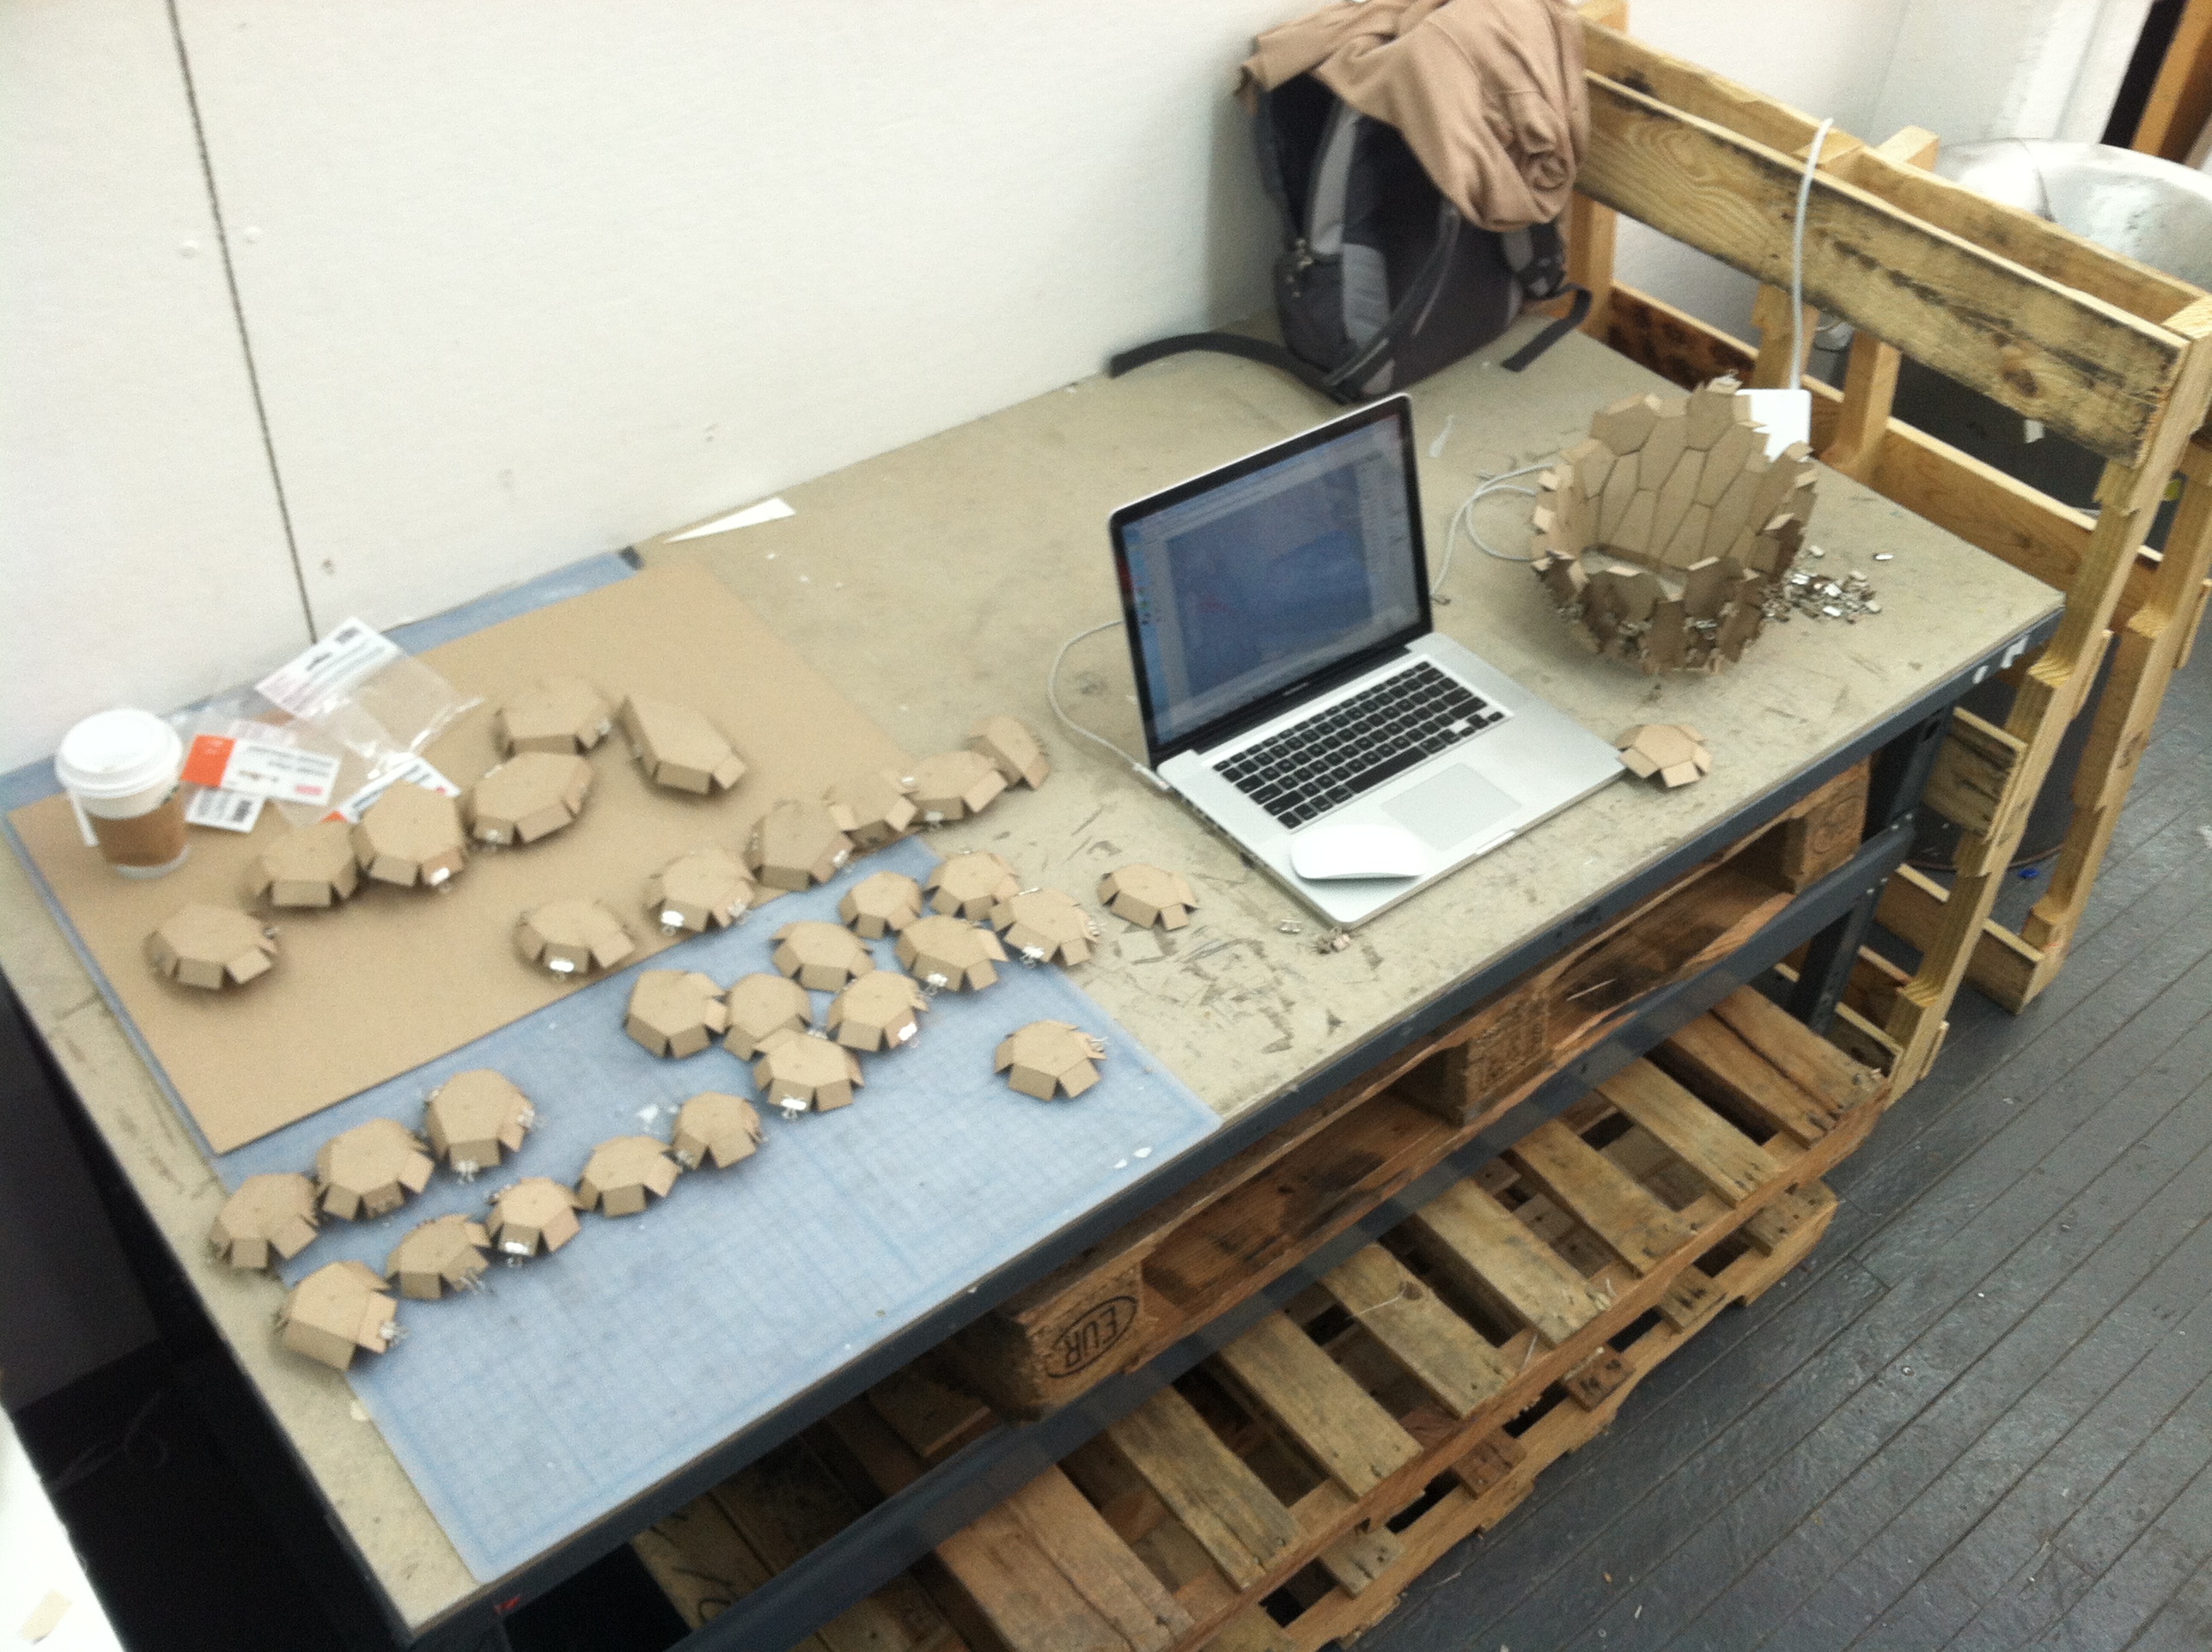
Here we are just beginning to put together all of our lasercut pieces!
I’m a little behind on the blog posting!
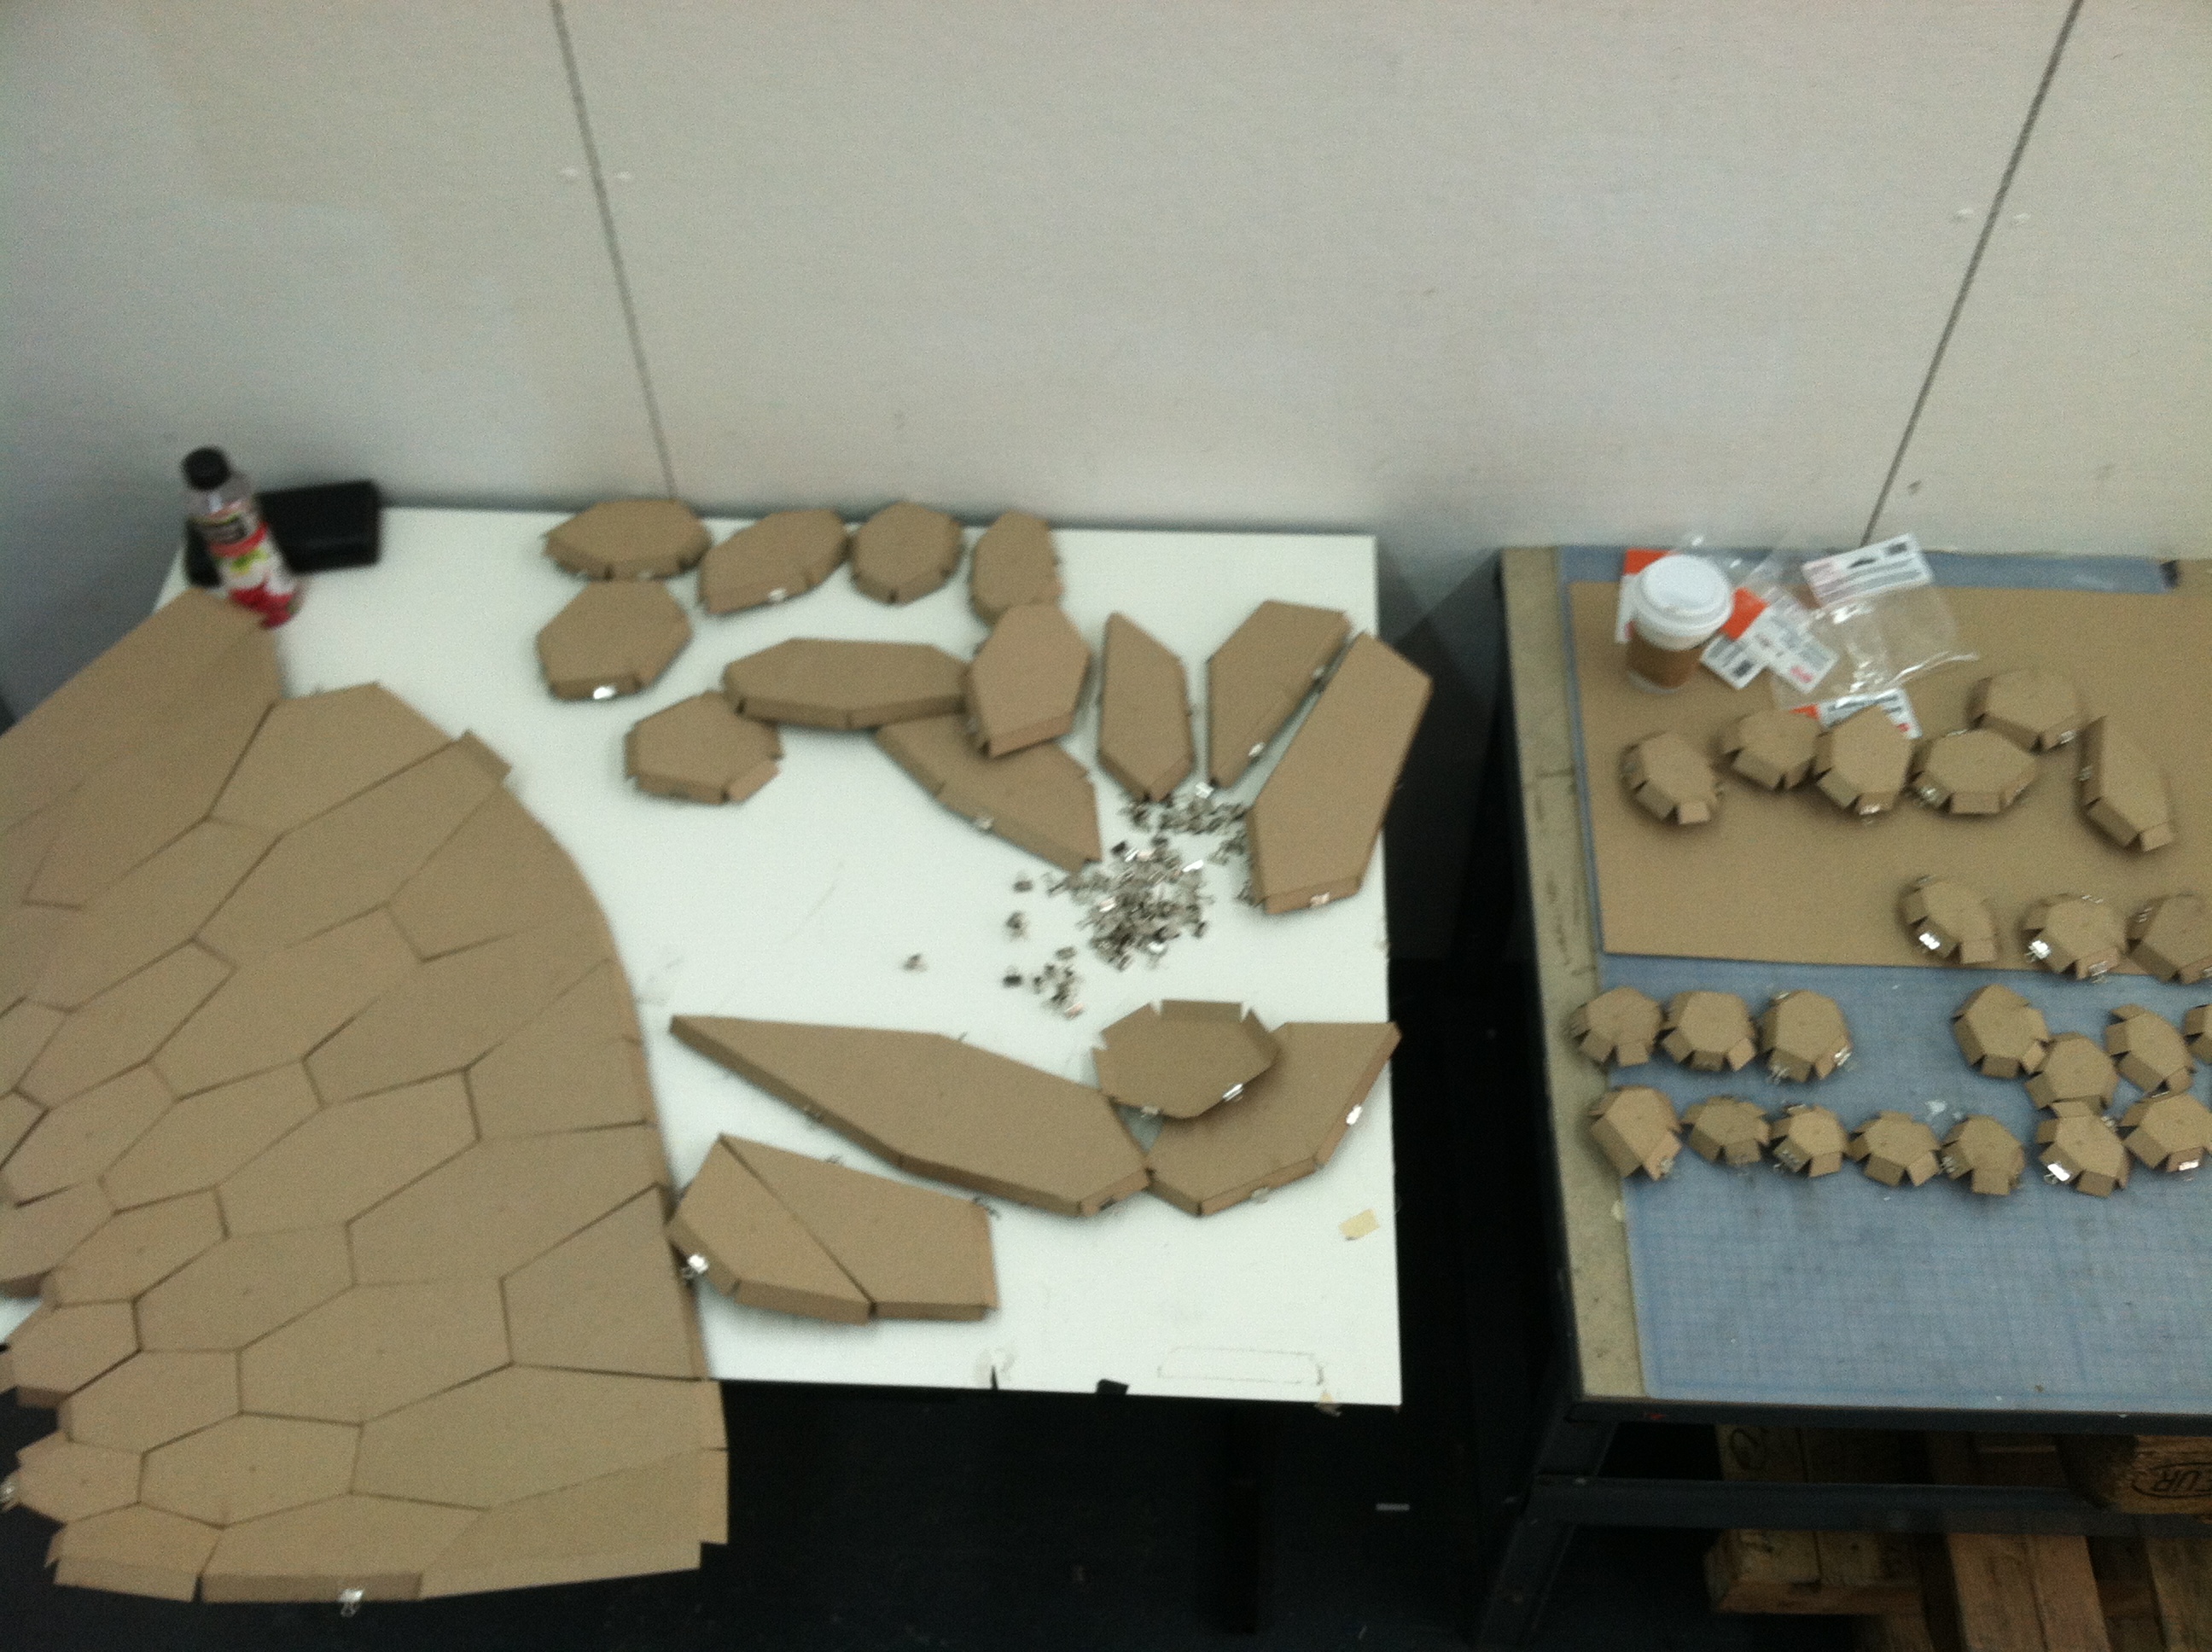
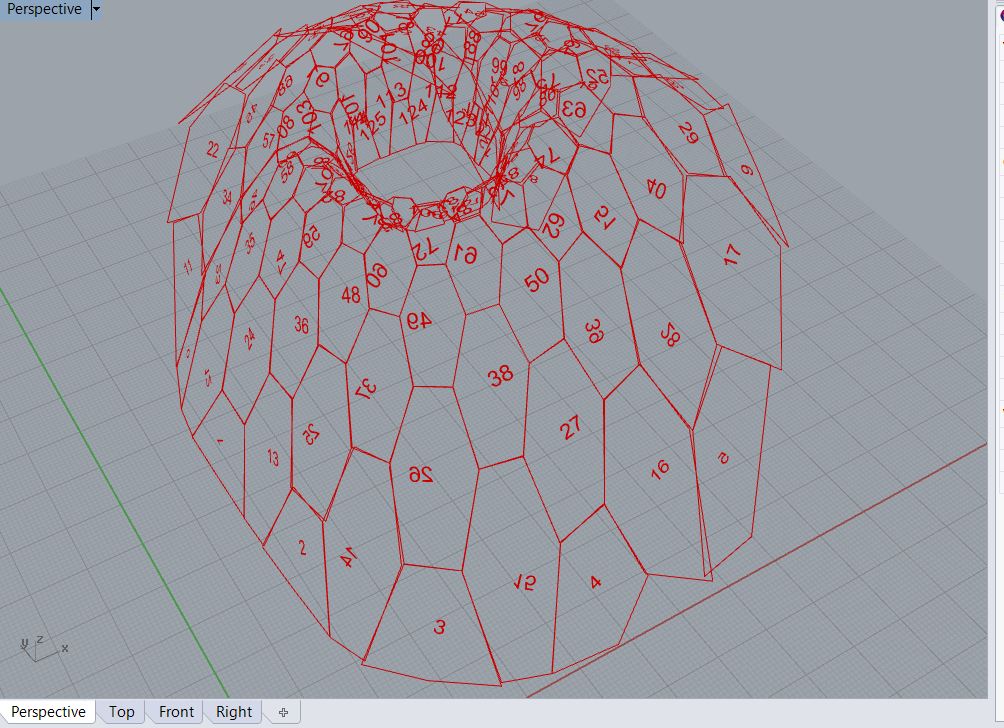
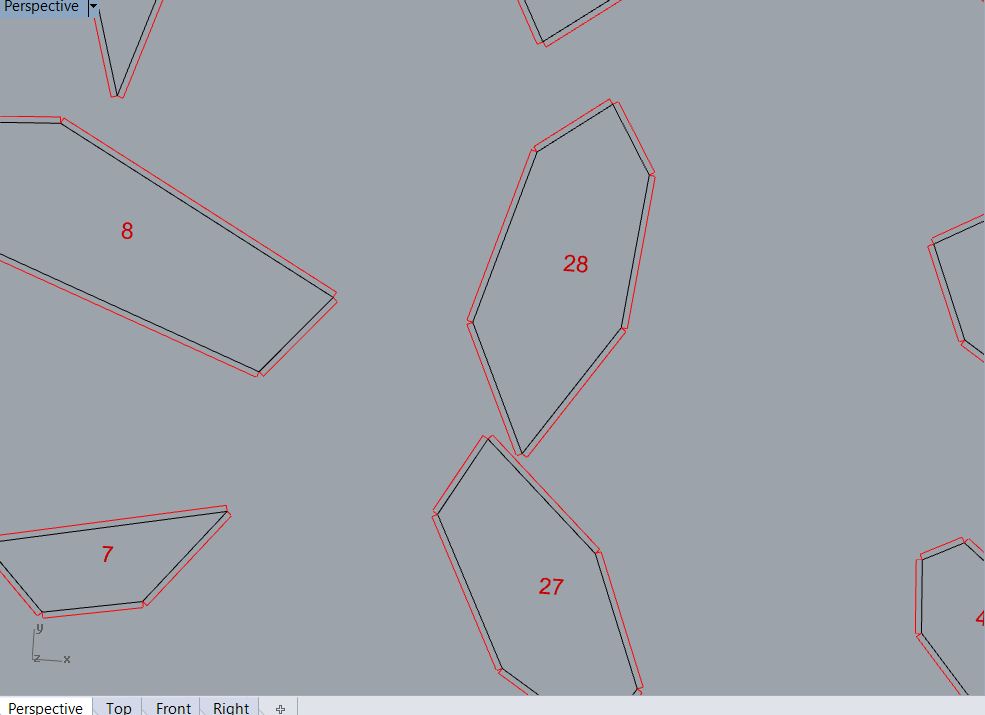
Seal recently posted about finishing the form finding for our structure and flattening the pieces to be lasercut. We were also able to label each of the hex surfaces on the structure with its index using the Text Tag 3D component so we could identify each piece:
One problem that became apparent is that the normals for each of these surfaces do not face the same direction – some face inside and some outside (as you can see in the photo, some of the text is backwards). We need to establish a clear direction for the final so that the lasercut score line folds in the right direction.
Also, putting together the pieces based on this index alone was difficult because the orientation of each piece was not clear. For the final, we are thinking of labeling each edge or vertex so we know quickly how the pieces fit together.
We were also able to generate “tabs” for each hexagon. We baked the flattened hex surfaces into Rhino and ran a separate GH file to generate the tabs. We identified the edges of each hex surface, offset each edge, and then drew a line from the start/end point of the original edge to the offset line. We were able to use the Color component in the Vector area to make the hex edges black (RGB 0,0,0) and the tab outline red (RGB 255,0,0) so they would be ready to lasercut.
We initially created the pattern that we wanted to apply to our form found surface in isolation. As you can see in the video, the pattern can be applied to various sized hexagons, the size of the cut-outs can be increased or decreased, and the orientation of the cut-outs in the hexagon can be rotated at increments of 60 degrees. The problem is that this particular pattern is built with brep geometry and cannot be applied to a mesh.
Then we created a new set of components for the pattern in conjunction with our form found mesh. As you can see in the video, we were able to create the pattern so that it the cut-outs could change size and the orientation could be rotated (the goal was to create a gradation of cut-out size using an attractor point and a randomized rotation pattern). However, the file we created was too heavy and we cannot apply the pattern to the whole mesh – we can only use a list item to display one hexagon at a time and change this list item to view the other hexagons on the surface. We haven’t been able to reduce the file.
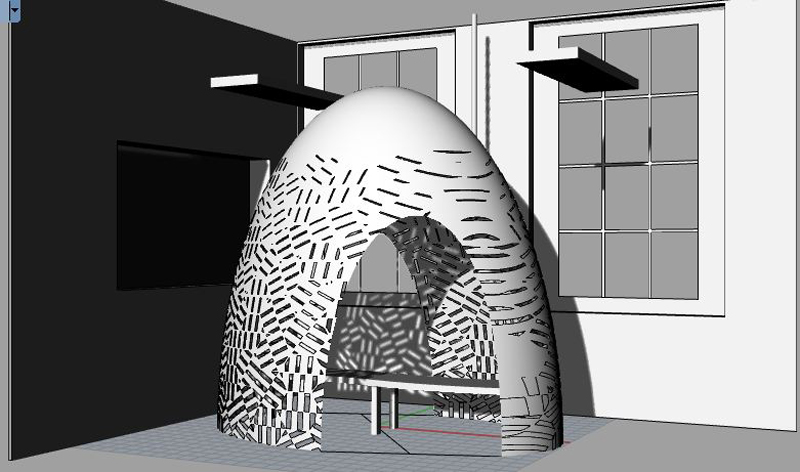
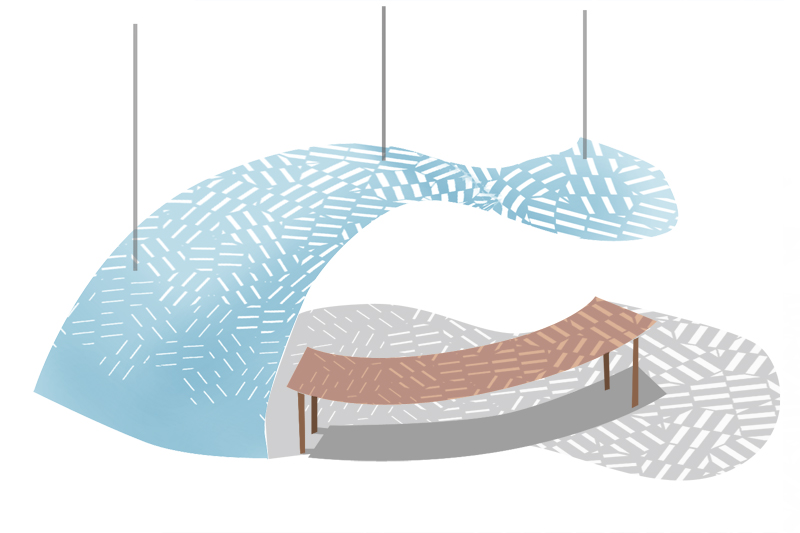
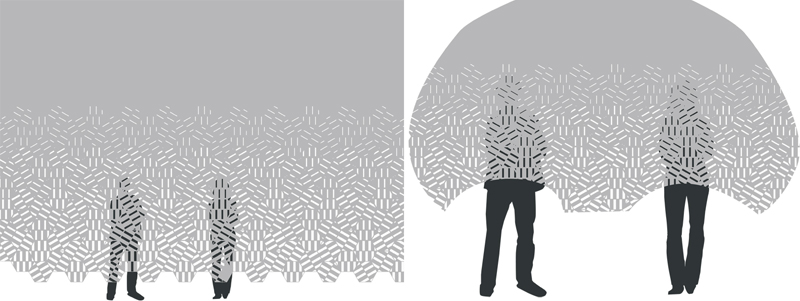
Here is another one of our concepts for the canopy. It is a structure to create and enclosed space around a bench. There are two openings – one on either side of the bench. From one side of the bench you have a view into the room and from the other side of the bench you have a view out the window. From a given perspective in the room, one person is concealed and one person is revealed, creating a semi-private conversation space.

Edeline, Seal, and I met this week to combine our initial ideas to form three project concepts to present today.
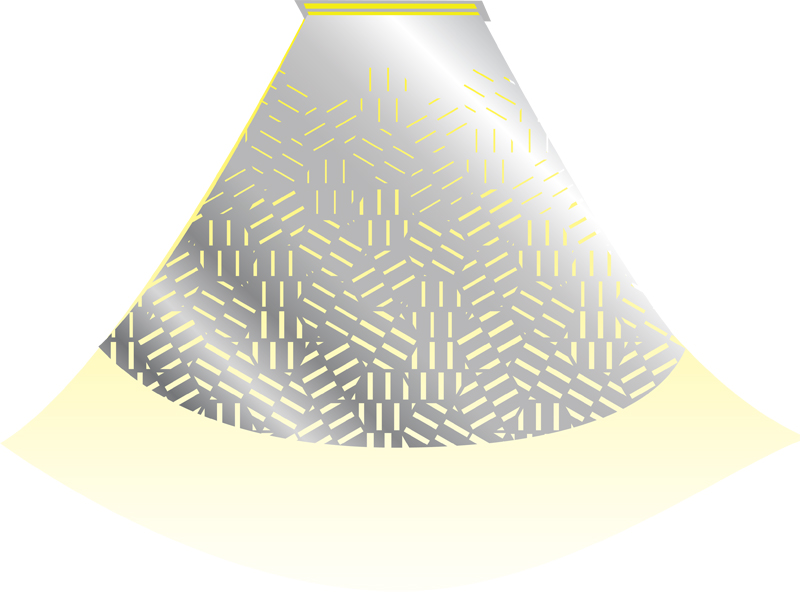
One is a canopy to hang over a bench. The canopy would have a pattern of cut-outs which would cast a pattern of shadows on the bench and its inhabitants:
Here are some ideas for the Form Found project:
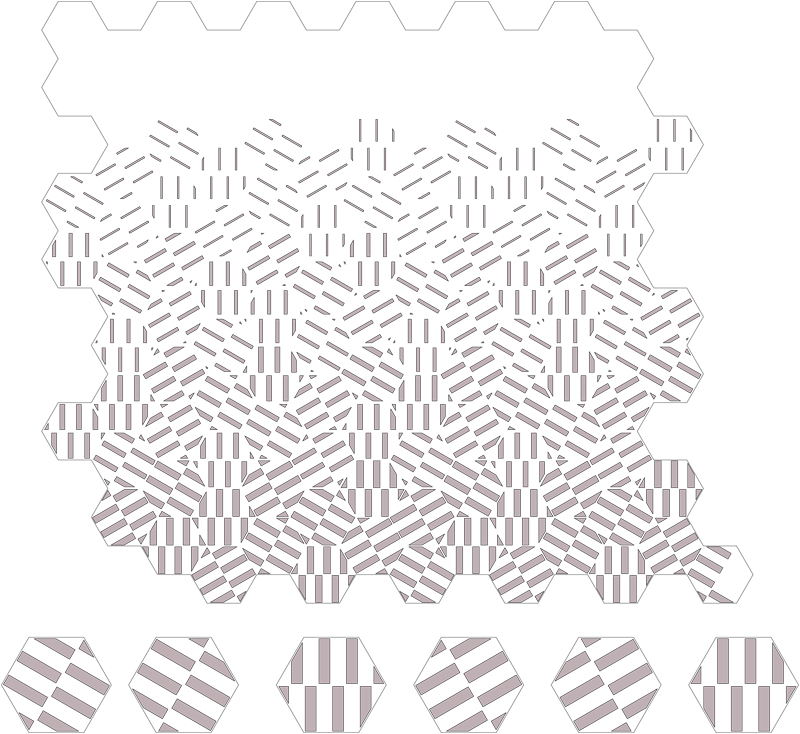
A pattern could be created using hexagons with rectangular cut-outs. Using grasshopper, we could have sliders to control the number of cut-outs in each hexagon, as well as the size of each cut-out:
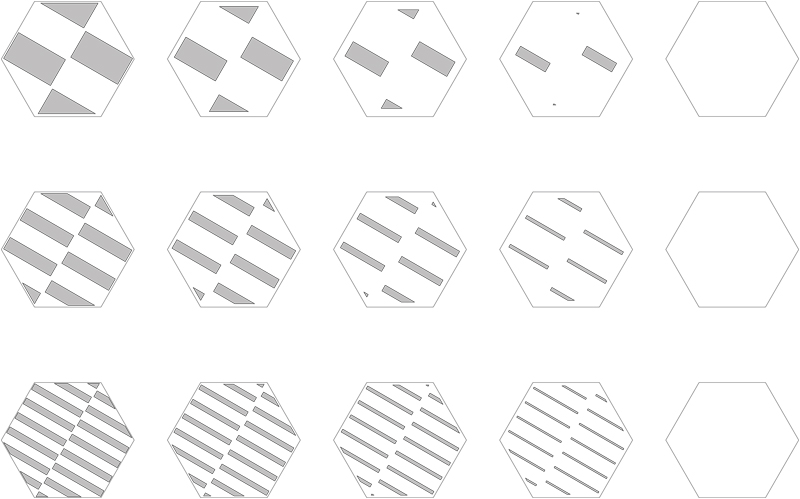
When arranging the hexagons in a pattern, we could create a gradation of transparency:
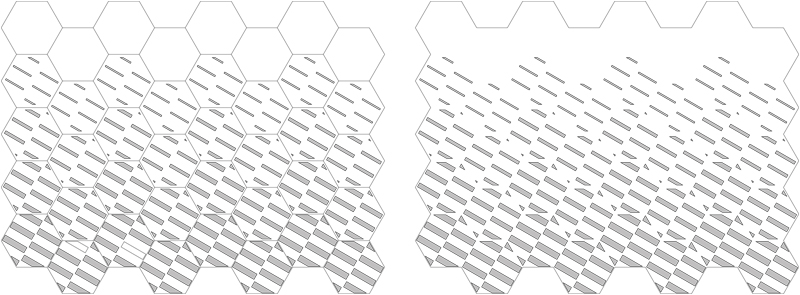
We could also make the pattern more dynamic by rotating the hexagons so the “grain” of the rectangular cut-outs would change direction. The rotation could be done in a pattern or it could be done using random components in grasshopper:
This could be used either as a dividing screen or as the surface of some sort of enclosed space that people could stand in (sort of like a semi-private “conversation bubble”):
OR the gradation screen could be used as a lighting element. We could create a hanging structure to sit below one of the fluorescent tube fixtures. If we used reflective mylar as a material, it could create some interesting lighting effects:

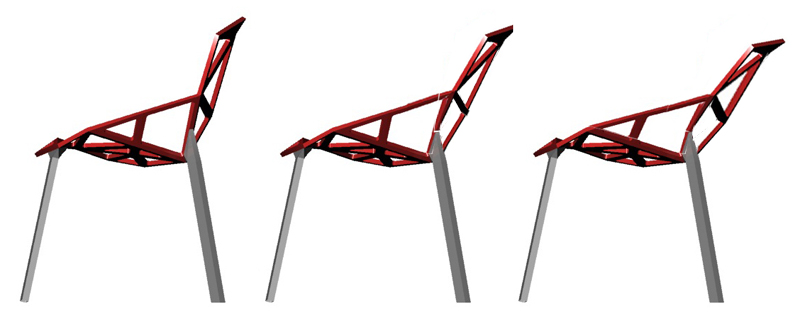
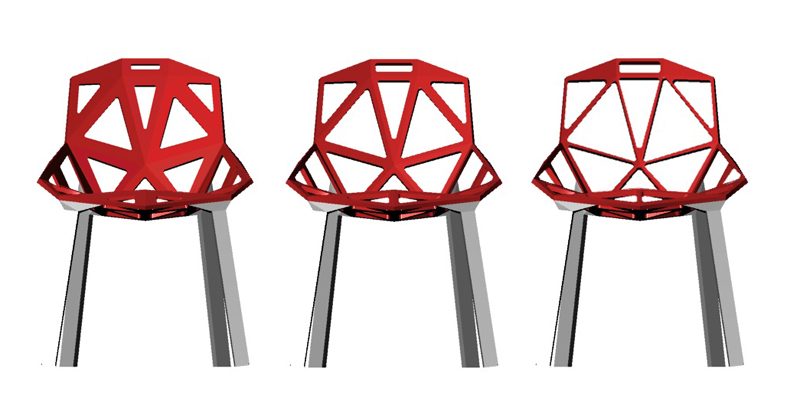
I was able to improve the cleanliness of the Grasshopper file in the second round of the Chair One design. I still think it could be simplified in places, but it is much less smelly than the first round!
In the second round of Grasshopping, I was able to control four drivers for the Chair One design:
1. Thickness of each rib
2. Degree of filleting between the ribs
3. Chair height
4. Seat tilt (I wasn’t able to separate the tilt of the seat from the tilt of the back of the chair so the whole bucket seat unit tilts independent of the legs)

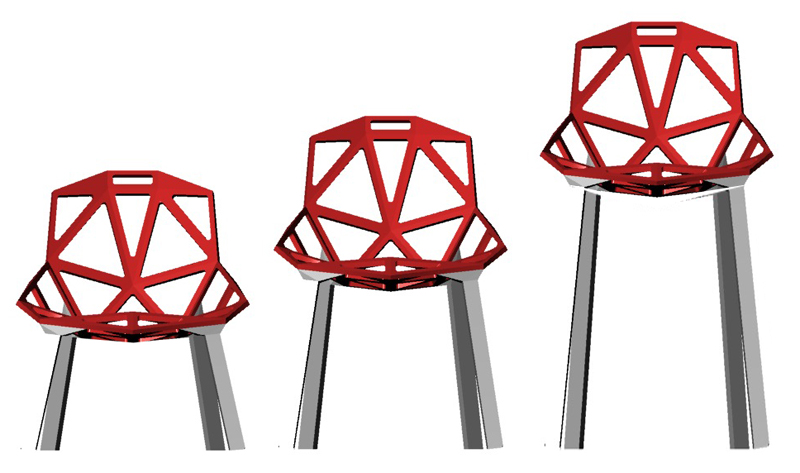
I’m a little behind on my blog posting … These are images from my first round of Grasshopping to drive the Chair One design in different directions.
I was able to vary the rib thickness and the degree of filleting between the ribs, but my Grasshopper file looked (and smelled) like a mess …
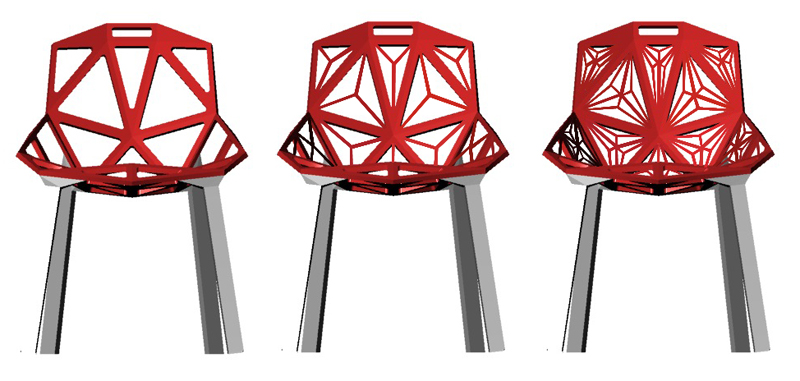
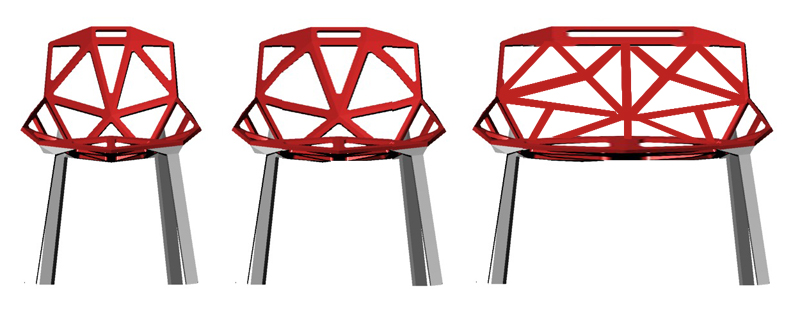
For the Parametric Seating Assignment, I chose to use Konstantin Grcic’s “Chair One”.
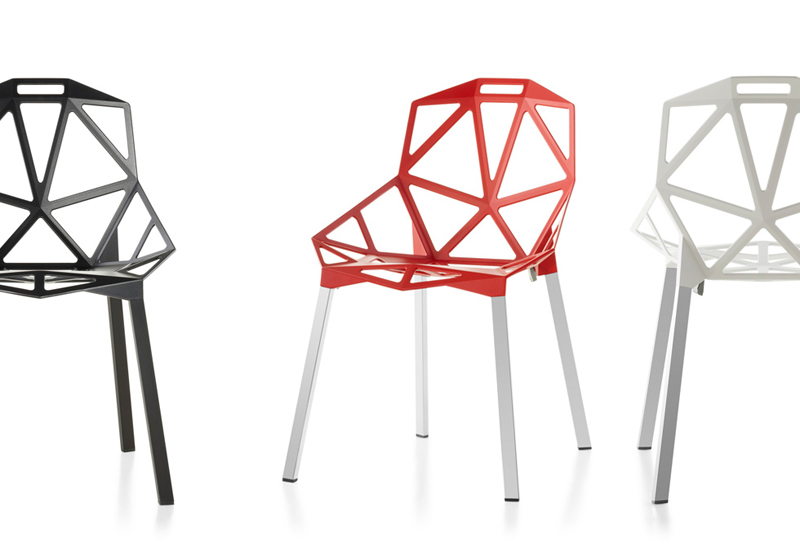
Below are several rendered views of the model I built in Rhino.
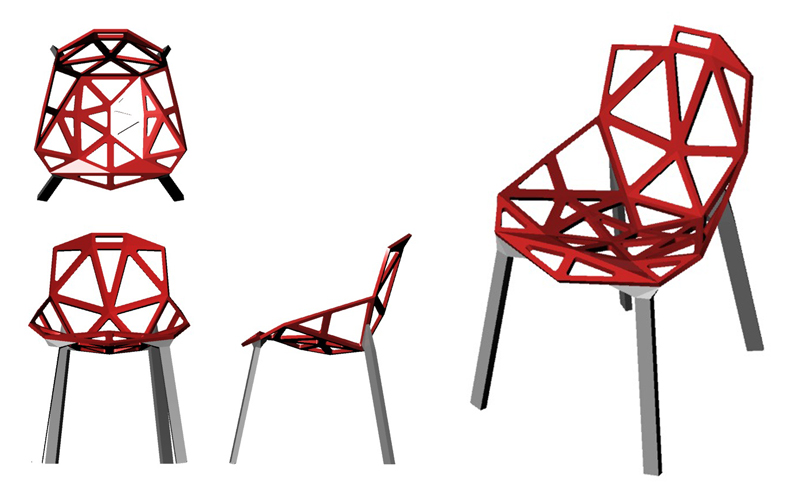
I will use Grasshopper to alter this model according to the below design drivers:
(1) HEIGHT – I will alter the height of the chair by increasing the length of the chair legs, while maintaining the distance between each of the legs on the ground.
(2) BACK TILT ANGLE – I will alter the tilt angle of the back of the chair.
(3) CUT-OUT SIZE – I will alter the sizes of the triangular cut-outs in the surface of the chair to fill in or open up the surface of the chair.
(4) SUBDIVISION – I will create a driver to subdivide each triangular cut-out into three smaller triangular cut-outs.
(5) SEAT WIDTH – I will alter the width of the seat so the chair can be transformed into a loveseat or a longer bench. I will increase the length of certain of the triangular “legs” to make the chair wider. I will set a limit for the length of these legs. I’ll use a Boolean operation to identify when that limit is reached and trigger a subdivision of the triangles that contain that leg.
– Justin Crocker

You must be logged in to post a comment.