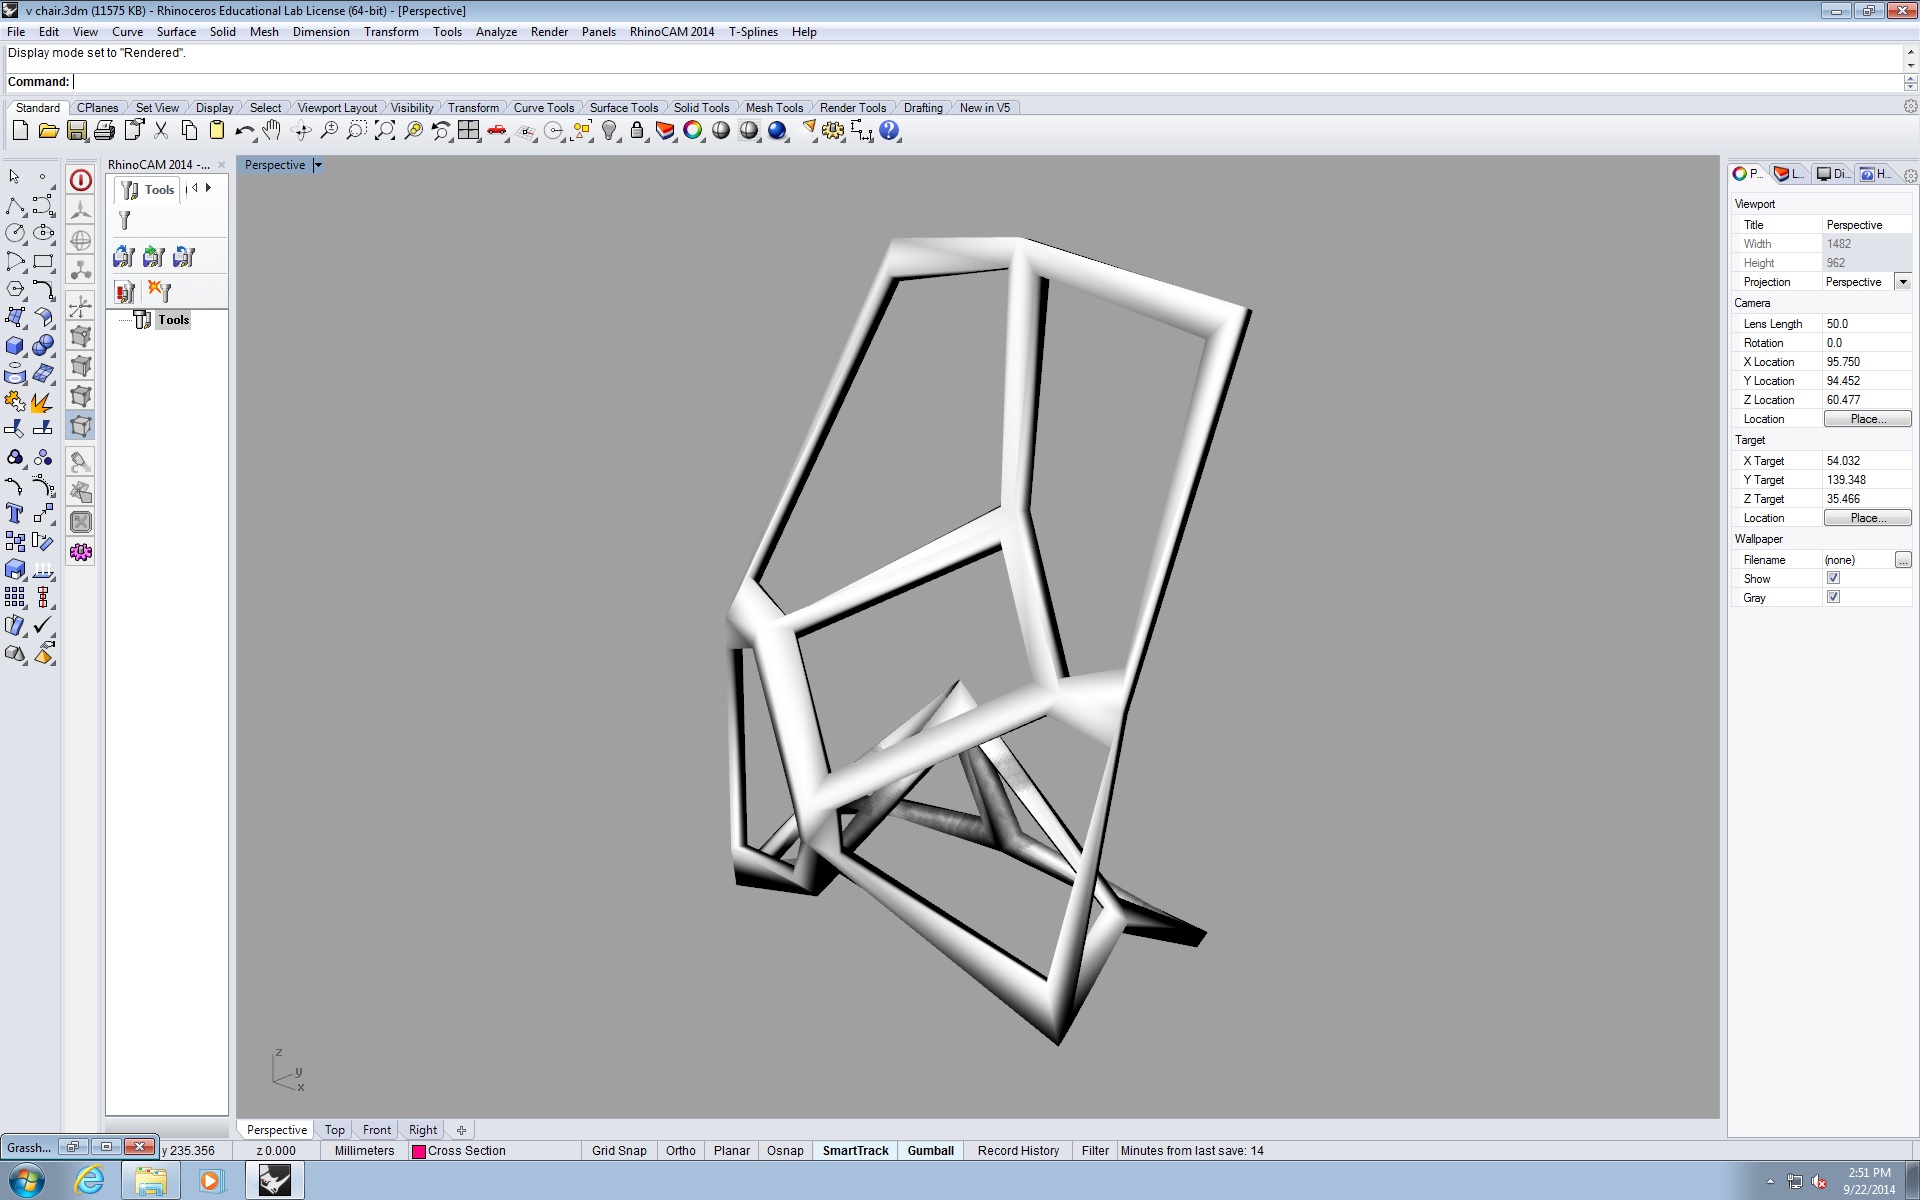
So I made a few variations of my Voronoi Chair. Below is a picture of the original and the subsequent are abstractions.


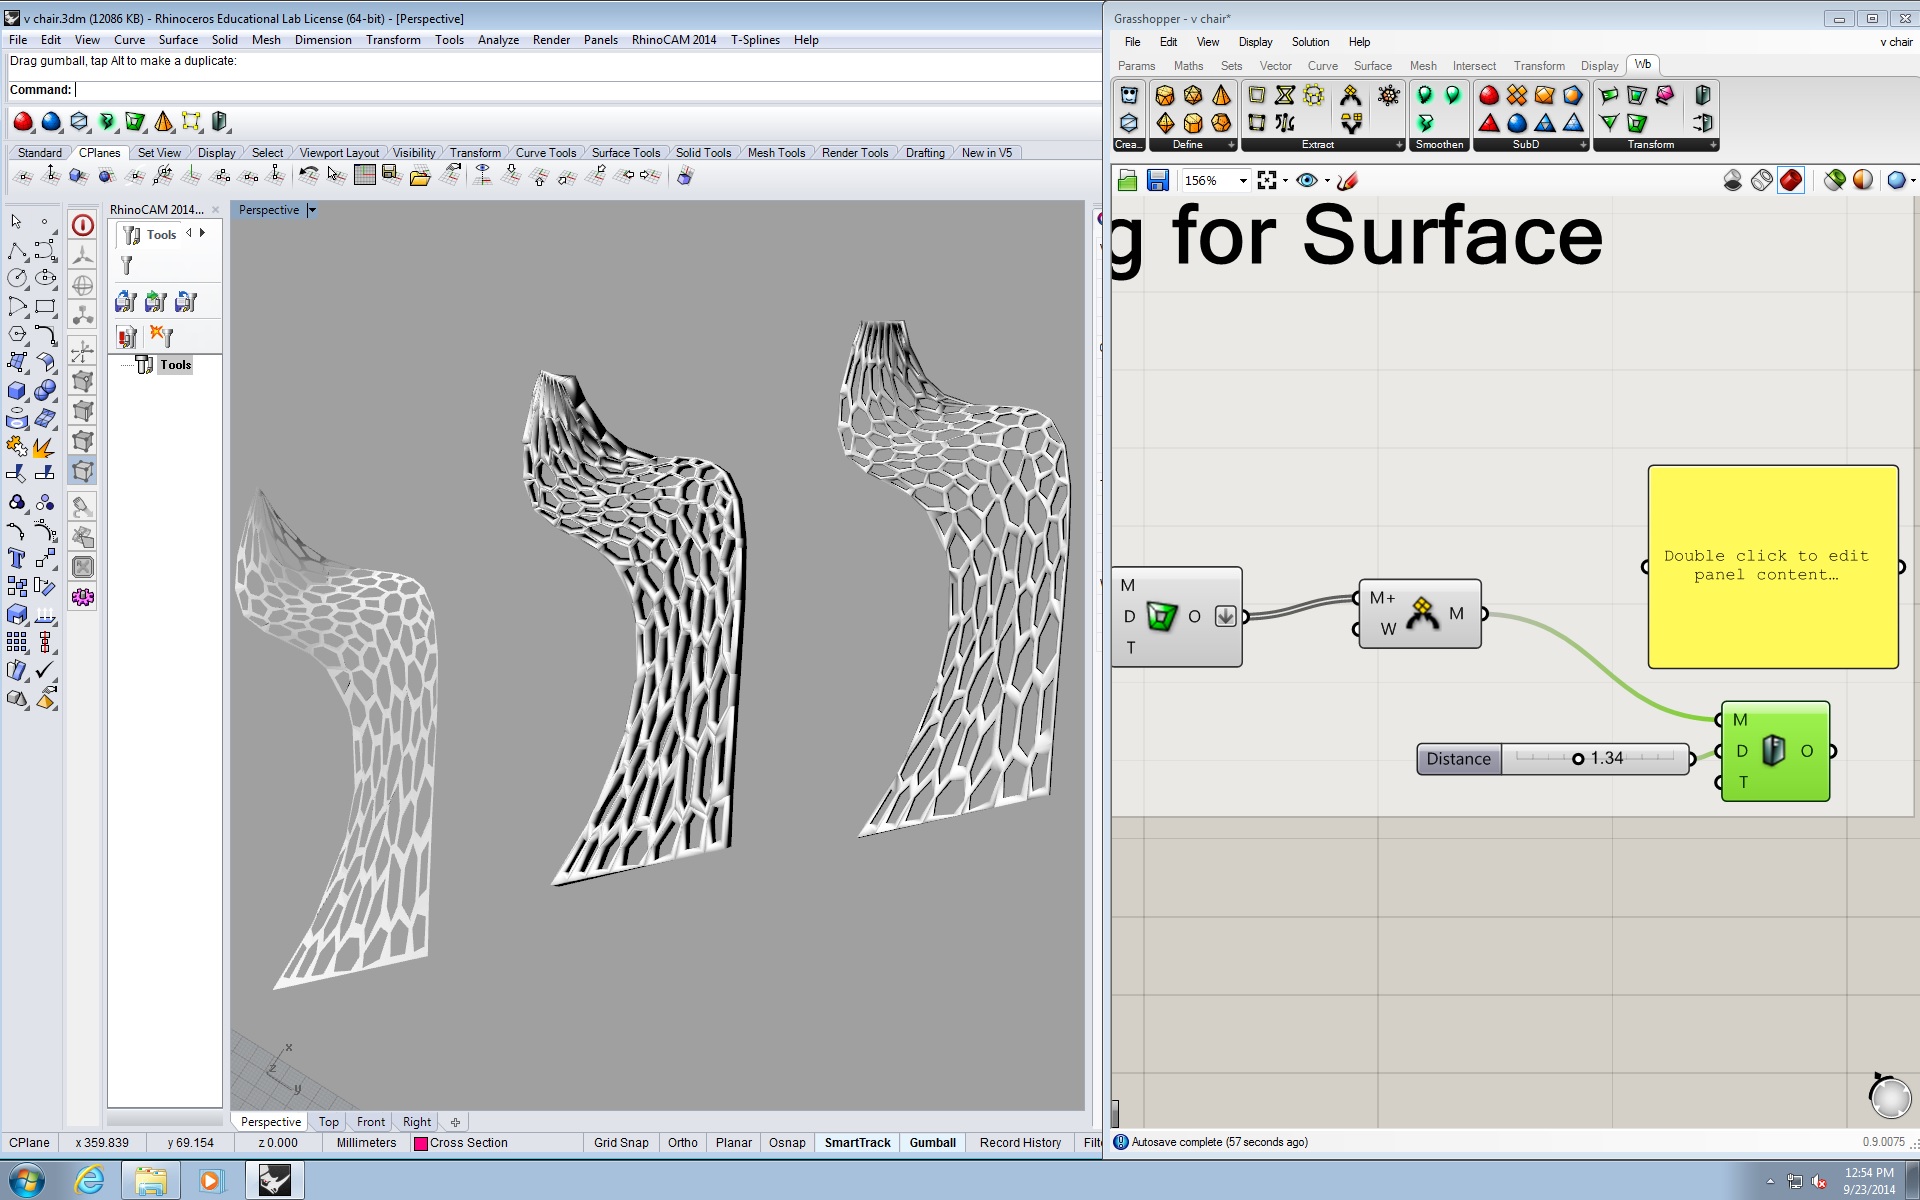
In this model, I changed the number of points to apply the voronoi pattern onto. I also changed the width and thickness of the polylines. All of these parameters were changed via Grasshopper.


In this model, I increased the density of the voronoi pattern. There are about 500 points to which polylines were created.

In this final abstraction, I created different shapes and applied the voronoi pattern onto it. It was a bit tricky because I tried to just set a new surface without having to do everything over. But I found that I had to detach all of the meshes and reattach them so the pattern would be applied appropriately and a mesh could be formed for the surface.
I decided to 3-D Print the first abstraction. I wanted to do all of them, but I learned that 3-D printing is quite expensive. If I wanted to print the original voronoi model I had, it would have cost about $64. No thank you. The cost was not due to the model itself, but because of the support systems it would need in order to be made. I listed the process of my 3-D print below.
Have a model in *.STL format. (You just need to save the rhino file as an *.stl). However, you need to make sure your surface model is a mesh or it won’t print. Submit the file to the tech, you pay (hopefully not a crazy amount –Good Luck), and then you wait to pick it up. The amount of time it takes to print depends on how complex the model is, plus an addition 4-5hours for washing. For example, my original model would have taken 21 hours just to print (without washing). The model I went with was much simpler and it took about 5 hours to print and 5 more to wash.

This is an image of the machine for printing. (Sorry for the reflectivity). The temperature of the machine is over 100 degrees F.

This is the first layer that was made during the print.

This machine is used to wash the model that was made. The webby stuff below shows the supports (which are the costly part of the printing). The wash is used to wash away the supports so that the model is what’s left.

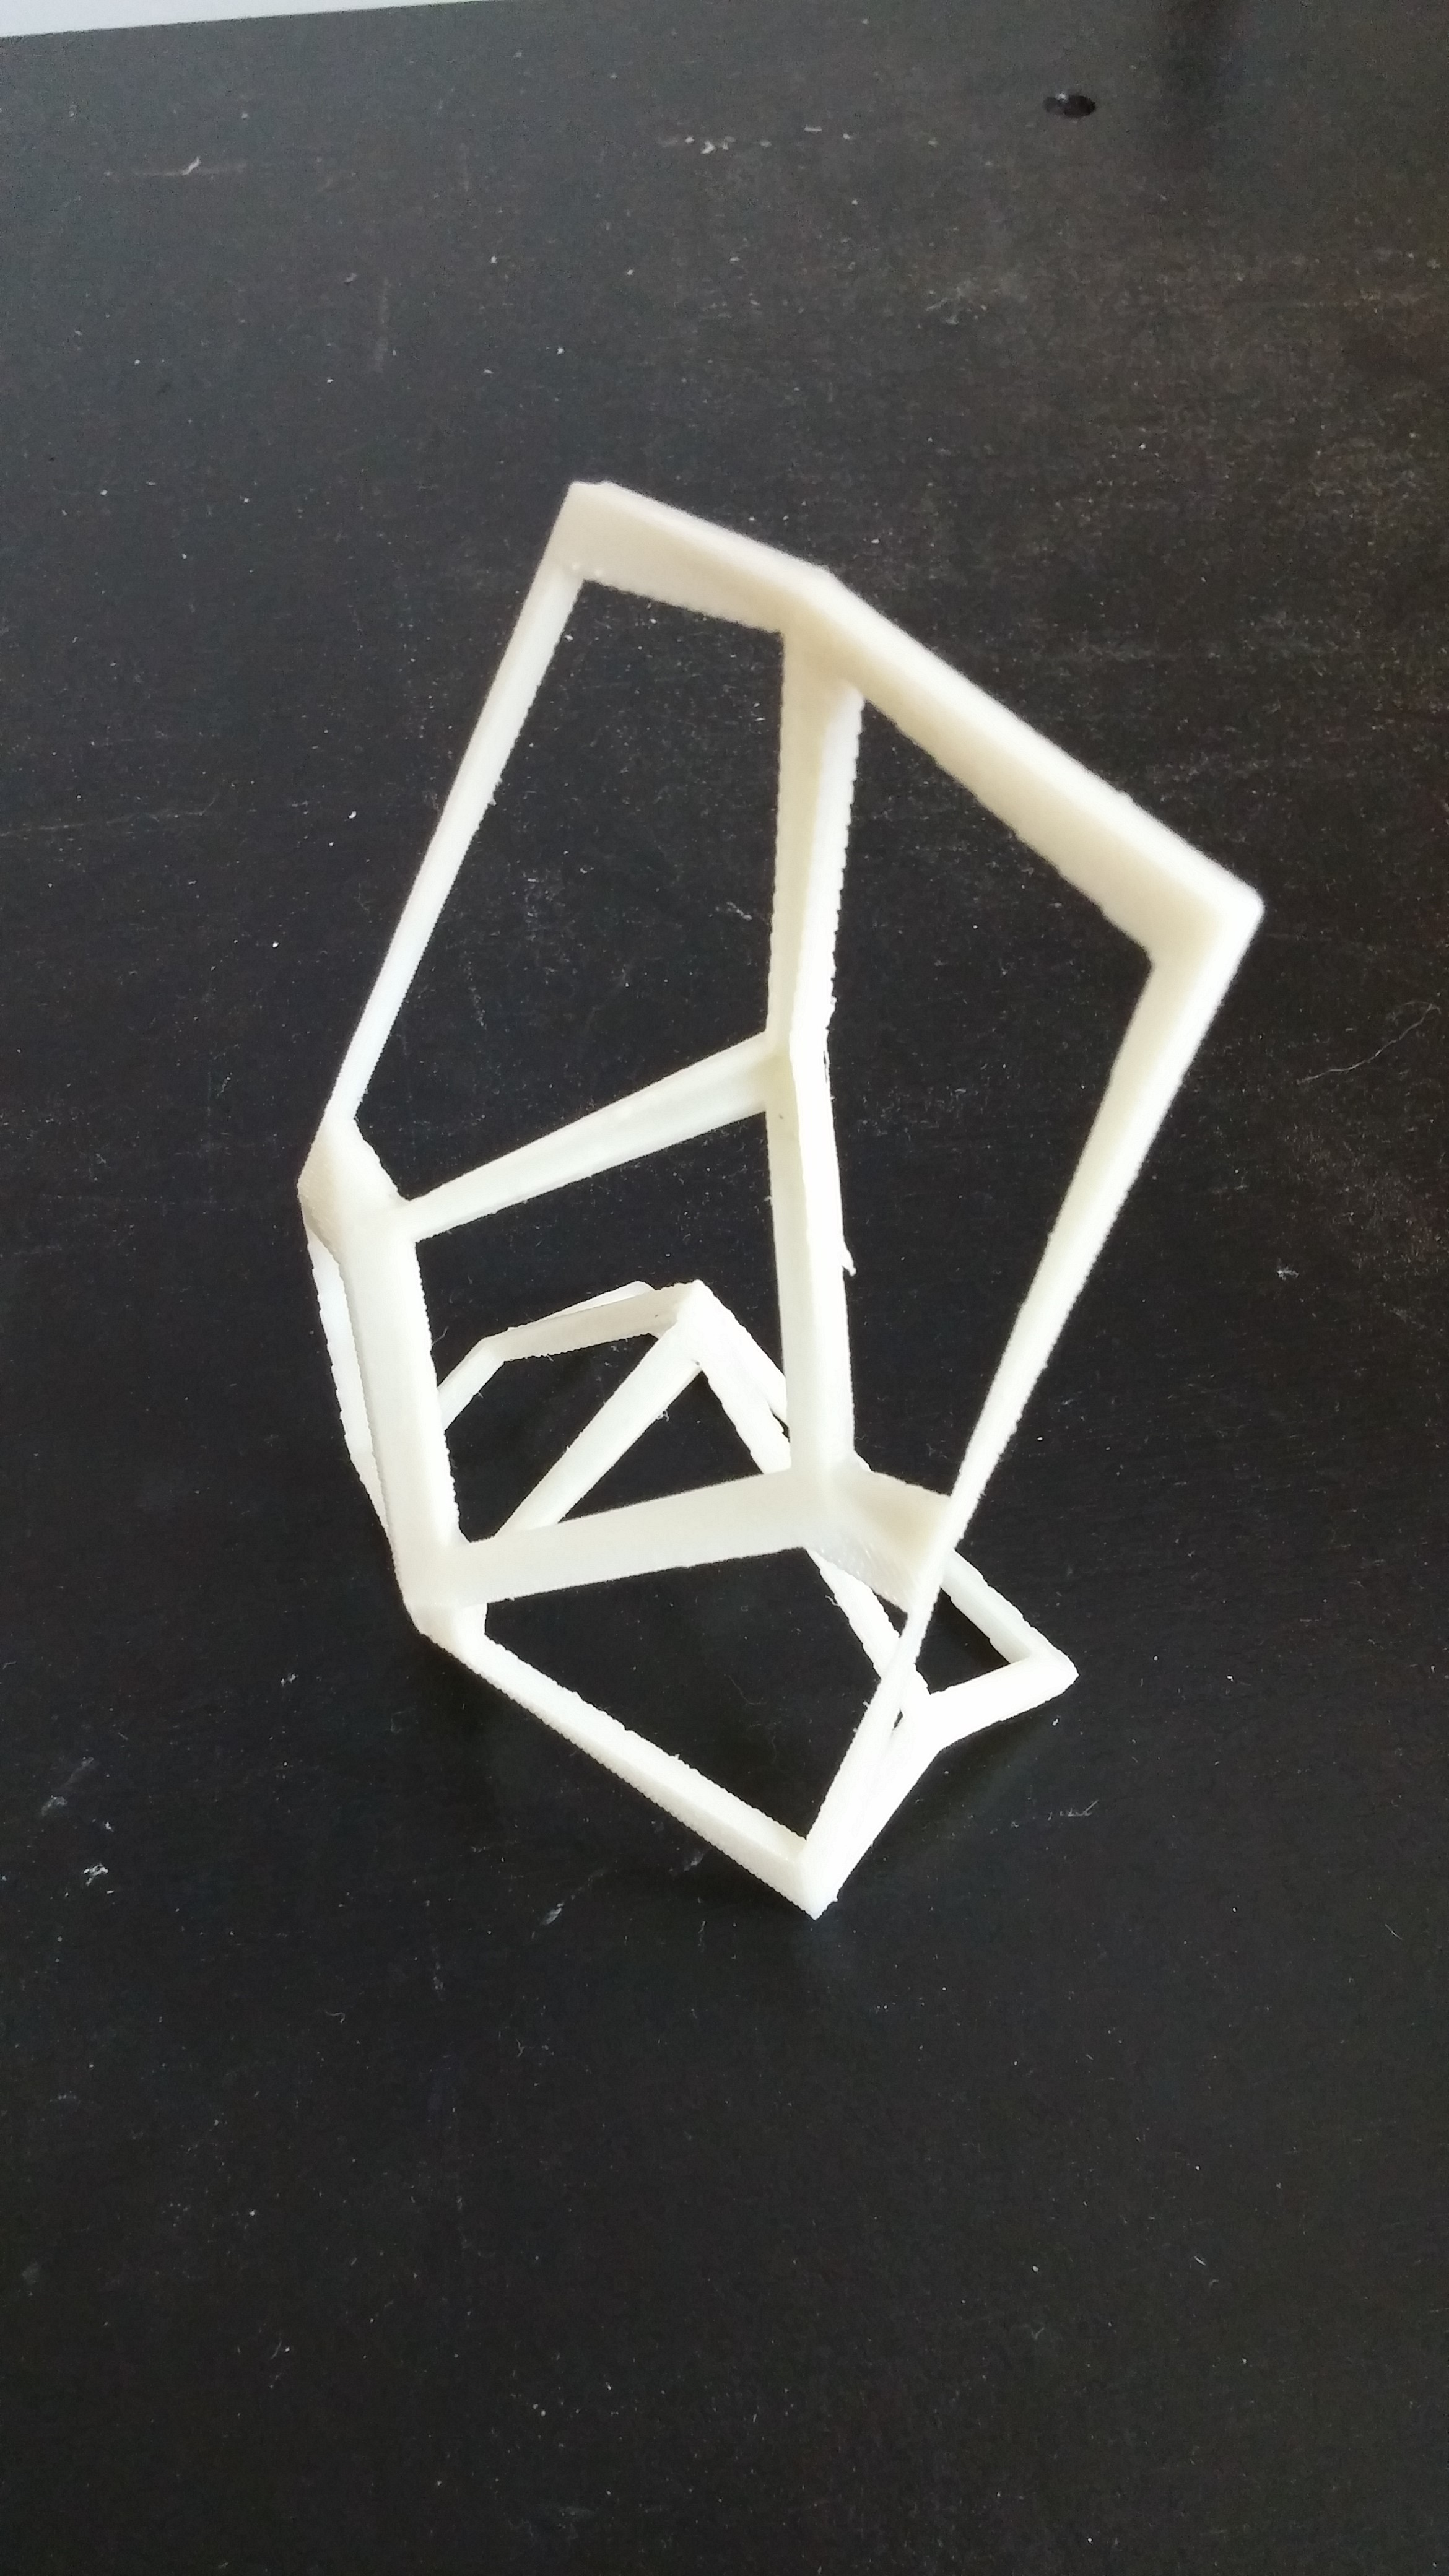
IT’S ALIVE! So above is the finished version. Interesting process, wish it wasn’t so expensive. Apparently, there’s the baker botts machine which is free for printing (first come, first serve), but it has quite the bad reputation of dying and therefore leaving a frantic student in misery. I wouldn’t really rely on baker botts if you’re working on a final.
