Hello,
I have screens! I decided to go with a singular hanging screen over my window instead of making two separate screens. My definition and drivers all remained the same. Since the midterm, it was really a matter of playing with Ladybug to find the right design for each season.
GRASSHOPPER DEFINITION:
DESIGN DRIVERS:
Controlling the number of Hexagons (Length)

Controlling the number of Hexagons (Width)

Controlling the Depth of the screen

Controlling the Angle of the Hexagon
Controlling the Size of the Hexagon center holes (Closer to UV = Smaller hole)

Controlling the Maximum distance from the center of Hexagon
Controlling the Maximum distance from the center of Hexagon
SEASONAL CONDITIONS:
WINTER: No direct light on floor
SUMMER: Minimum direct light
SPRING & FALL: Maximum direct light
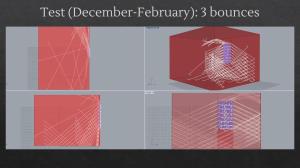
I used Ladybug to test whether my designs met the criteria. Each season had different tests. For each season, I checked every month to make sure the conditions/criteria were met. The biggest testing unit was done during the 1st bounce of light. After this, I would check how much light could get into the room by experimenting with the number of bounces in light.
CONSTRUCTING THE SCREEN
UNFOLDING AND TAGGING PIECES:
Unfolding my hexagons weren’t an issue. Tagging, however, became tricky. I had to work backwards and found out there was a minor issue in my definition, which goes to show how one mistake can really catch up with you. I made my tabs for construction purposes using Panelling tools in Rhino. This is a plugin that I downloaded.
My model turned out pretty well. Laser cutting took a long time. I ended up only being able to cut close to 2am and didn’t finish until 4am. I only then decided to do one model because of the time constraints for access into the lab. Building the model didn’t take as long as I had feared. It was about 3 hours. The only unfortunate part is that I was not able to put model up against my window to see how light comes through. I had to leave my model in school because of how big it is. Also, I haven’t been home in the day time to test it out.
Overall, I am satisfied with the screens. I’m happy I was able to fabricate something I was able to test out digitally and customized to a space. I think this may be one of the first classes where things were practical in the sense that I can make use of the information provided via rhino and grasshopper and be able to apply it to real life.


