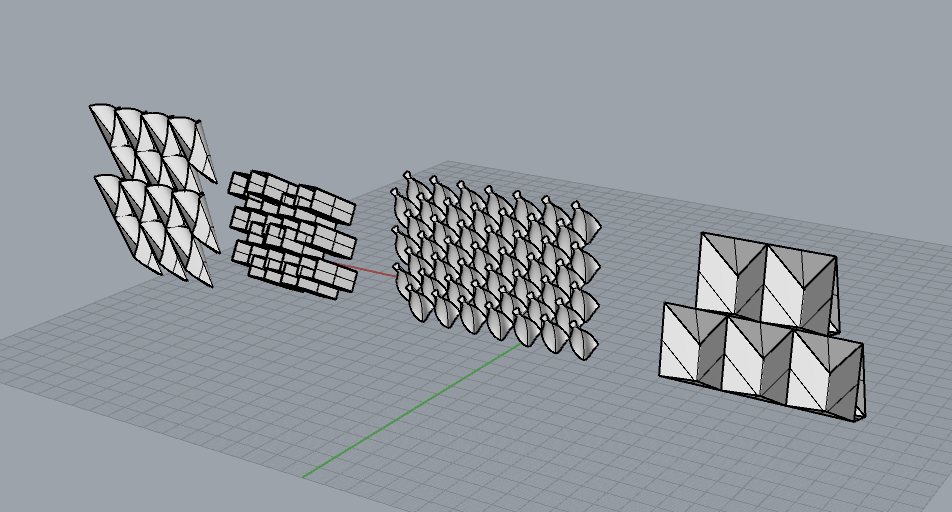
These are four examples of modules I am planning. They absorb light, either reflect or glow in a ninety degree angle towards the ceiling. I am planning on bending and folding mylar, with different layers for different levels of light.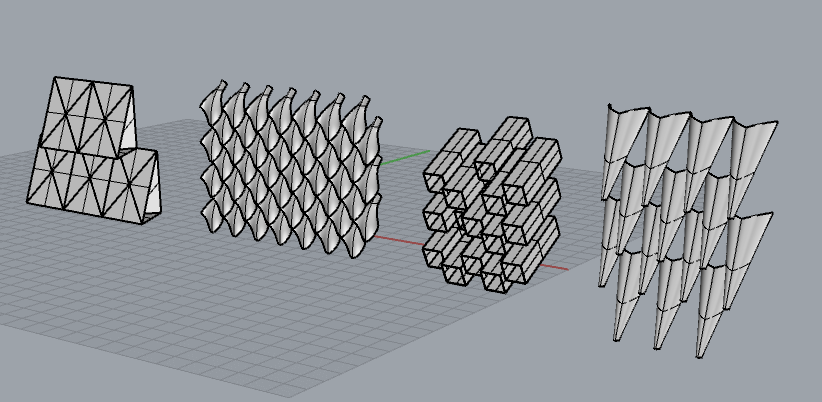
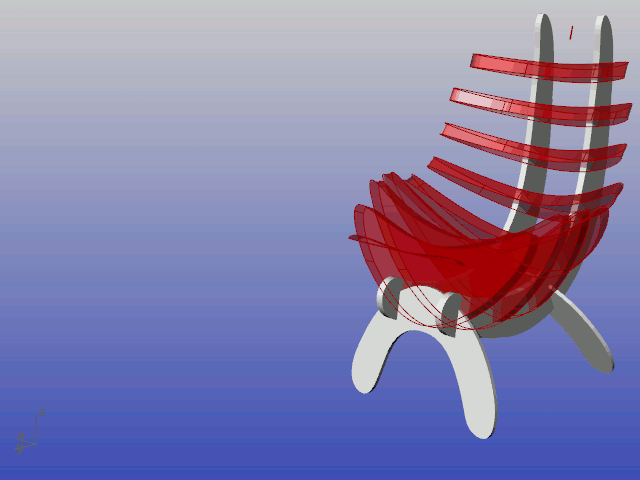
Newson Chair Revisions
Hey Everyone,
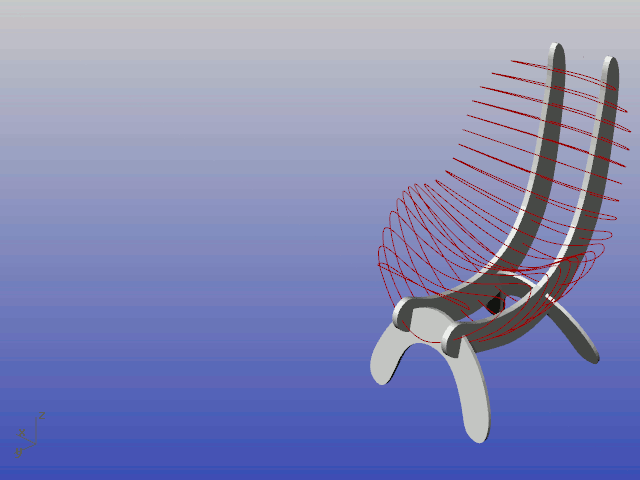
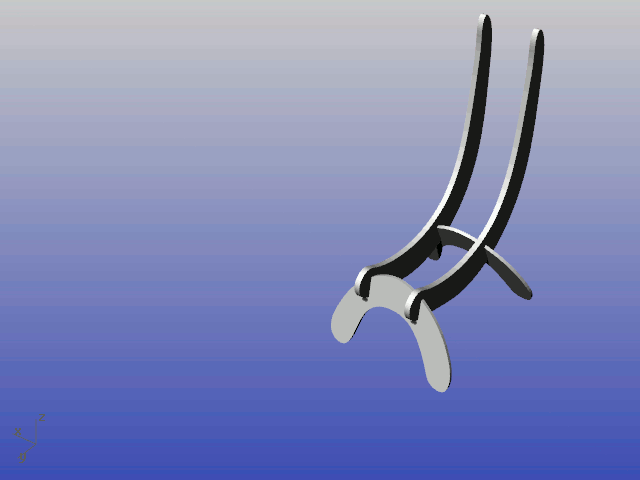
I wanted to share the revisions I made to my chair. I am very excited that I have the ribs going vertical and all of the drivers are connected to each other! 


Weirdly Designed.
The main area with the two large windows is my living room, and the space with the door and smaller window is the boundary between my bedroom and the living room. No sunlight enters my bedroom, so I will create a structure that can shine the sun from the window of the living room to the ceiling so that more light can bounce into my bedroom.

BUILDING A ROOM!
Hello All!
Here is the Window I am doing, a Skylight in my Room! (I just moved a week ago, so excuse the mess!)
 I
I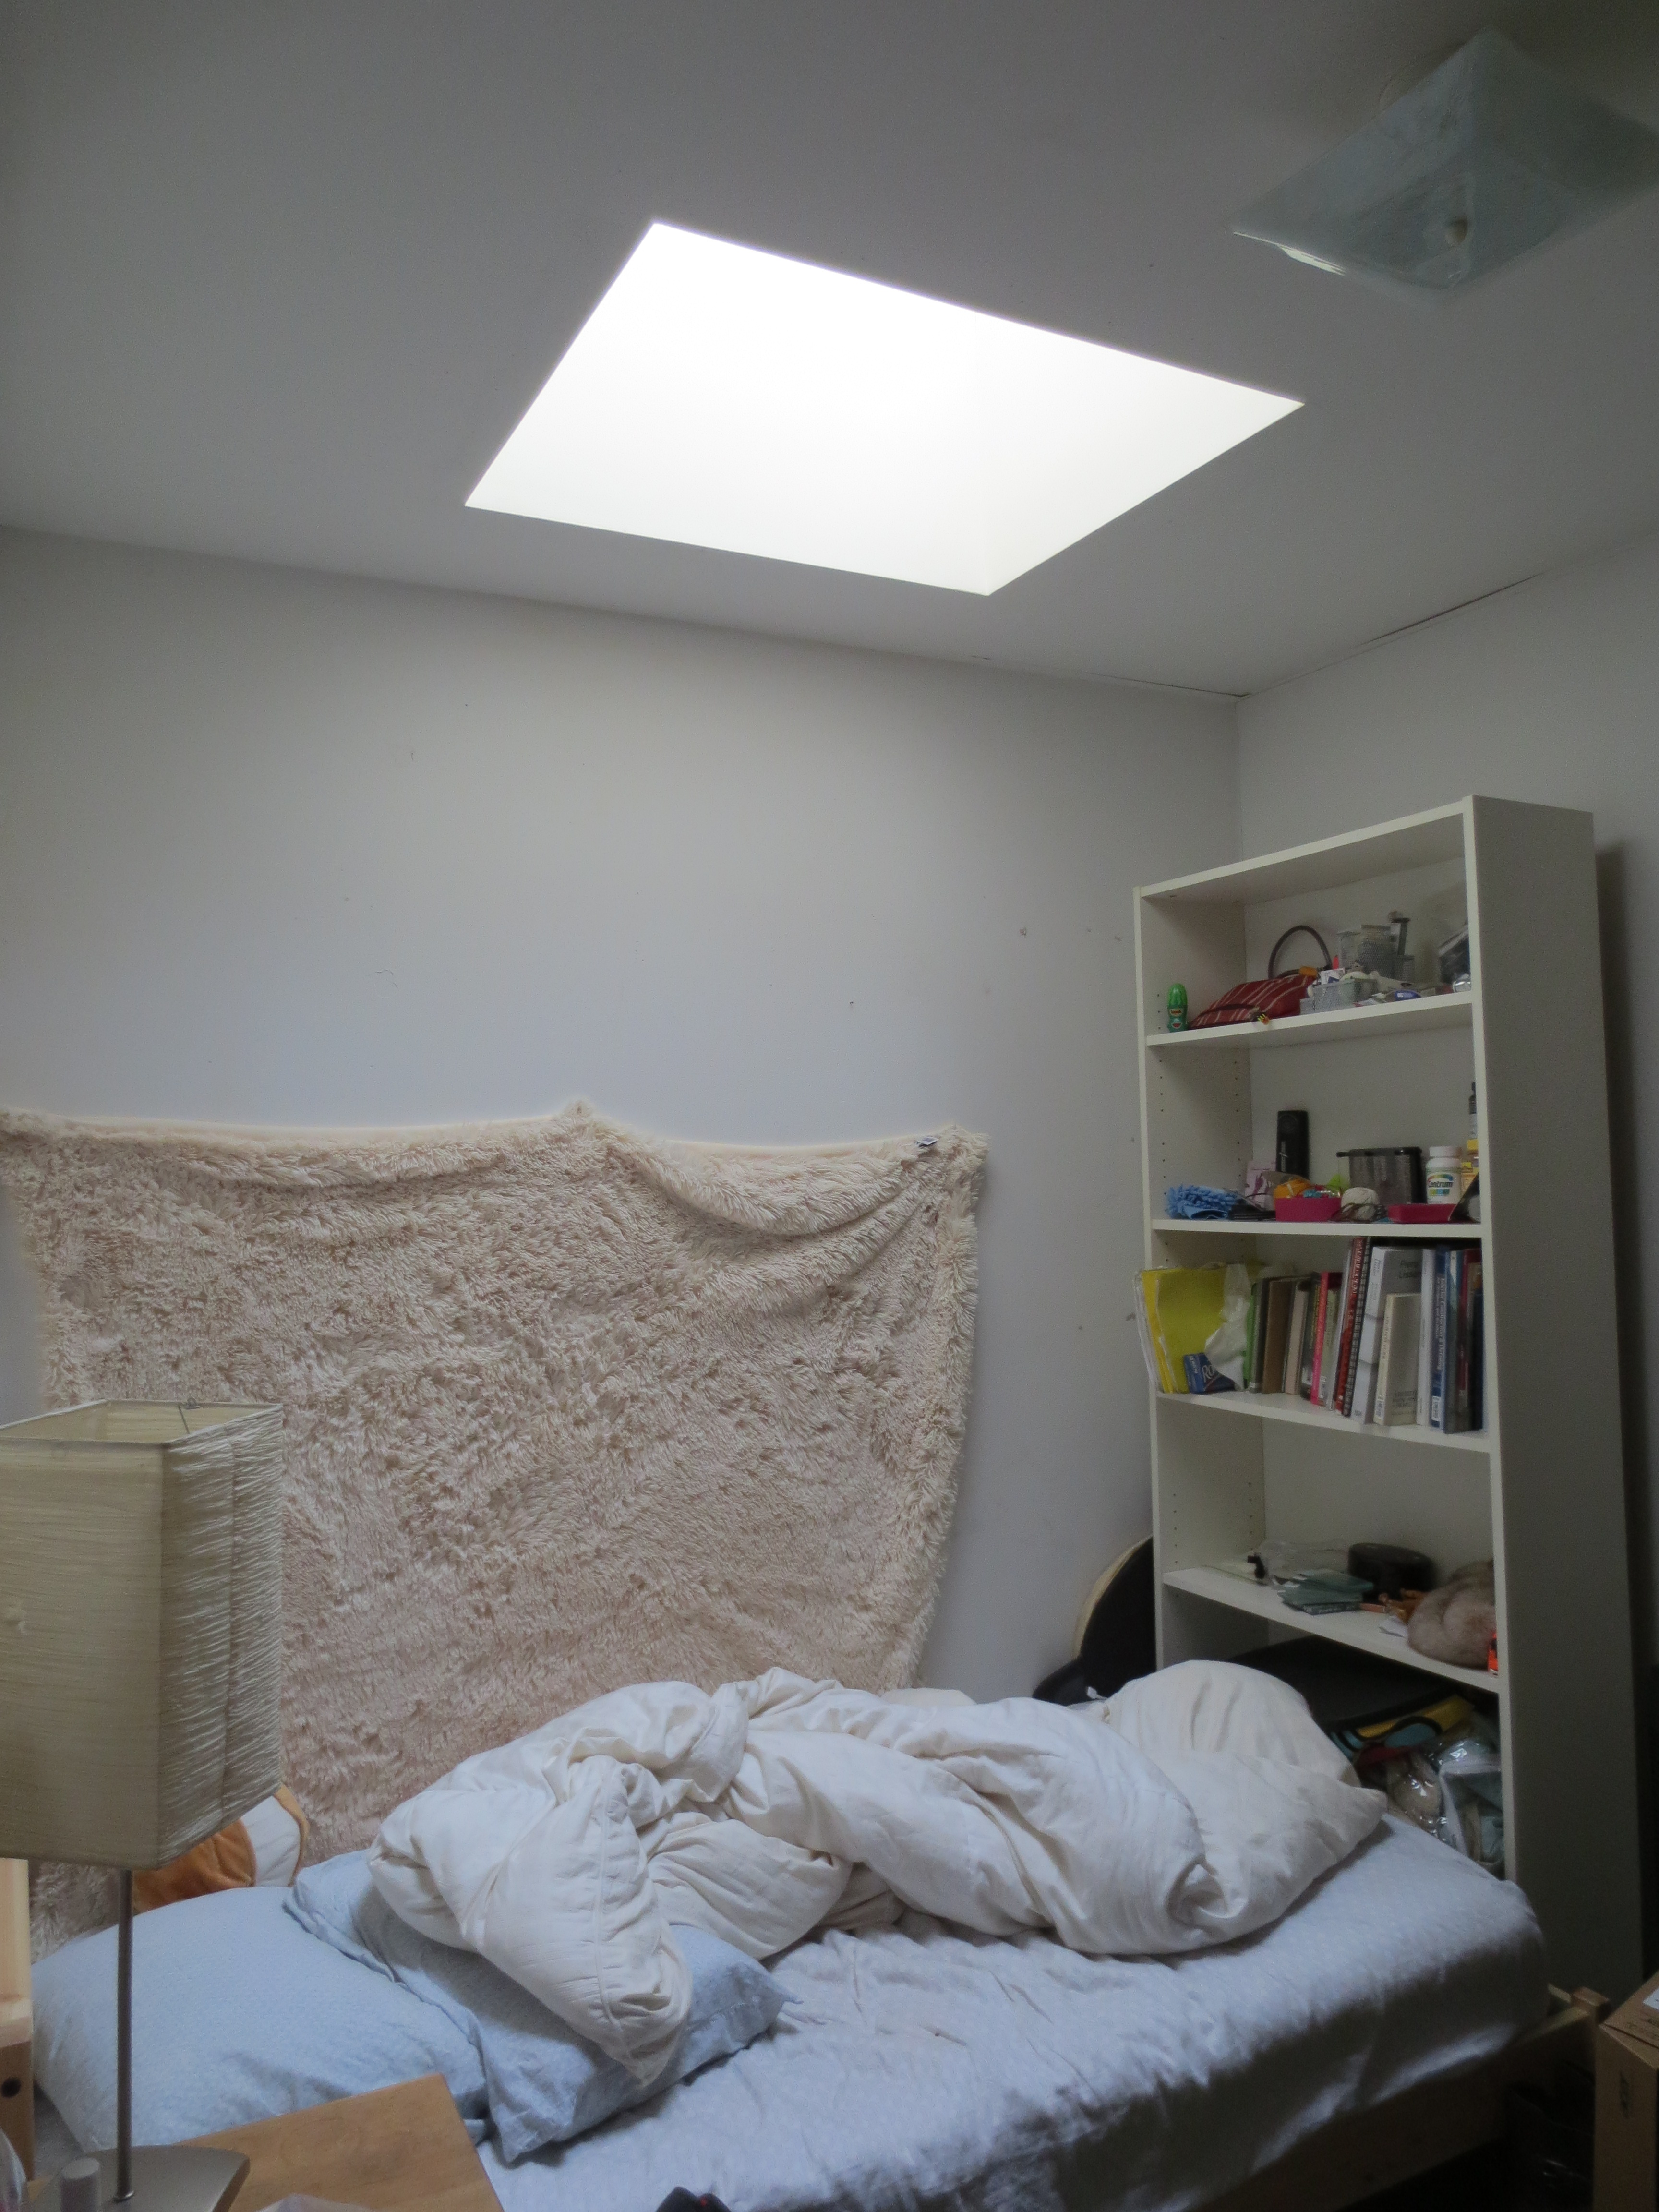
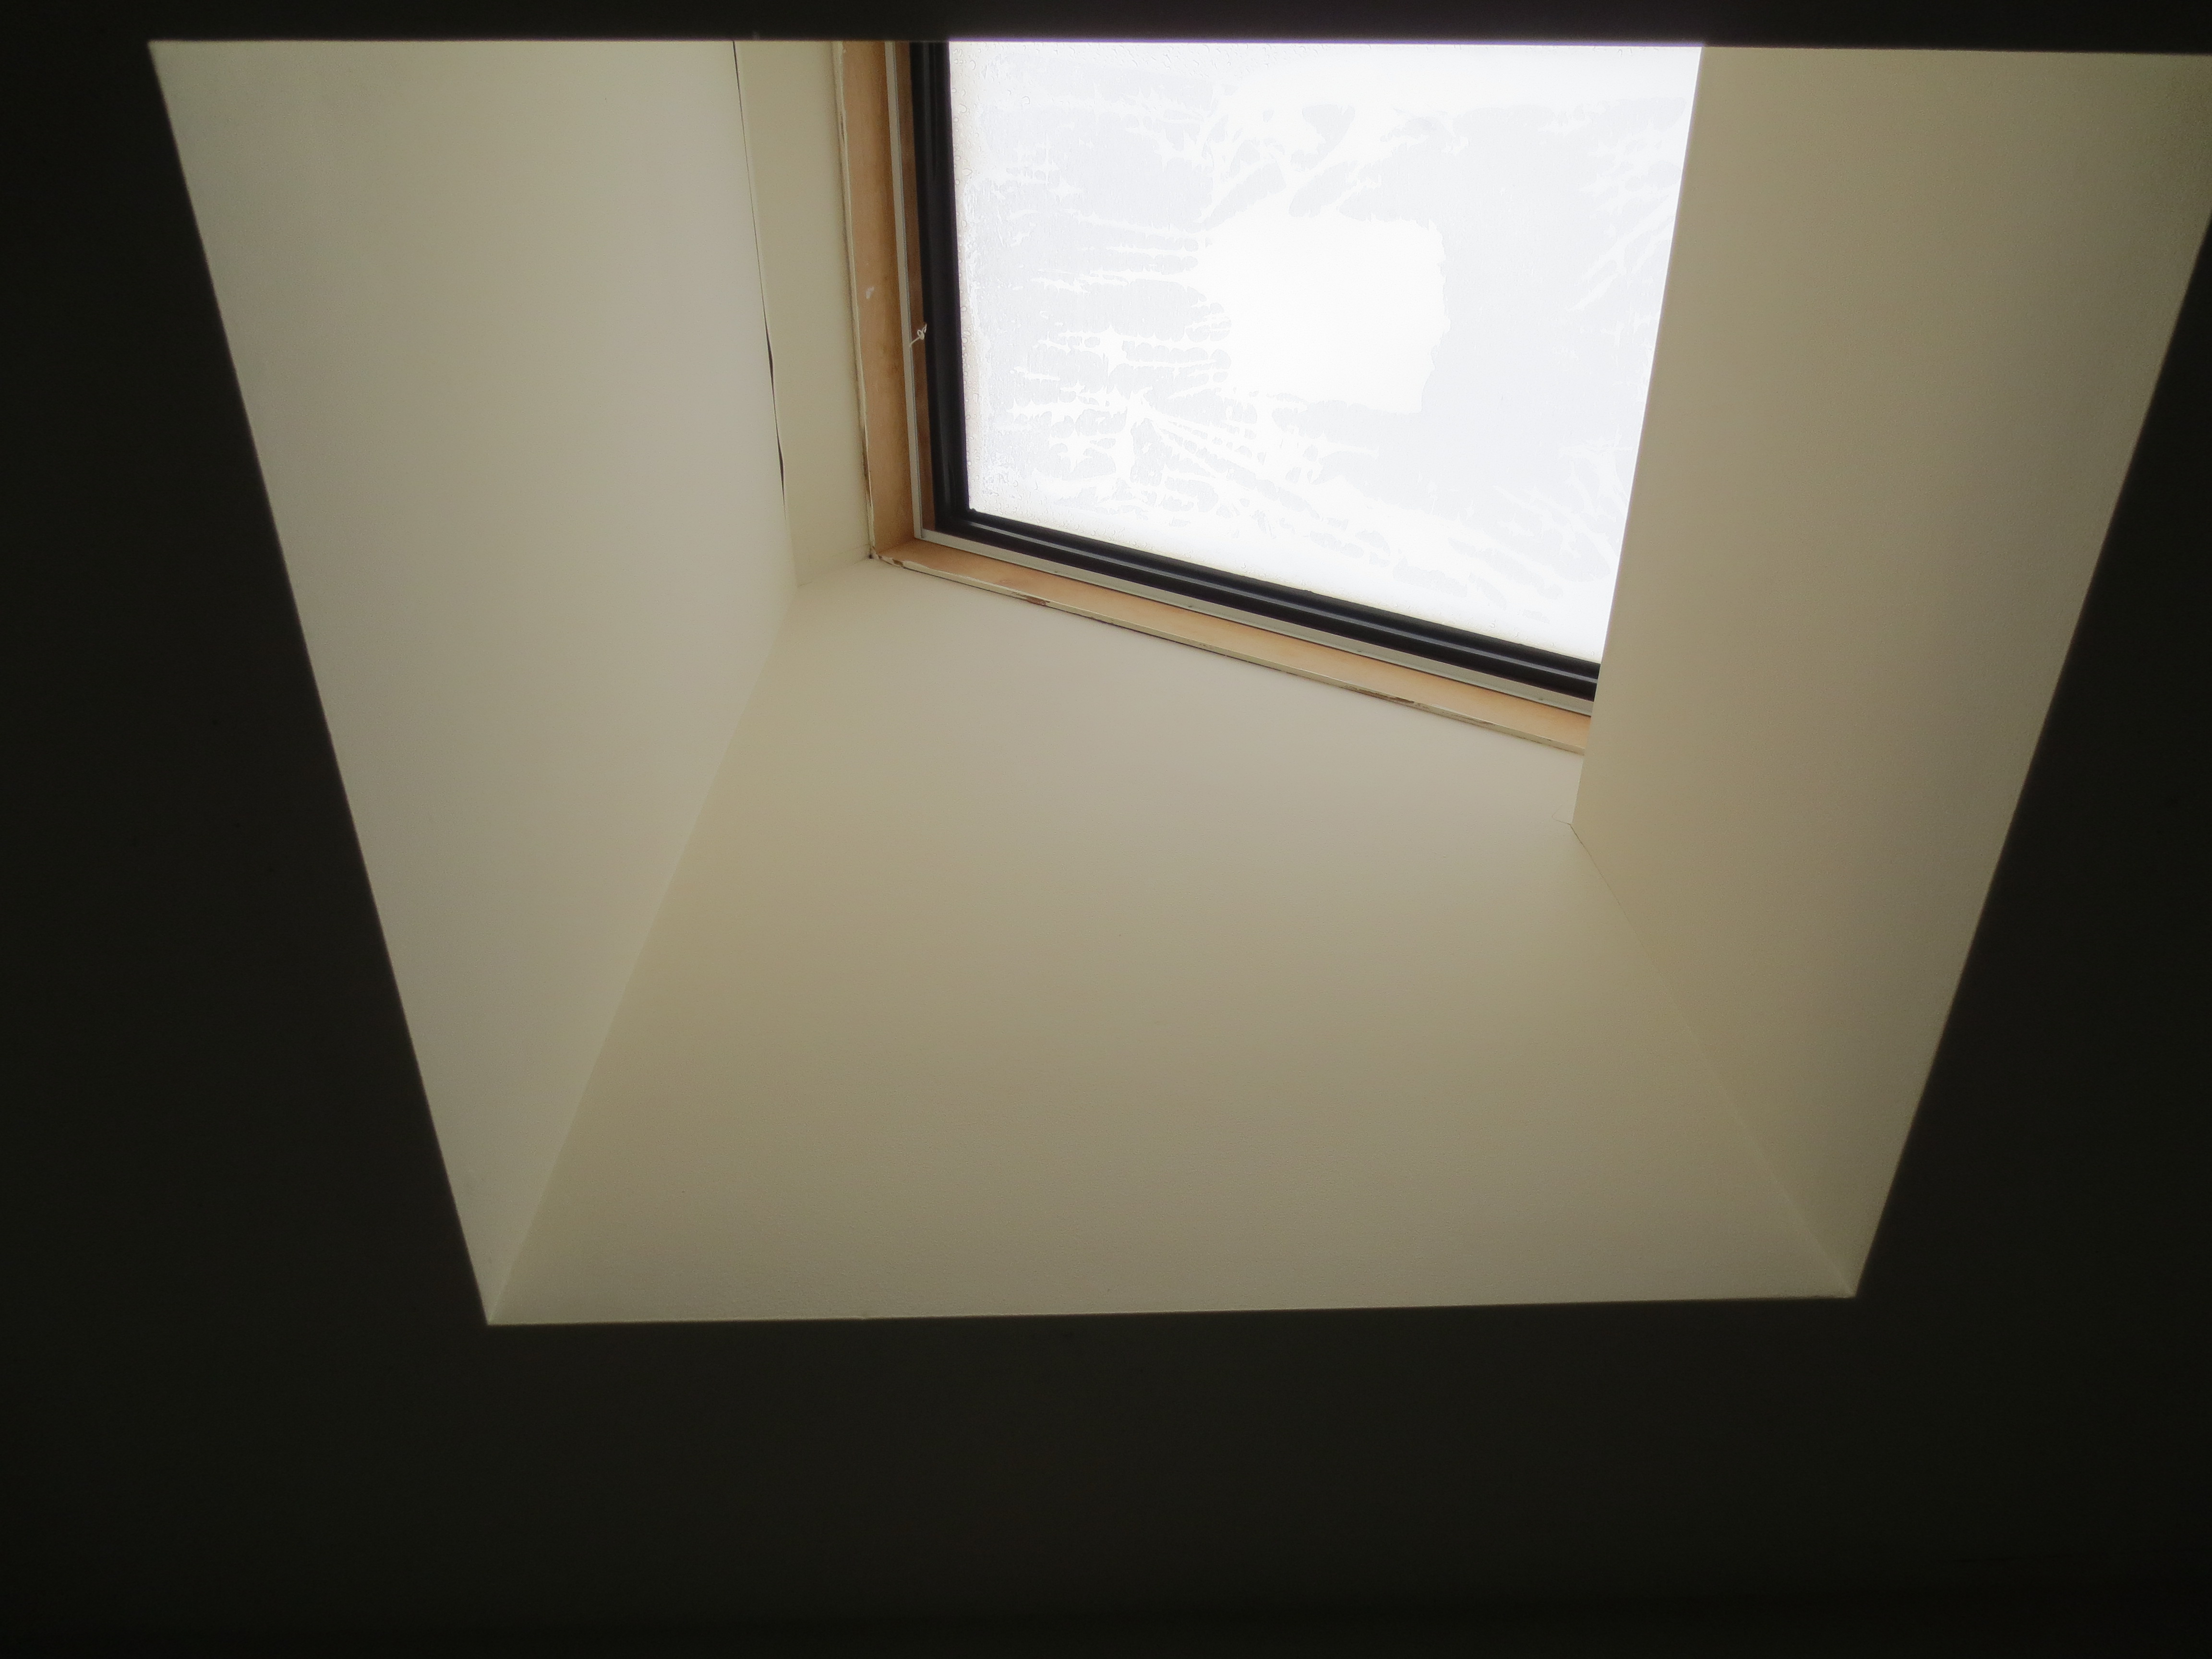
It’s angled which is an interesting dynamic added to this project. The Black drapery stuff was left by the previous roommate.
I took Donna’s Advice and started to Draw my plan and elevation in Autocad. I only did plan and one elevation and used my sketch of my room to fill in the blanks. I am doing a skylight since my room has no wall windows AND the skylight is right above my bed, so it would be a really great way to integrate this project and real life problems and attempt to control the sunlight. Nature’s alarm clock woohoo!
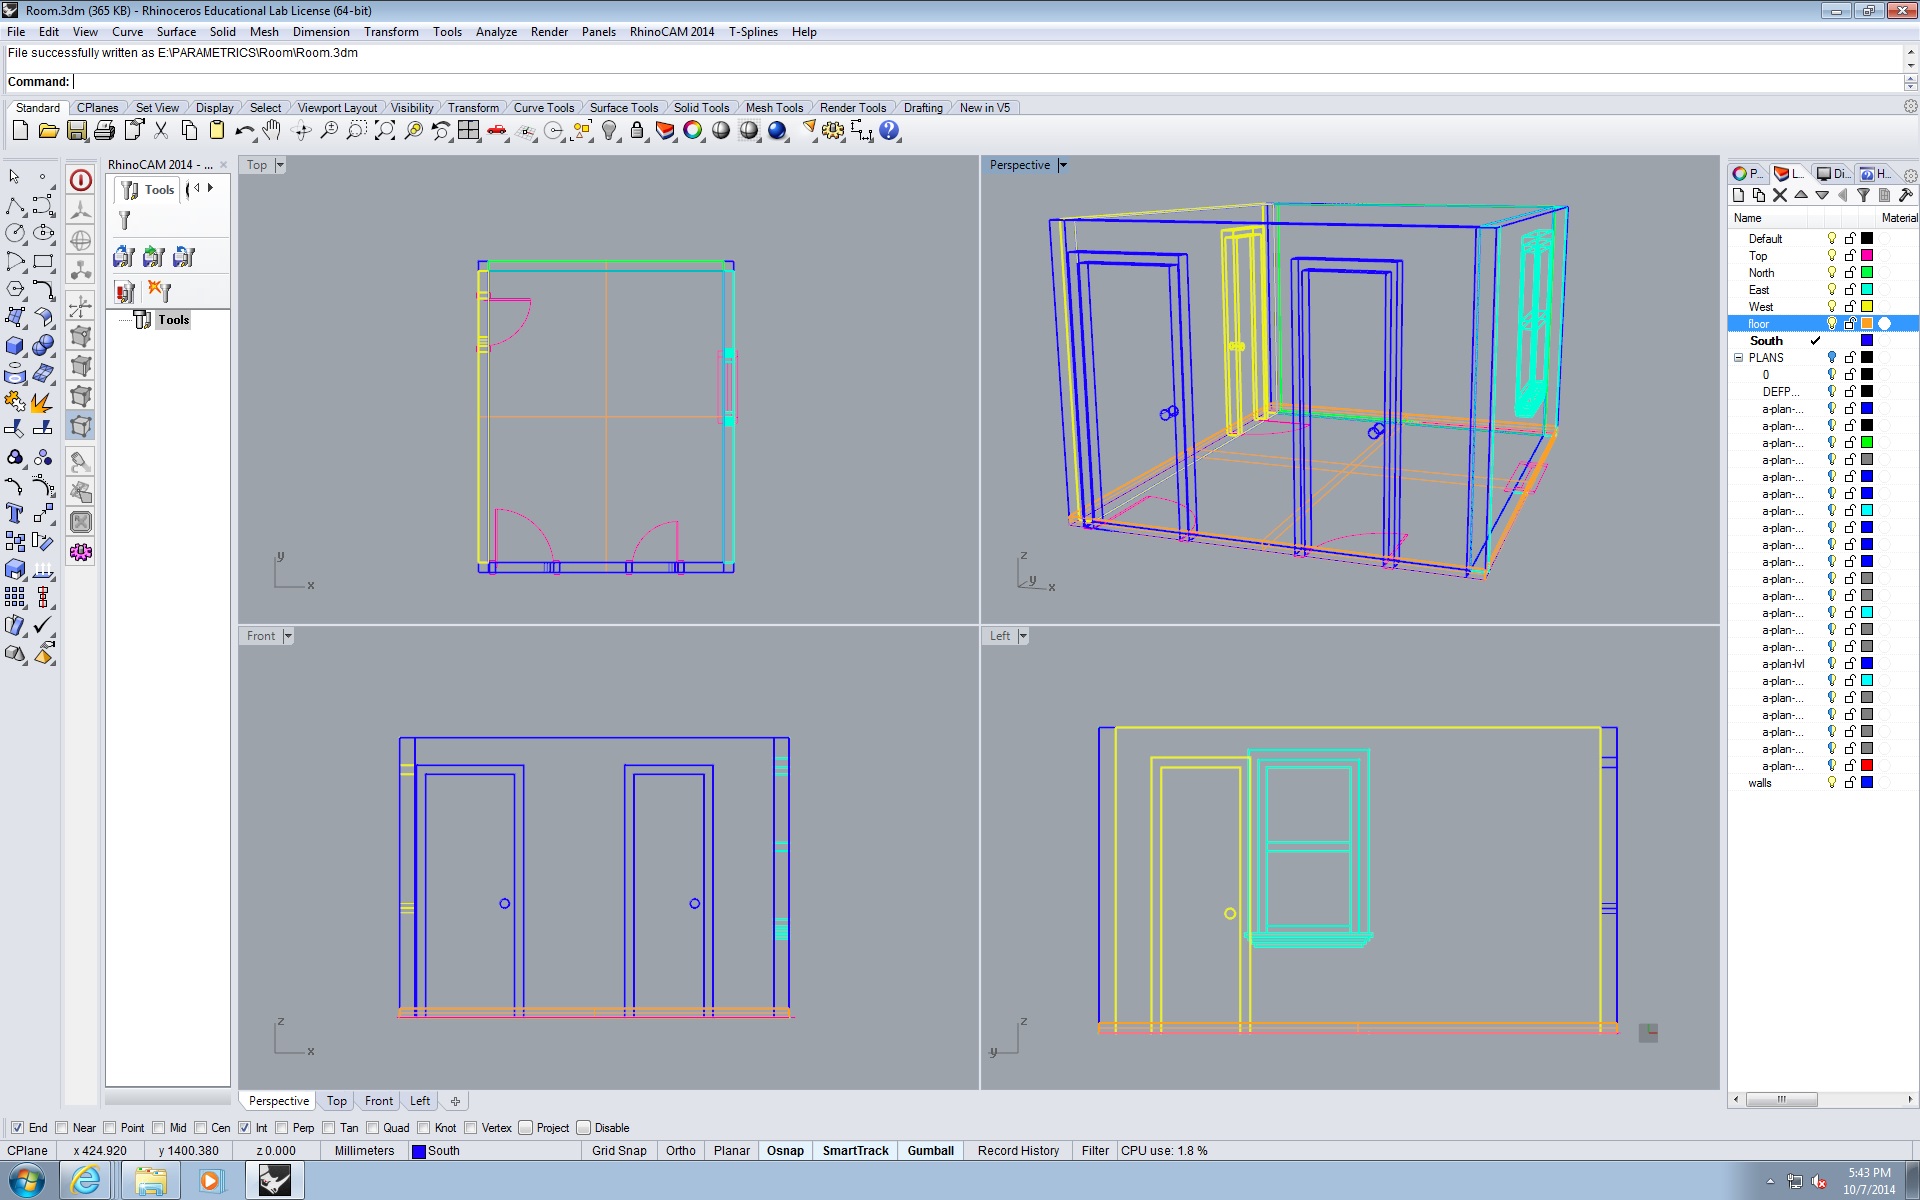
Ok so, I am not sure exactly how to use the unites in RHINO. So i imported it 1:1 scale, however, I made a 7 feet line to check the scale and my imported files were too small. I had to scale them up using the reference line. Afterwards it was easy as pie.
Check it out:
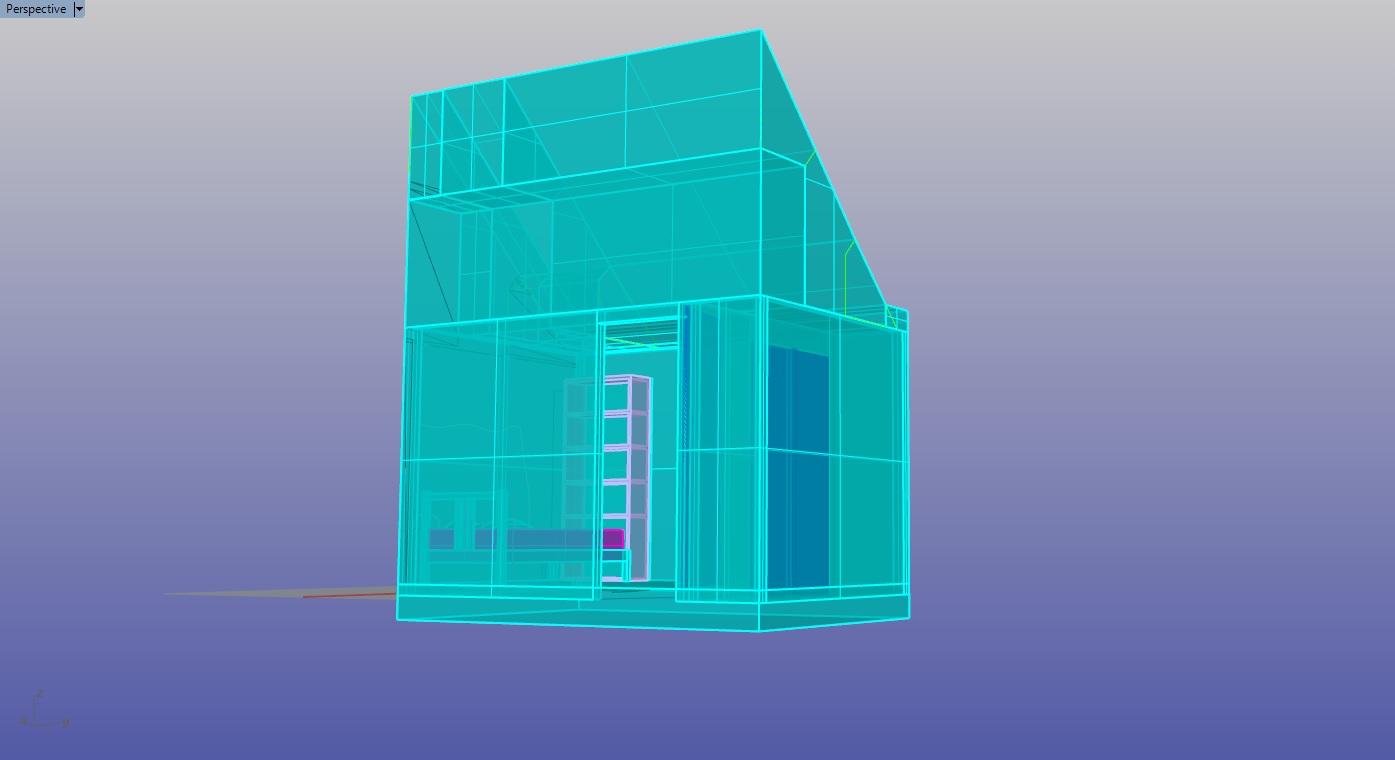 IMPORTED CAD FILES FINSIHED ROOM WITH FURNITURE VIEW THROUGH SKYLIGHT
V
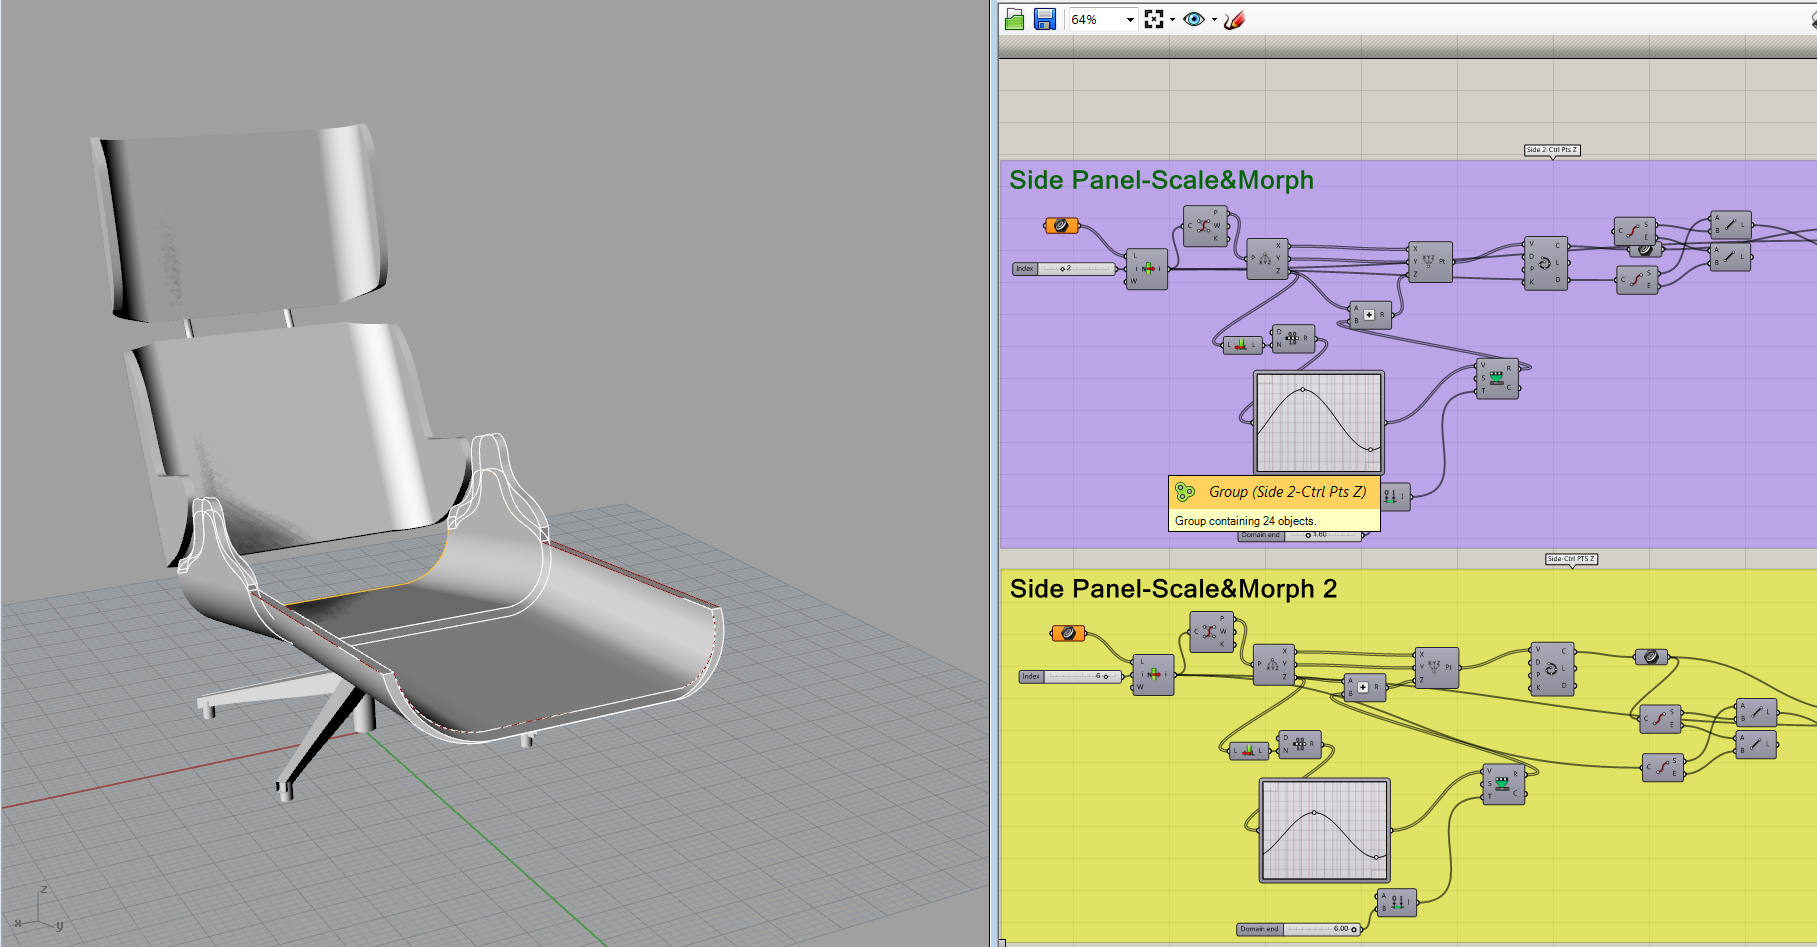
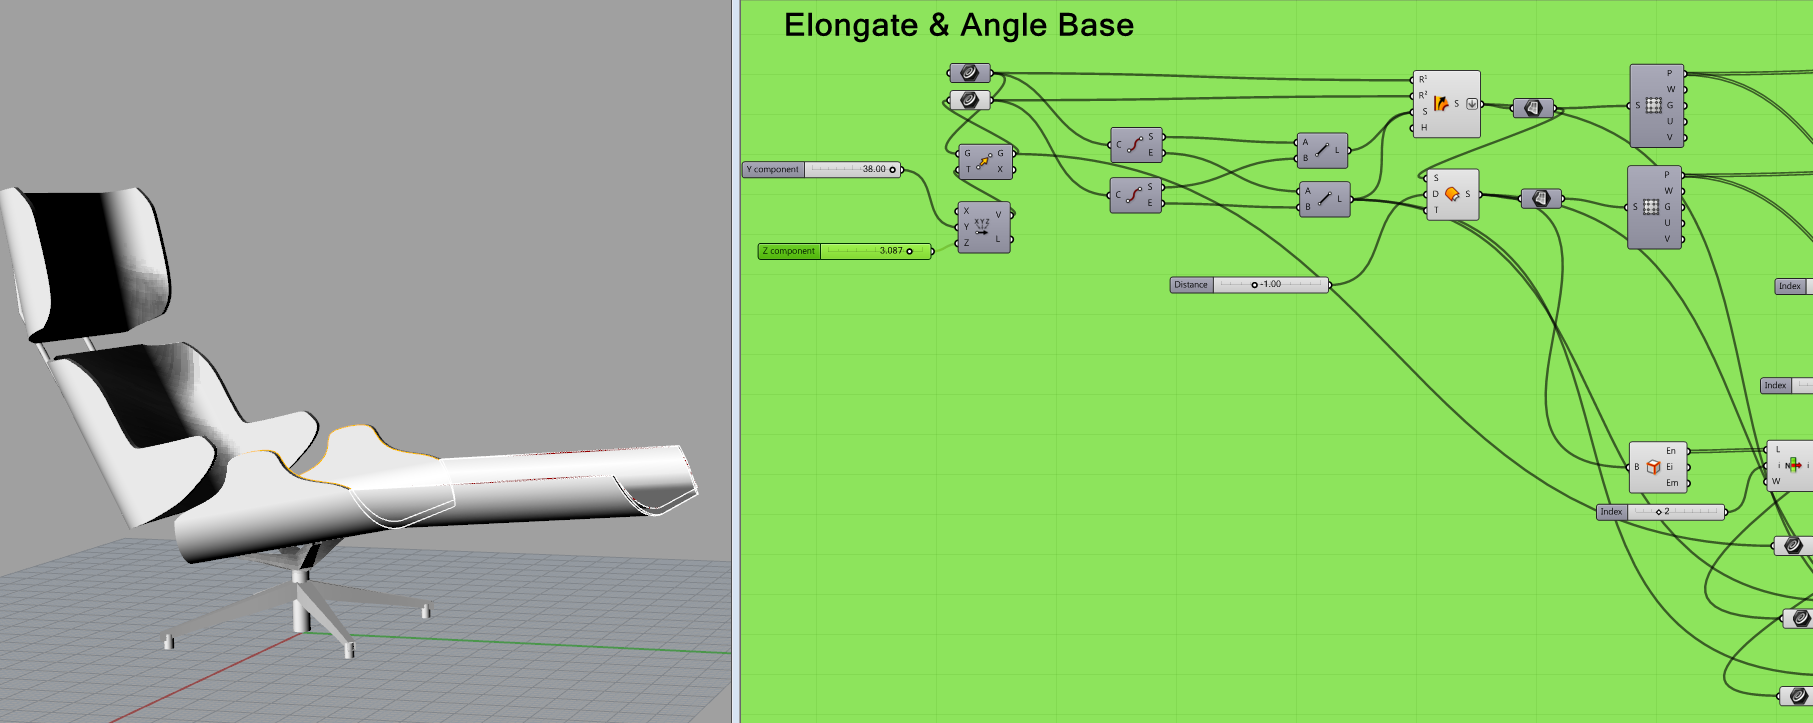
Parametric Eames Lounge
I modeled the chair in Rhino using image references, once I got the curves needed in place, I used network of curves, sweep, and surface from 3,4 curves to creat4e surfaces. Then I offset surfaces to give it a thickness and filleted necessary parts.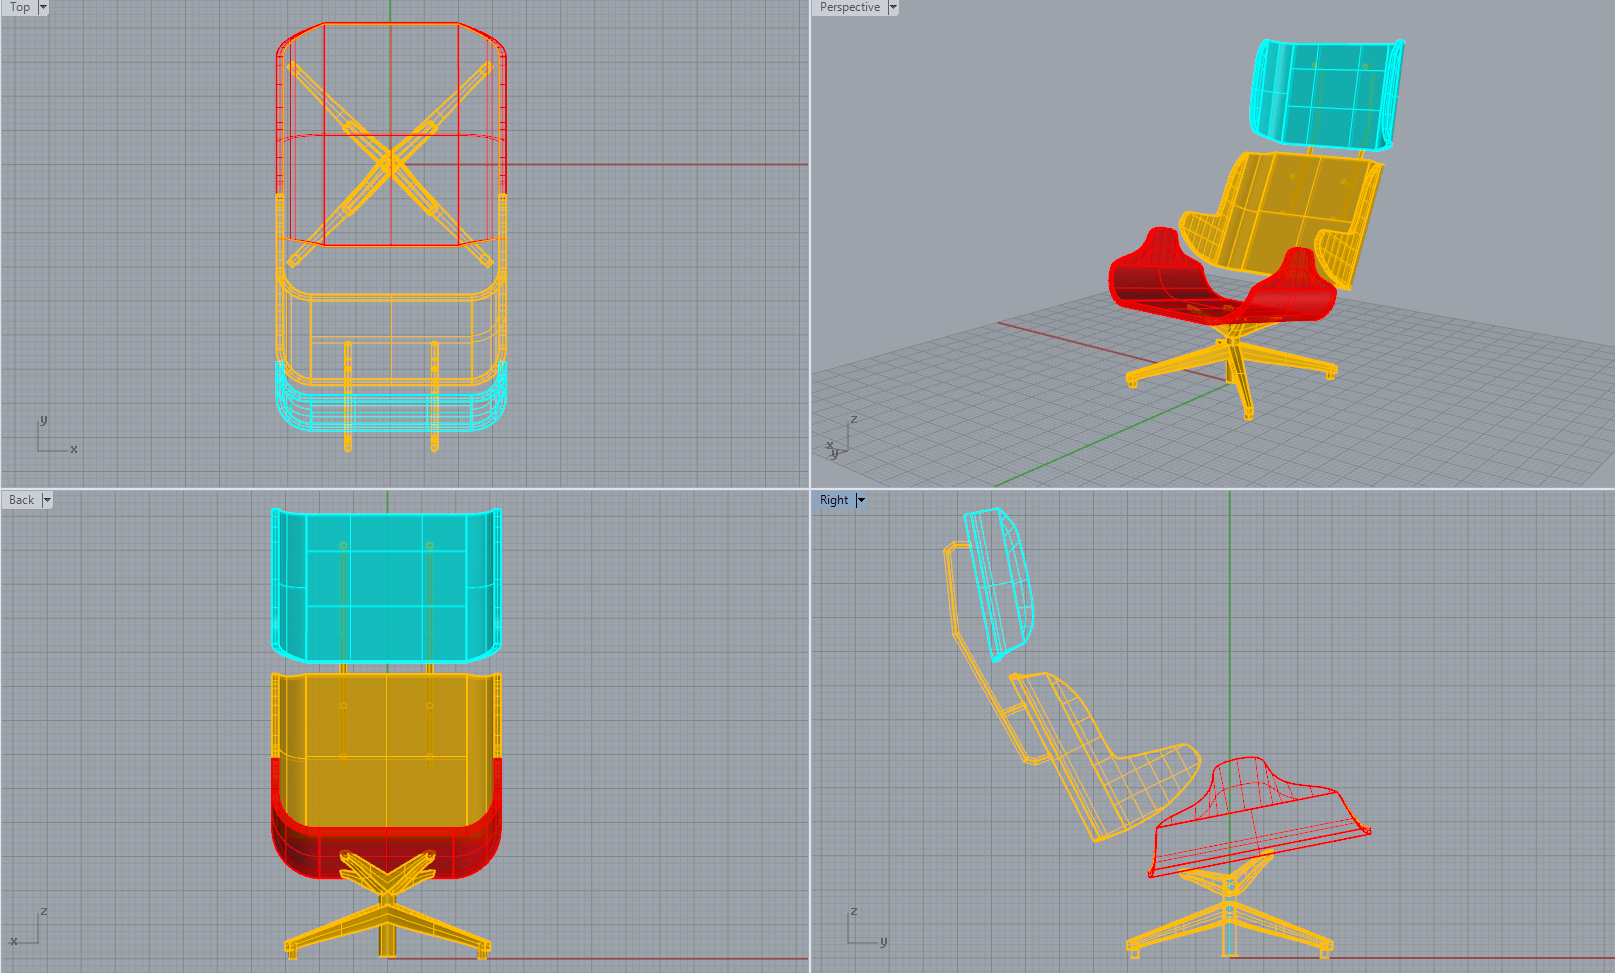
Then I used grasshopper to get the following results
Elongate base into a day bed

Extend Sides
Control Angle of the base
GIF s are below click to play!


Building Room
Hey guys,
Bring in the cad file of your room. It’ll be easier to model the room in rhino from there. I separated the file into layers. (north, south, east west, etc.)
Use RemapCplane to orient the elevations. Select the lines (I.e. north elevation) in the Top view – “RemapCplane” – click into the viewport you want to set the elevation on (I.e. front view). Use Move tool to place the elevation where it should go. 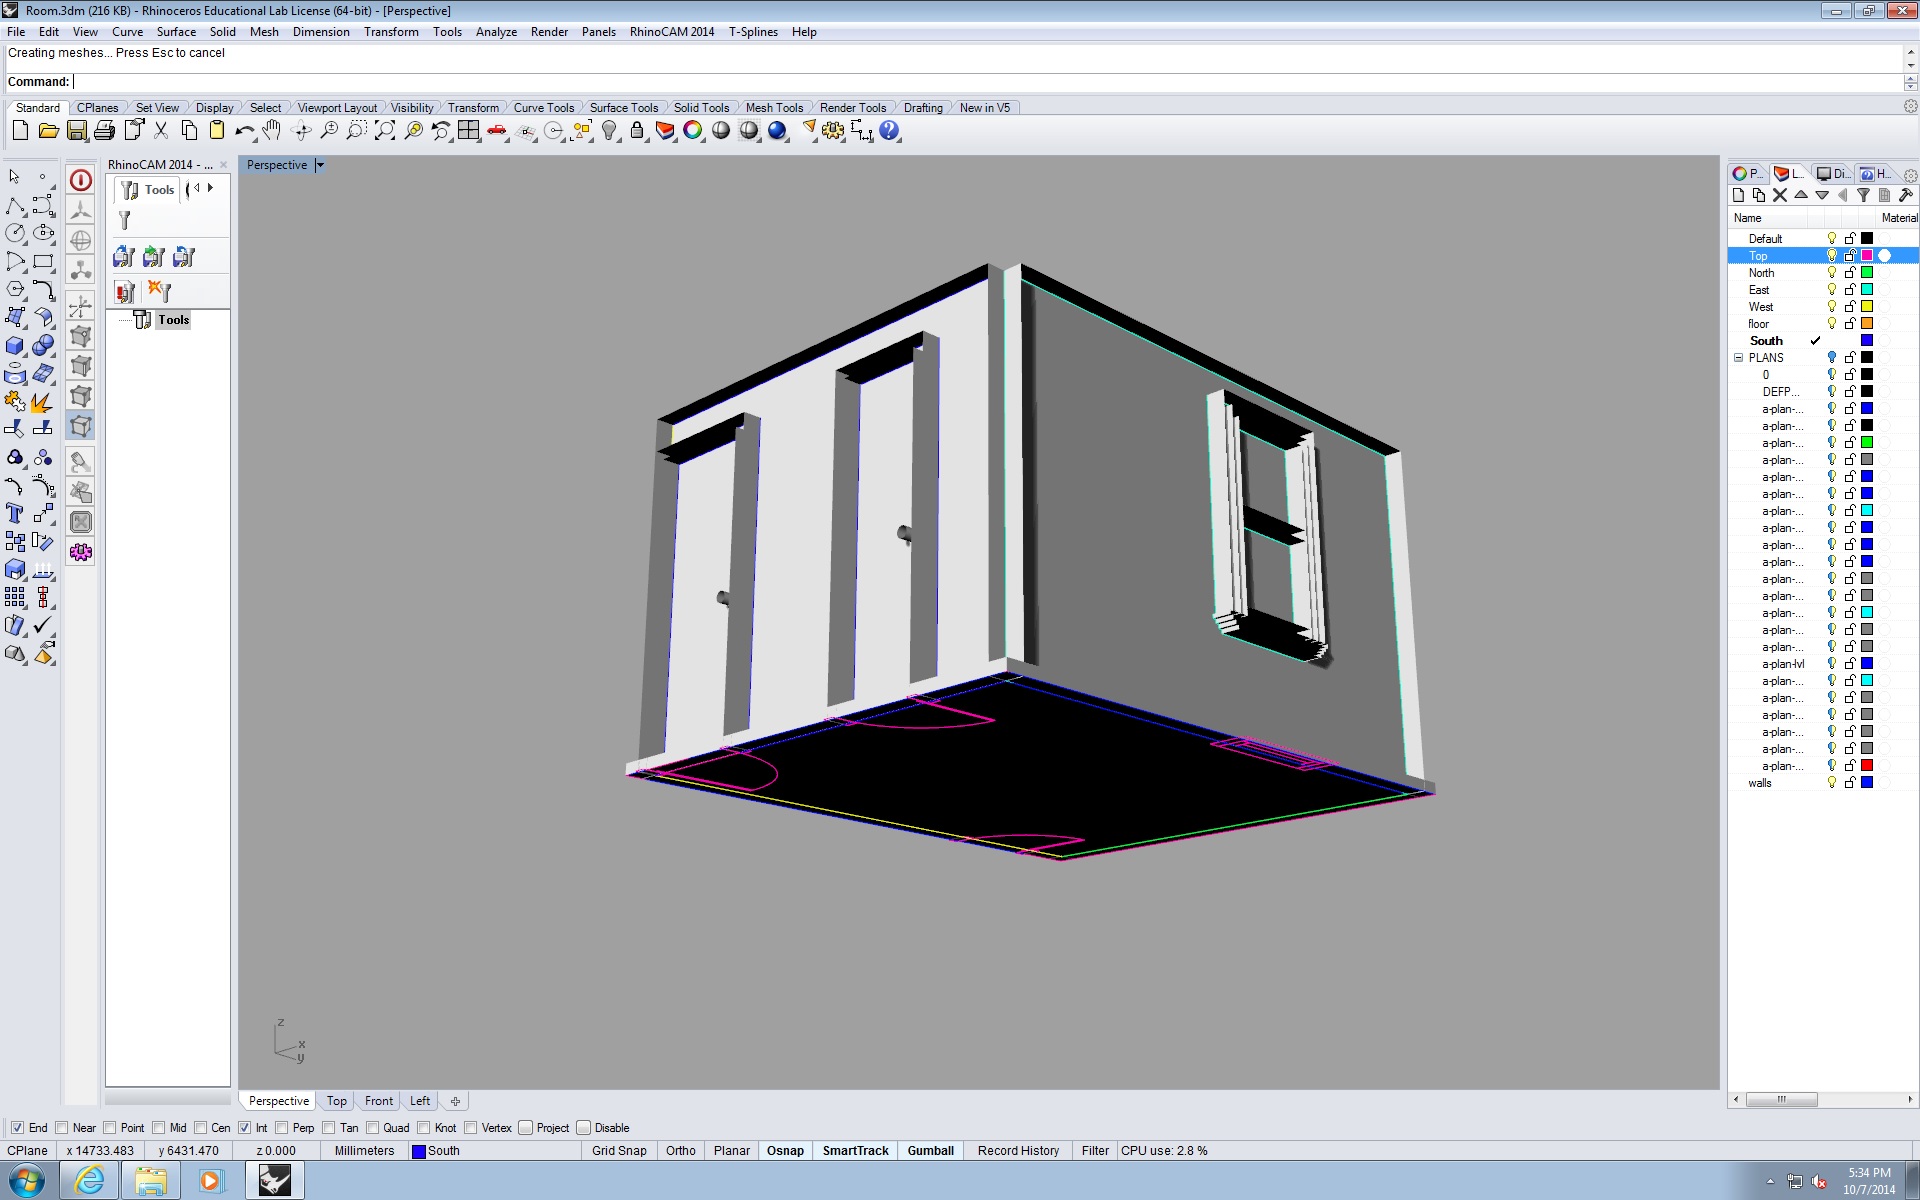
Found the Truss we made

PARAMETRIC SEATING: FISHBONE CHAIR
Hello All!
I began by building the whole chair in Rhino. By using curves, lofting, capping, dividing, and then splitting the solid to form the final chair.
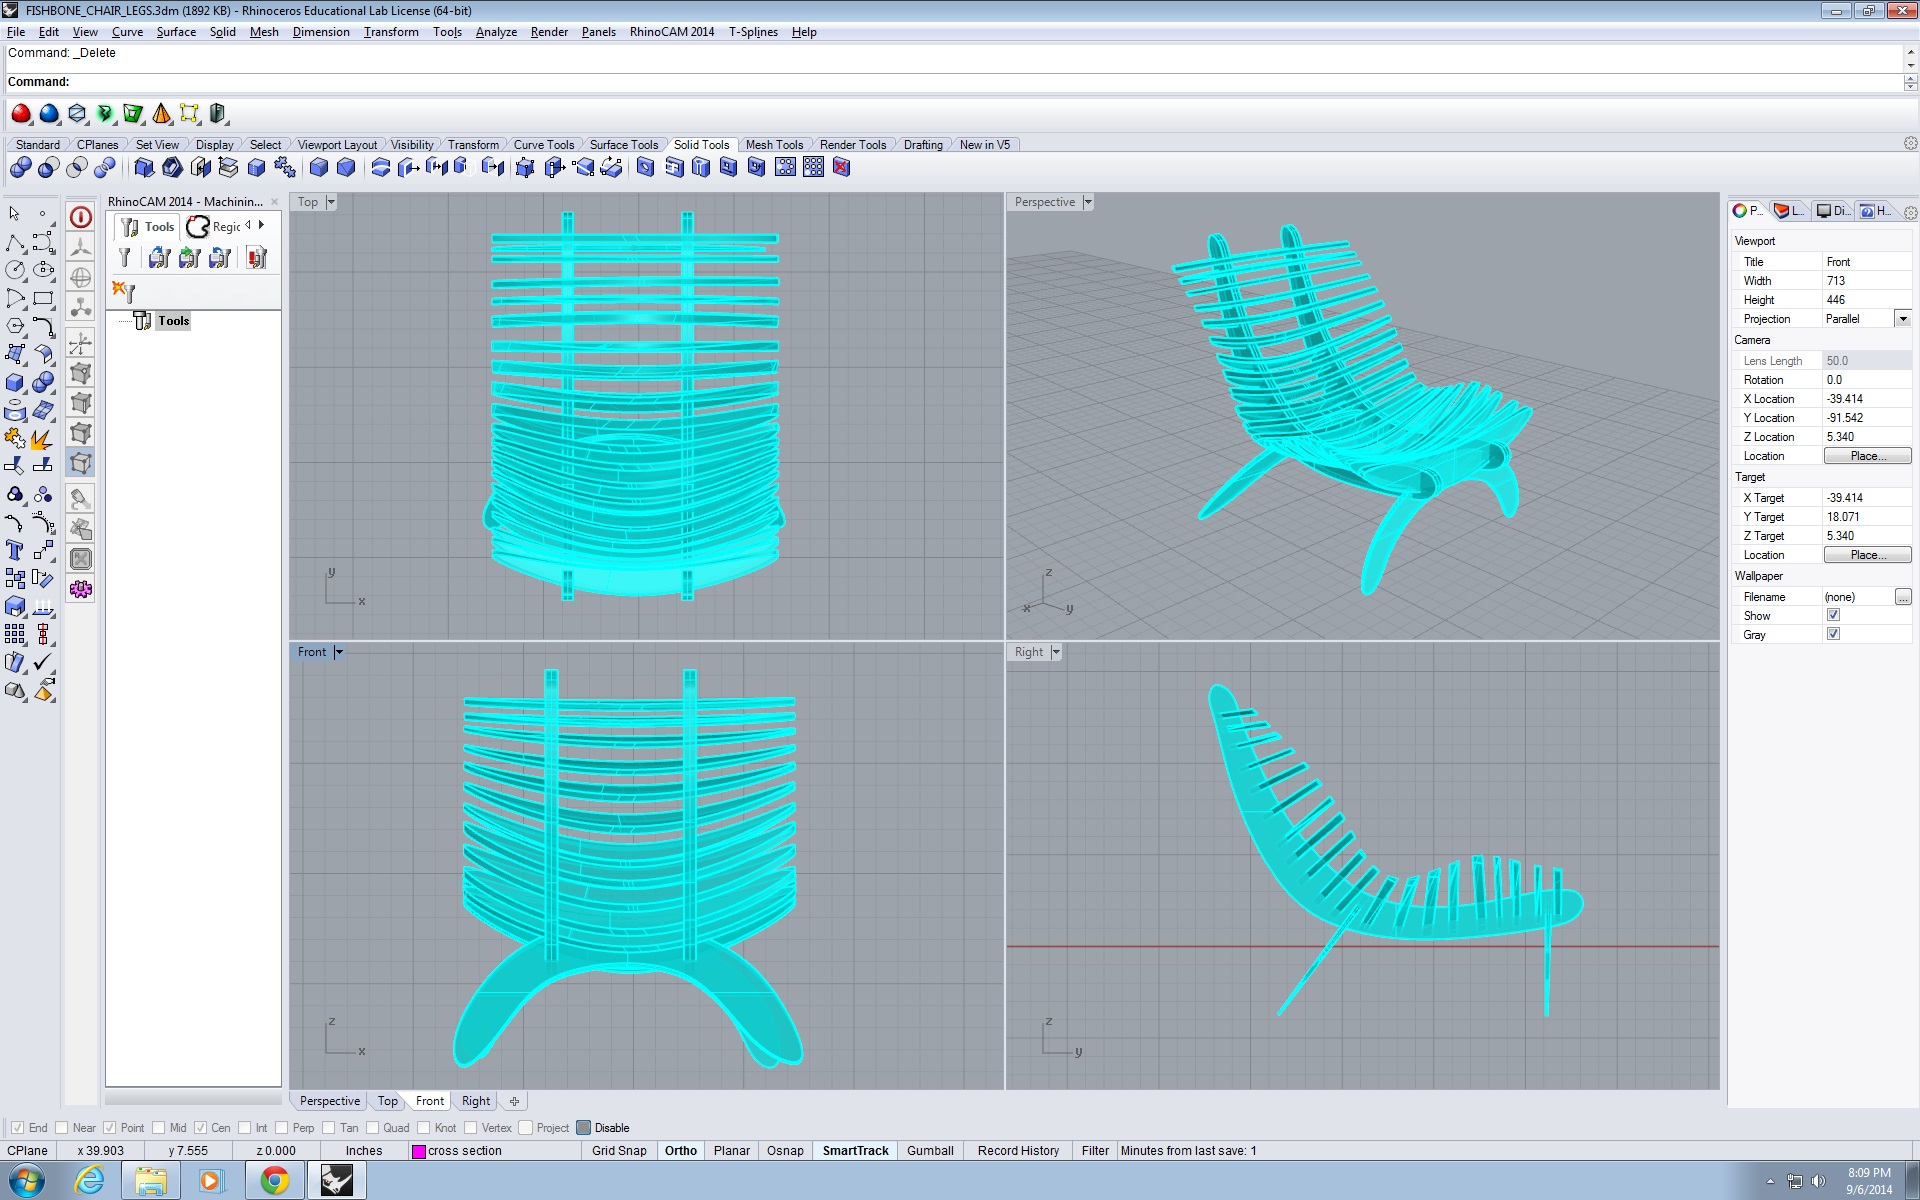
I redrew the curves for the final chair since I was a bit off in the shapes of the chair as a whole and also the shape of the individual ribs. Above you can see it is rectangular from the front and top views, but I redrew it to have an egg shape, similar to the original design.
Instead of splitting the solid into the ribs. I want to influence the solid to be manipulated in grasshopper with these Design Drivers: Width of Ribs, Thickness of Ribs, Frequency of Ribs, and Direction of Ribs.
First I create the surface as a solid using my curves.

I then draw the legs in RHINO.

Then, in grasshopper I reference a curve in the middle. Apply perpendicular planes to the curve. Deconstruct it. Meanwhile, I reference the surface as a BREP. I apply the perpendicular curves in the boundaries of the BREPPED surface.
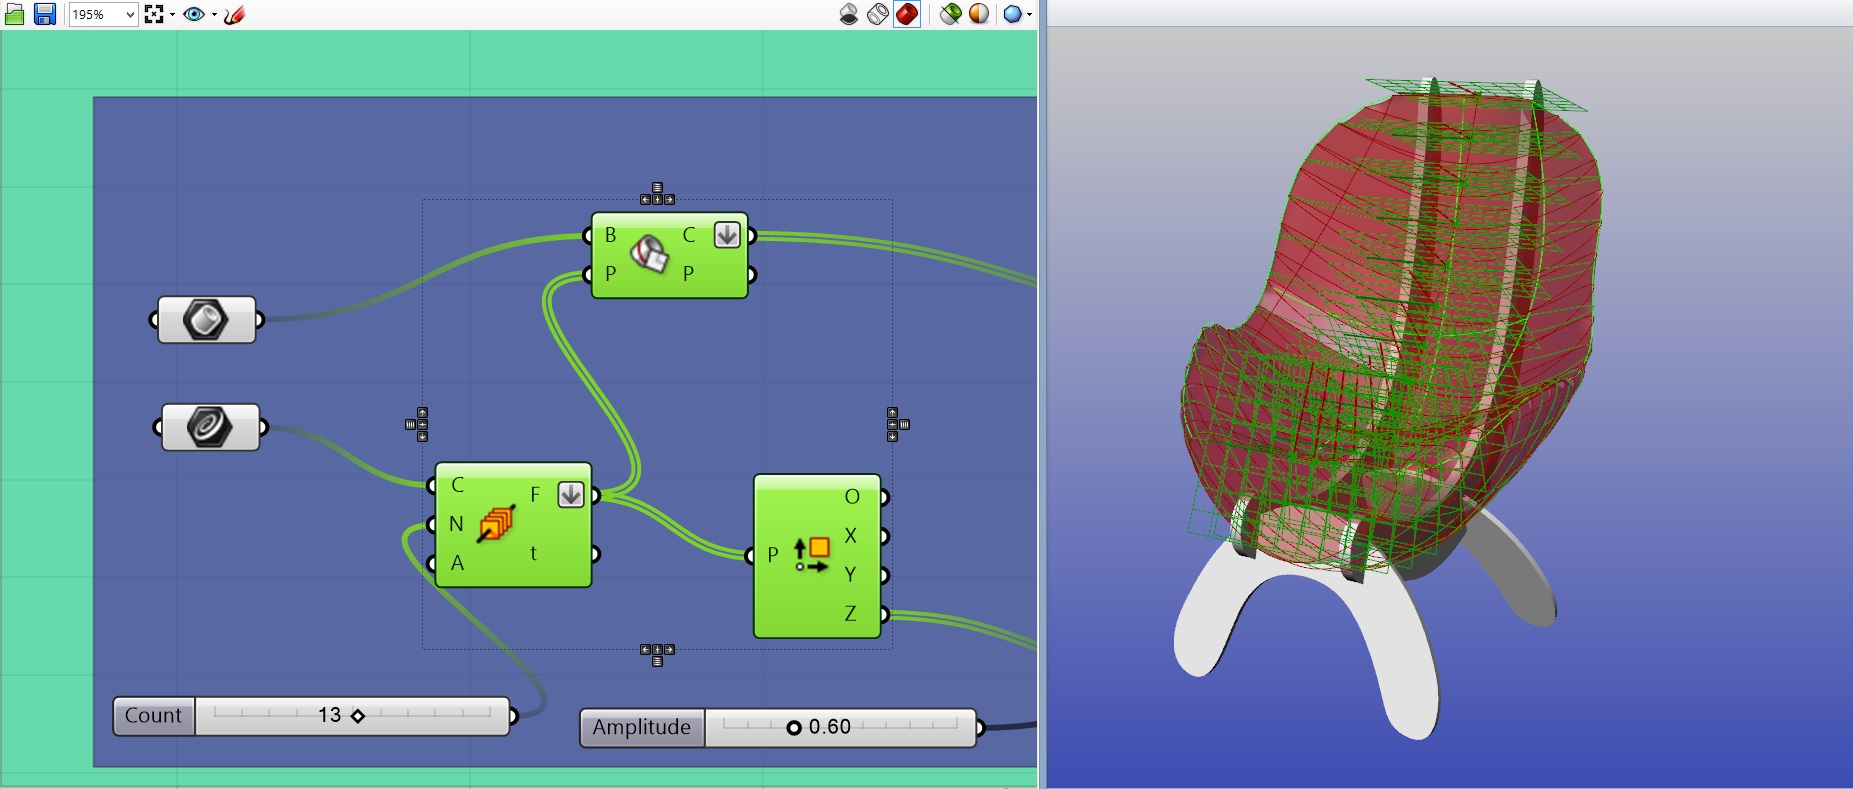
I then extend the planes, which I refer to as ribs, in the Z-axis, attaching a number slider to influence the width of the ribs. Extrude with the parameters of the BREP and then cap and voila! Baked and ready to go in Rhino world.
 Frequency of Ribs
From here I will post Grasshopper and Rhino chair photos side by side with the drawings.  Thickness of Ribs
 Perpendicular Ribs – Same properties
 Perpendicular Ribs – Different properties
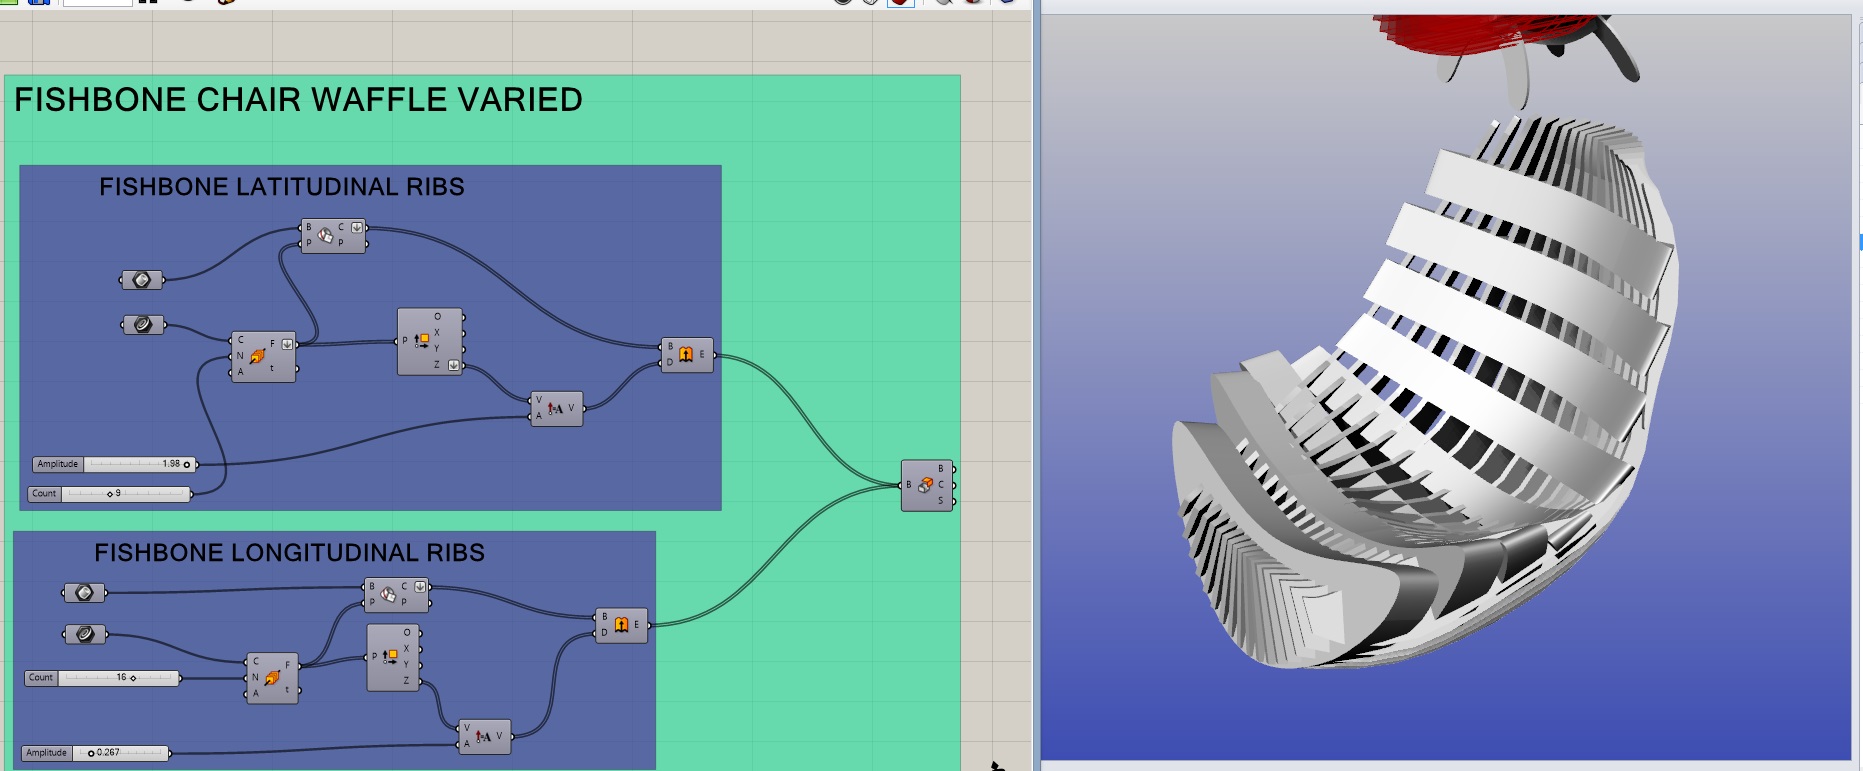 Thickness of Latitude Ribs and Frequency of Longitudinal Ribs
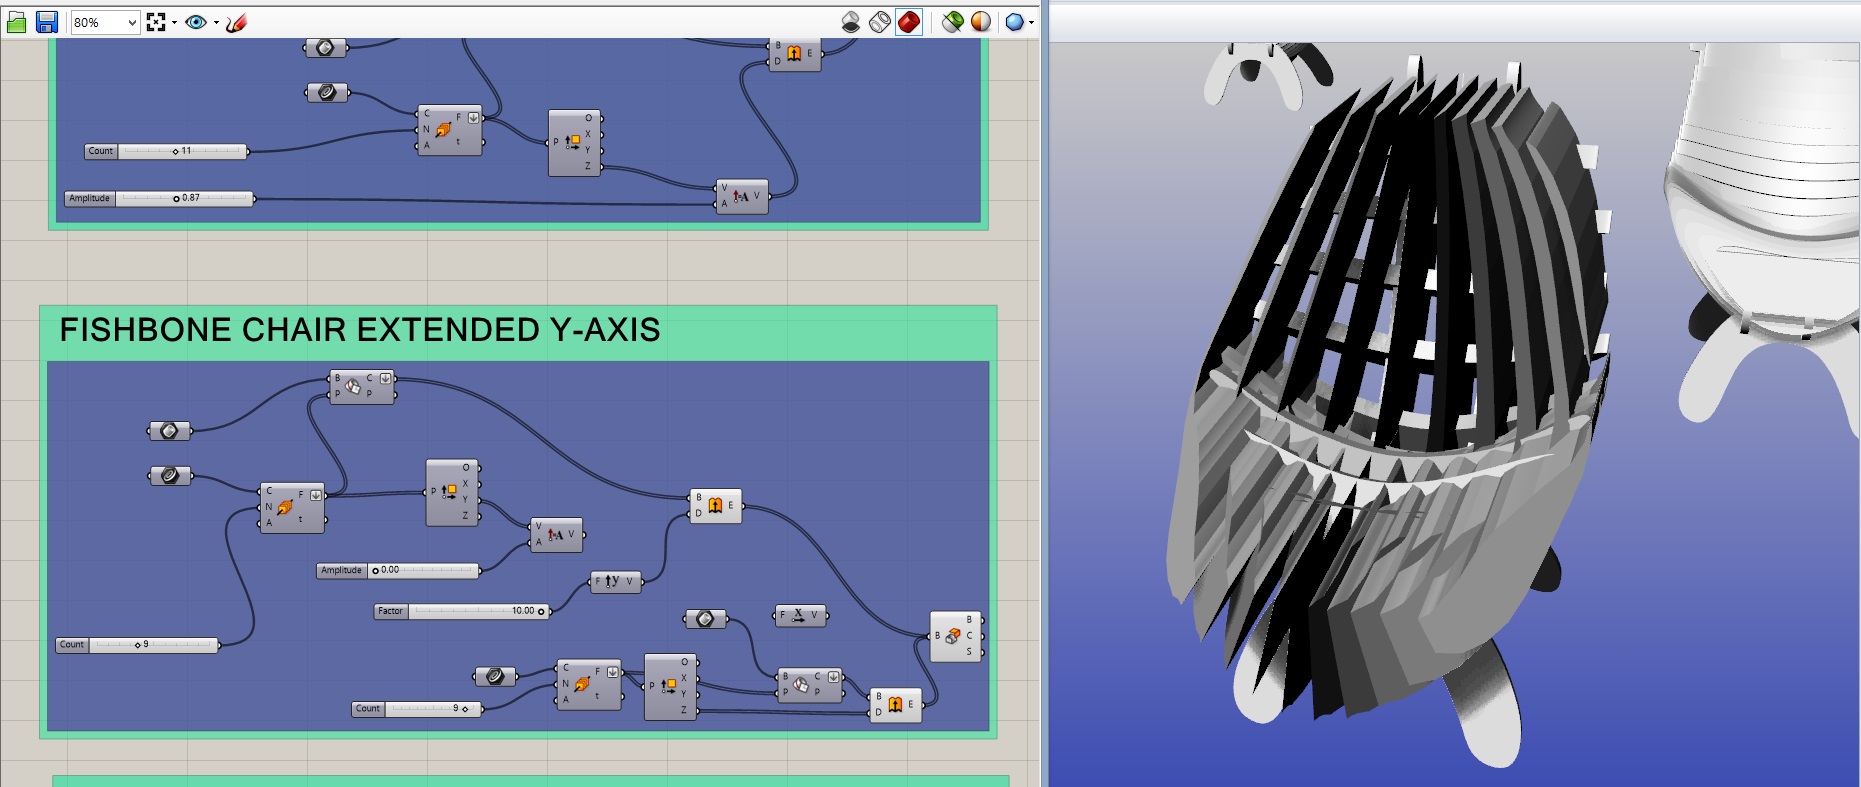 Extend Longitudinal Ribs in Y-Axis.
PDFs of the Drawings Below:
nofeet Model (1) woah Model (1) WAFFLEVARIALBE Model (1) WAFFLENORMAL Model (1) normalthick Model (1) normal Layout1 (1)
Gifs of Each Driver being influenced by Grasshopper as stated below.


Thank you!
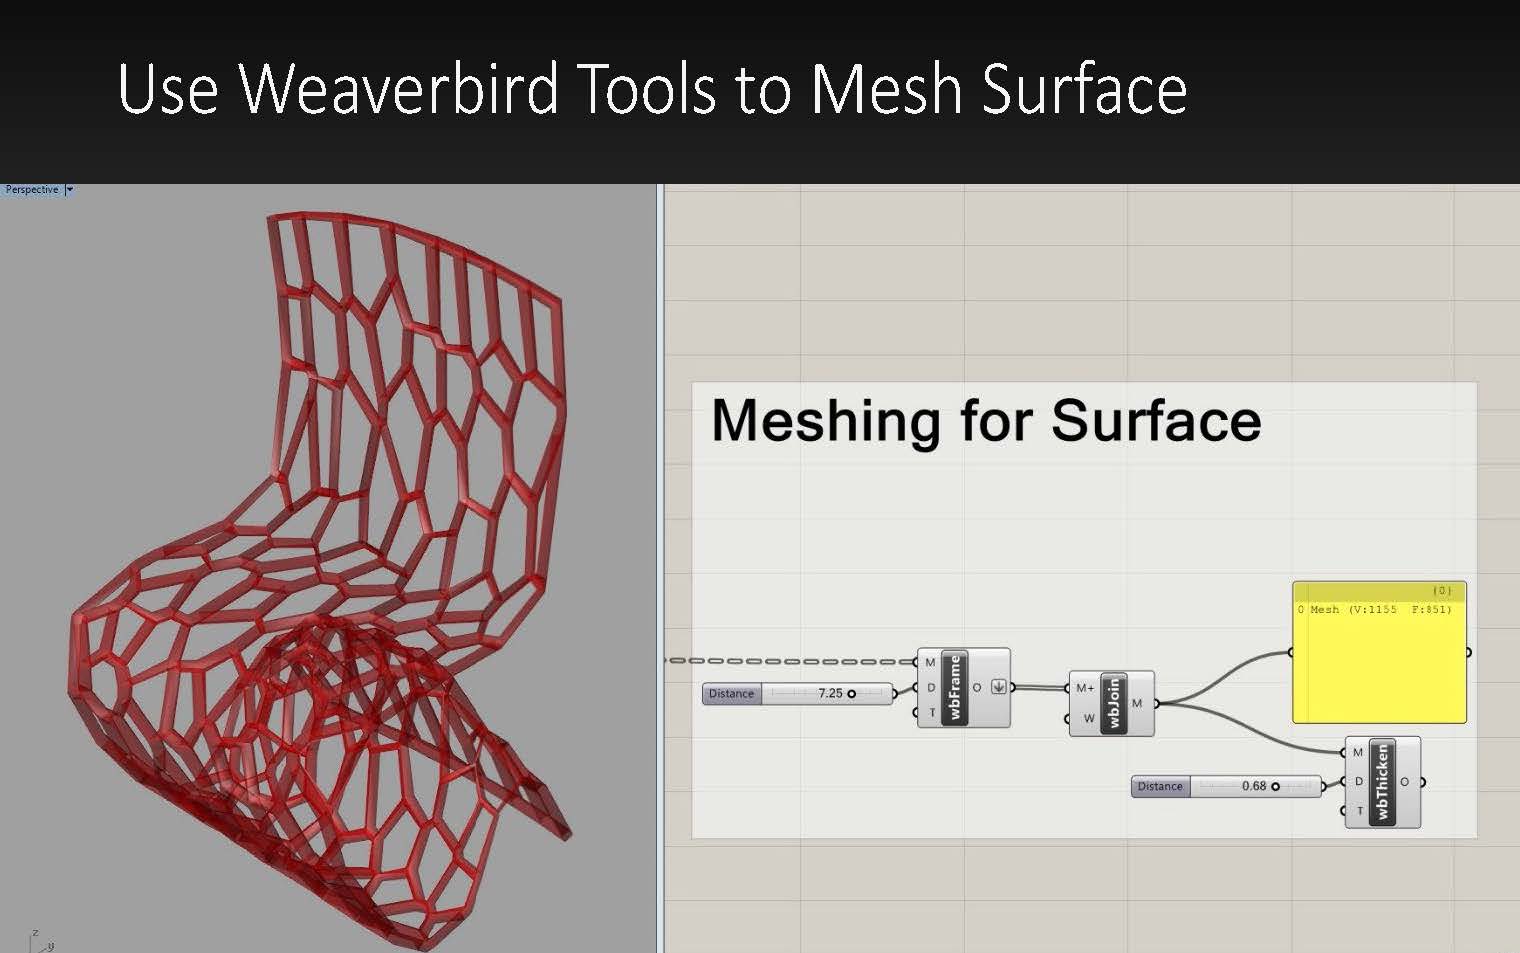
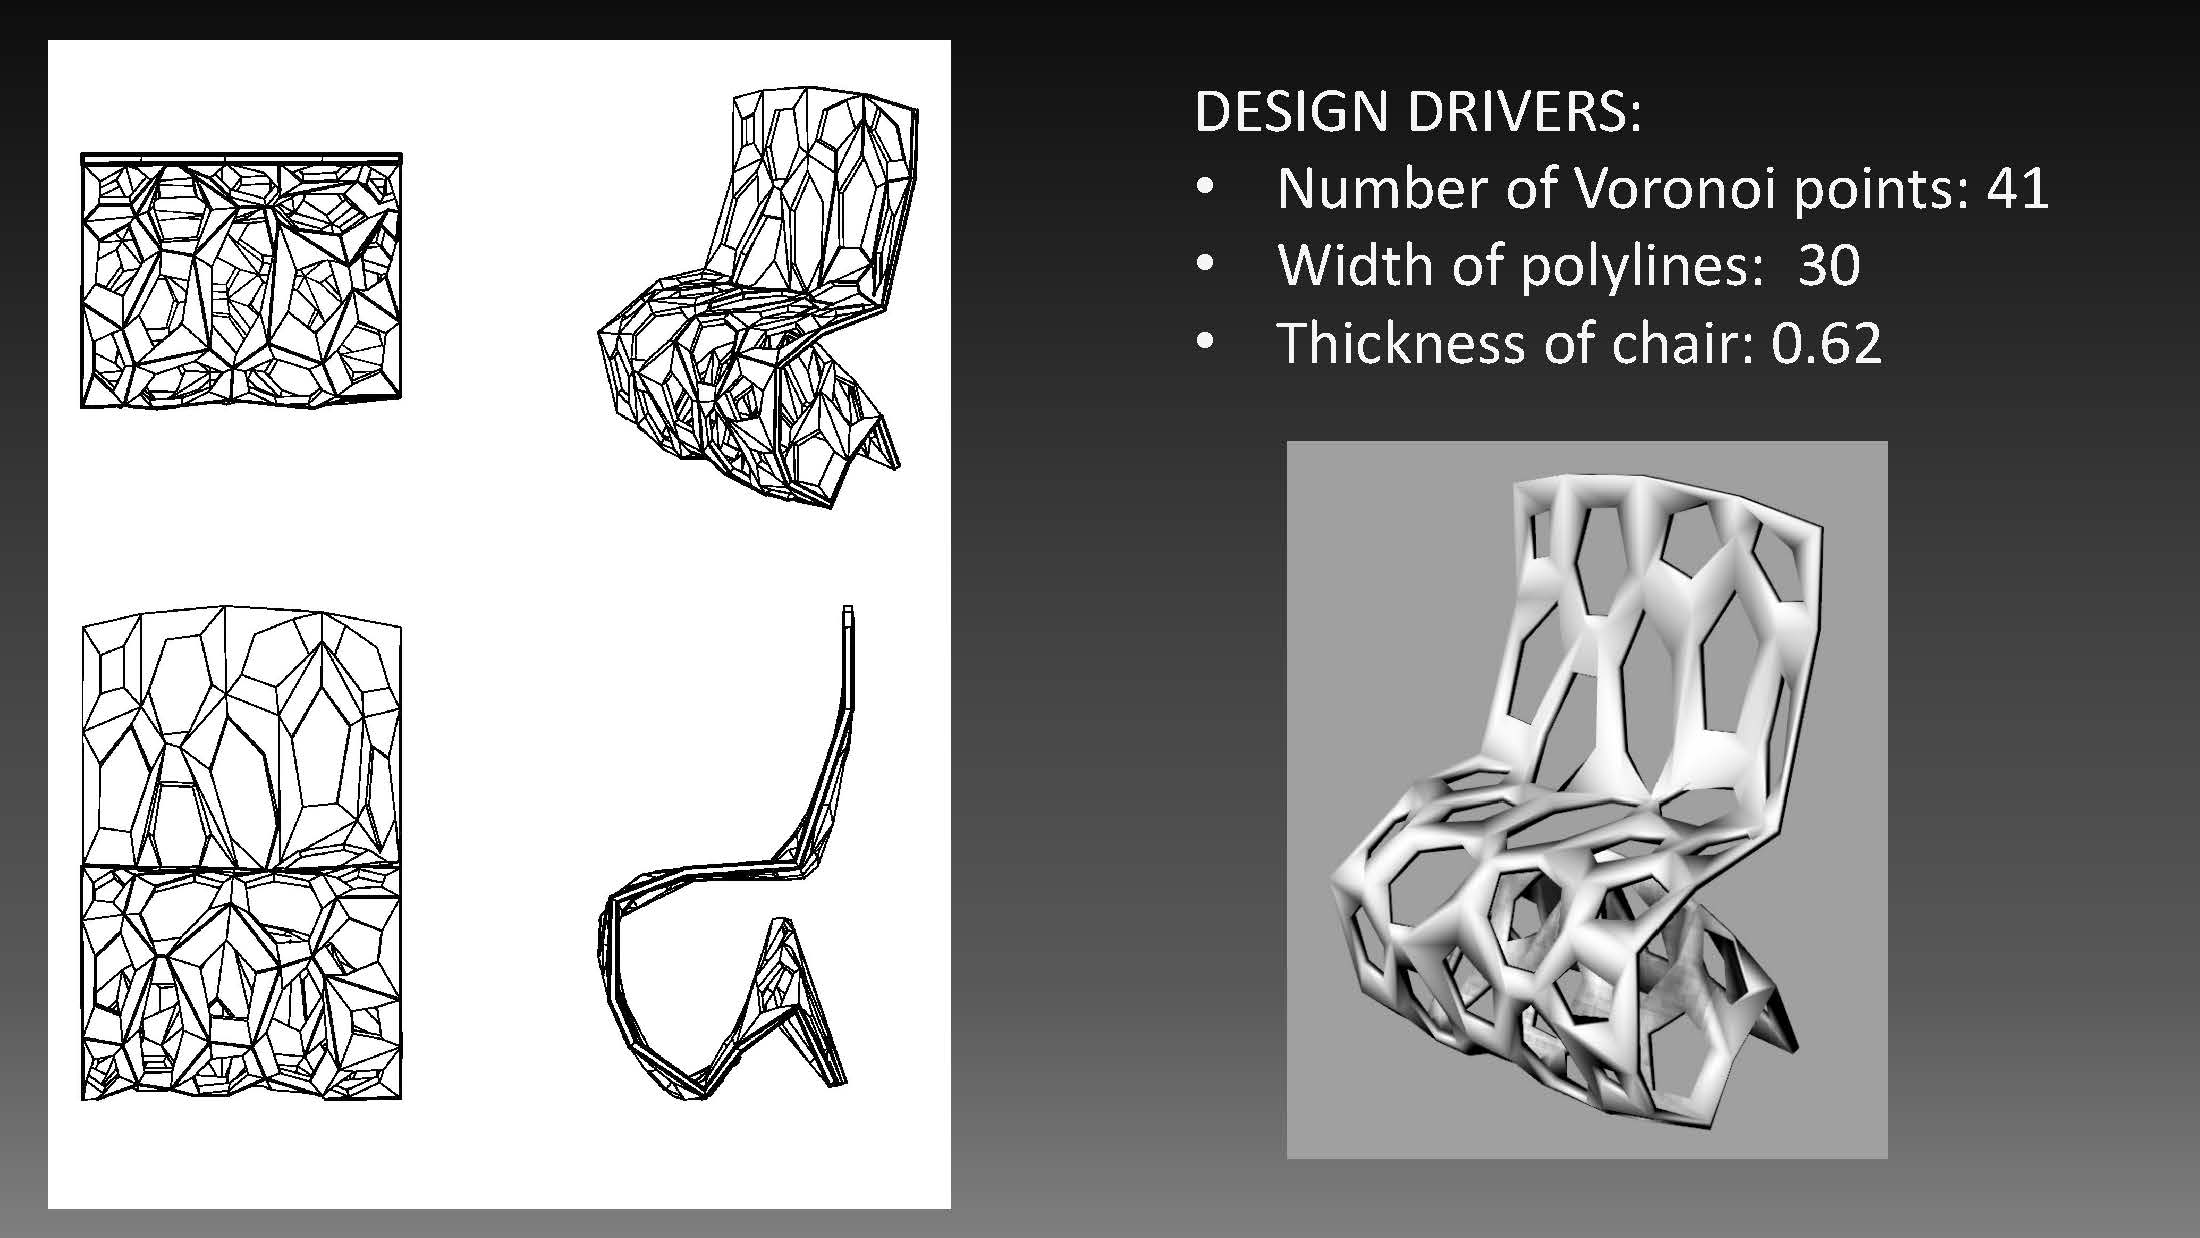
Parametric Seating – Voronoi Chair
The chair I chose was the Voronoi Chair.

I started with making the surface model in Rhino and using Grasshopper to apply the voronoi pattern onto it.

Because the voronoi pattern can only be applied to a planar surface, it was very difficult to apply the pattern to my curved chair. I therefore had to create a reference plane. I created a rectangle in Grasshopper as my surface reference plane to build the voronoi pattern onto. From there, I essentially projected the points onto my organic chair.


Making my chair such that the polylines were fluid also proved difficult. Many of you may remember my previous result, such that one could die from sitting on it.

I used the Weaverbird tools to create a mesh out of my polylines.

Design Drivers and Resulting Chairs:

I used Grasshopper to control the amount of voronoi points I wanted in the chair, the thickness of my chair, and the width of the polylines.


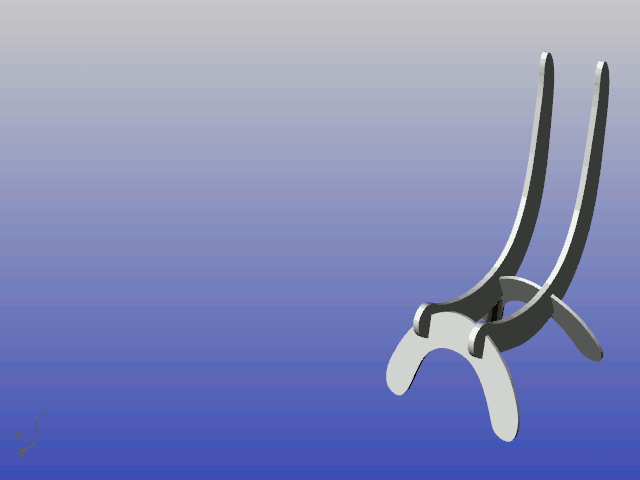
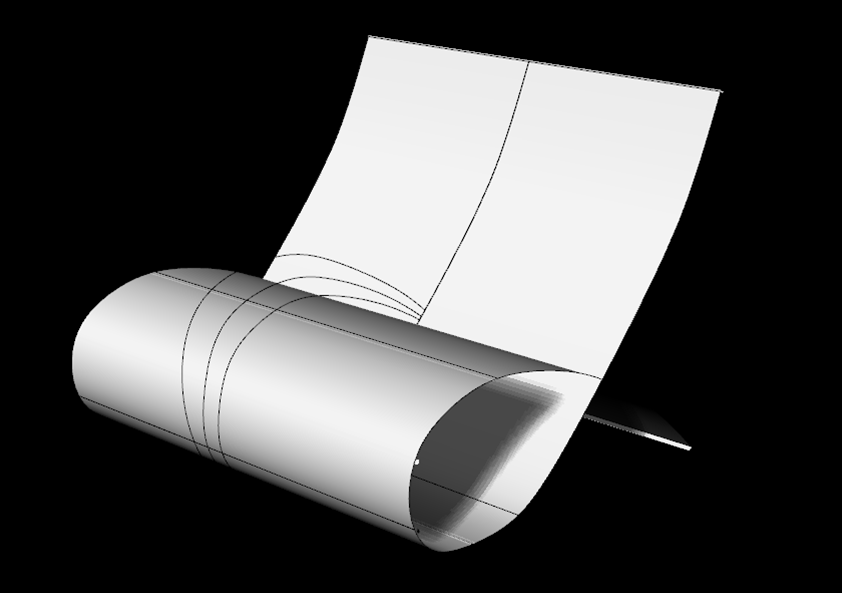
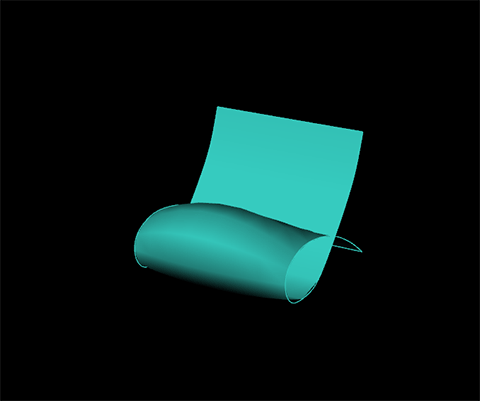
Newson Chair
I selected the Cappellini wood chair (1988) by Marc Newson to use for my parametric extensions.
Original Chair:

I began by drawing my end curves in Rhino and then by 2 rail sweeping the top and bottom curves to the side curves. I added 3 support curves in the seat, true to Newson’s design. I also drew 4 additional curves in the center of the seat to reference for when I extend the seat curvature in grasshopper.
Rhino Model:
Next, I defined my design drivers and proceeded to grasshopper where I used sliders to manipulate the rib count and width, the length of the seat, and the curvature of seat.
Define Design Drivers:


I got all of the drivers to run to the best of my ability at this point. The main thing I am still trying to figure out is how to attach driver 1 (Rib count and width) to the drivers 2 and 3. This is probably something very simple….
Driver 1 Rib Count:
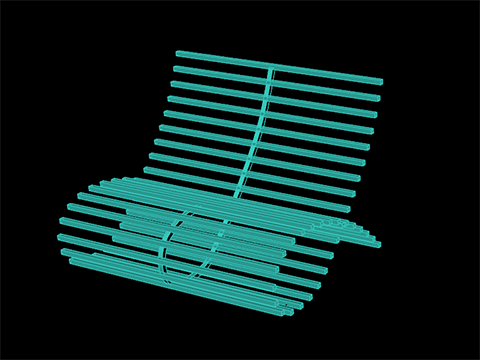
Driver 2: Rib Width
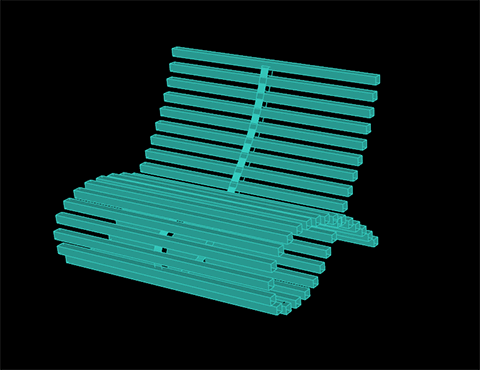
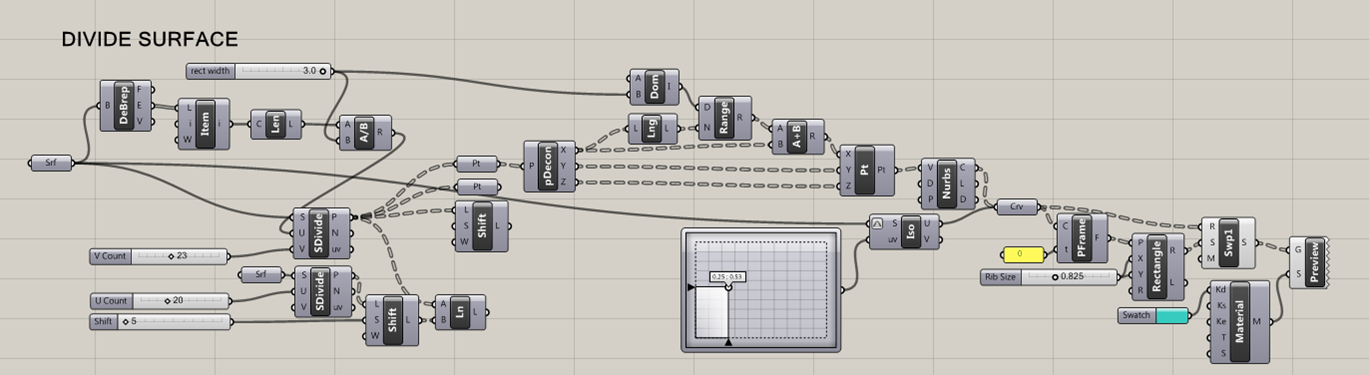
Driver 3: Seat Length

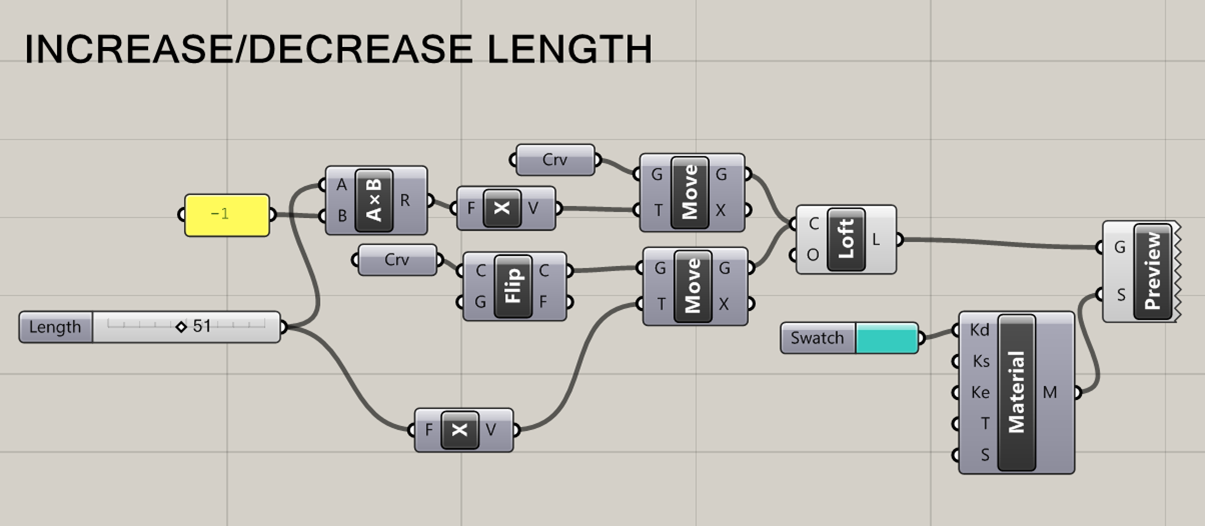
Driver 4: Seat Curvature


You must be logged in to post a comment.