

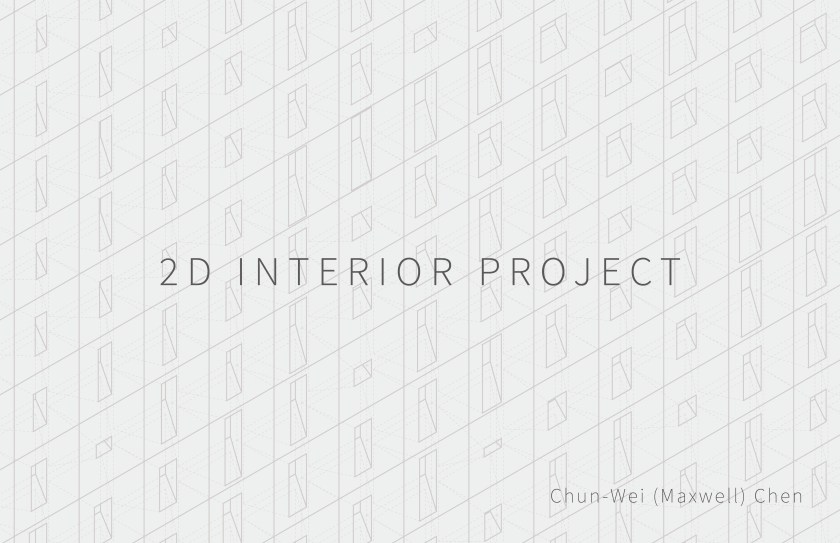
2D interiors project
As the first exercise we did by grasshopper, it’s a tough process to understand each component and use skillfully.
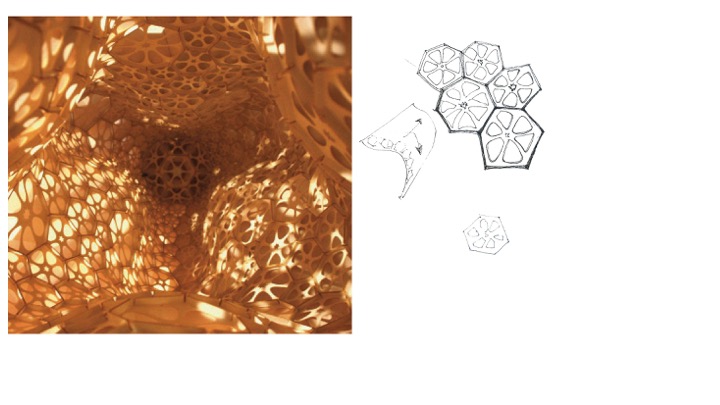
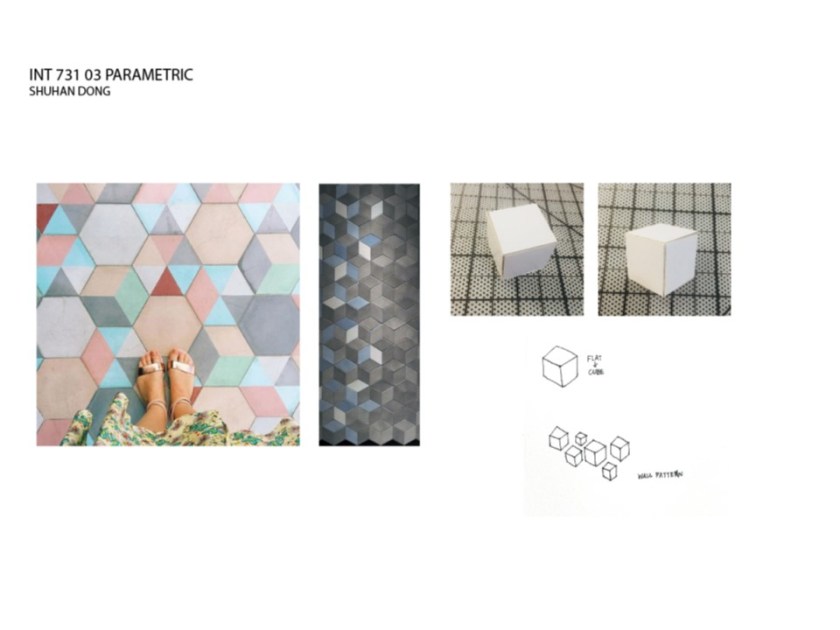
The precedent I followed is a 3D surface, it also can be used as a wall pattern. In the beginning, I wanted to make a curved surface with this hexagon and hollow out the circle pattern. Therefore, my first test used the morph component to hollow out a circle. The first step is making two polygons and boolean difference. The second step is making a curved surface which I can control the fluctuation frequency.

This method works but I failed to get the hexagon shape. The shapes I can get are very basic polygons such as cones and cubes. However, it’s difficult to make a hexahedron.
My second test used ‘Project’ so firstly I used the same surface, but I tried to project the hexagon shape on the surface. However, I don’t know how to get the hollow circles in the hexagon frame. 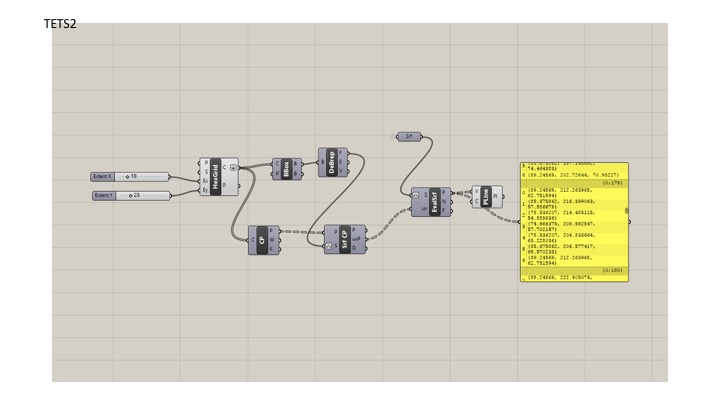
The third test I used a flat surface… I divide the surface into small grids and get hexagon shape through creating Points and Centrepoint and connect them with lines. Thus I can get the small triangle surfaces. Then I used Offset and get the hollow circle. I also can change their sizes by changing the distance. The next step is using Scale and Move to change the size and position of some ‘special hexagons’ and I used Swatch to change colors. 


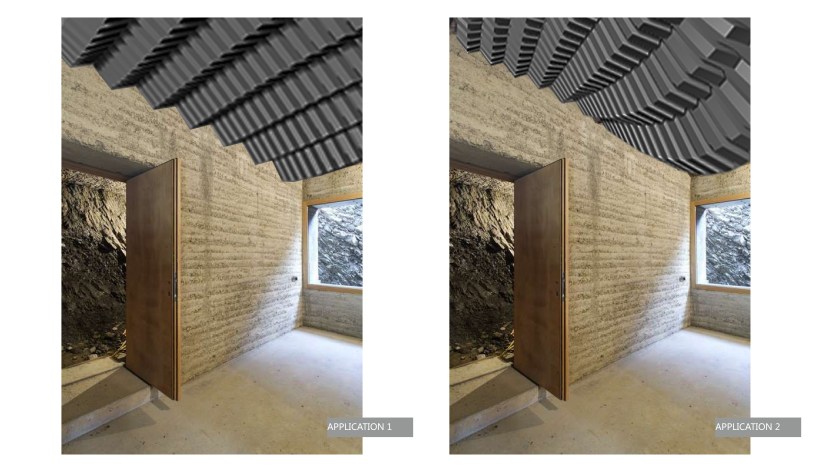
The 2D interior project I designed is a ceiling system project. The material of the ceiling is traditional Chinese brick. My intent is to make each piles of the bricks start to rotate and do series of movement in order to create more amazing ceiling structure. I believe this design will allow visitors have different experiences in both horizontal and vertical directions.
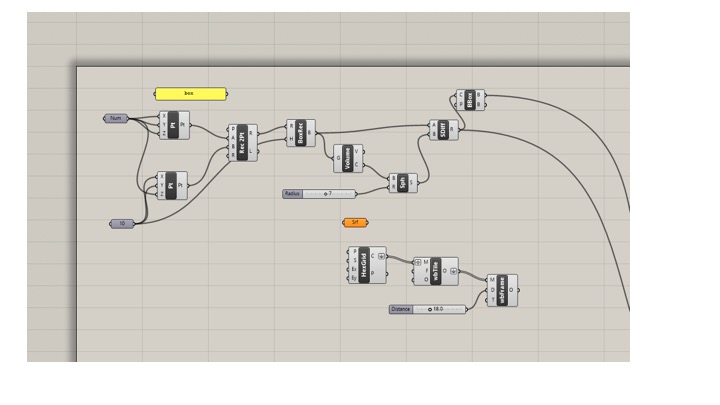
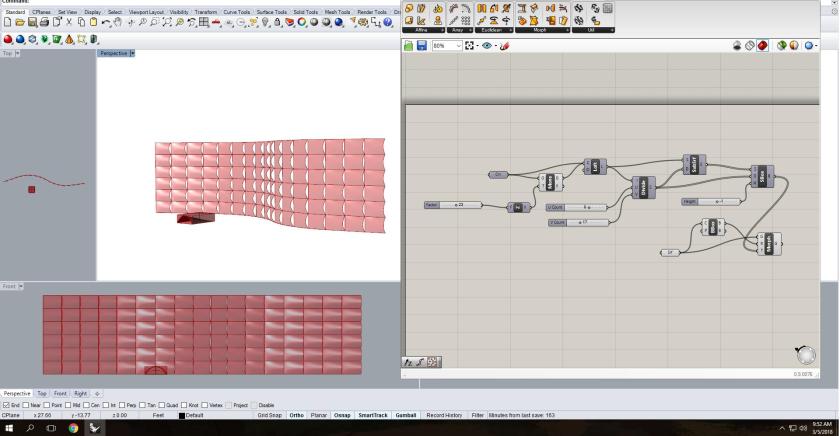
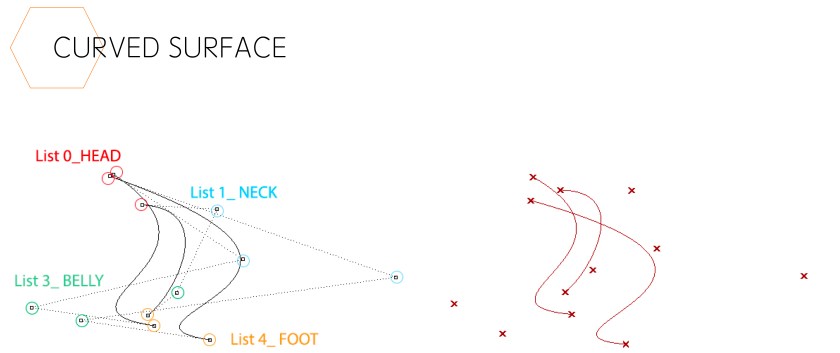
In the final project, I set up 3 lines, which are consisted of 12 x-y-z points, and then I loft these three lines to build a surface. I also create a geometry and morph this box to the existing surface to build a group of boxes. However the surface moves, the boxes will move along with the surface which of course is connected with the 12 points. Then, the twisted piles of boxes start to be same as the geometry in my drawings.
I also build the surface boxes to surround each of the geometry to create some spaces like the real bricks do.
The geometry I create has thousands of alterations because of the different shapes of the surfaces.
I learned a lot from this lecture.
PRECEDENT AND DRAWINGS

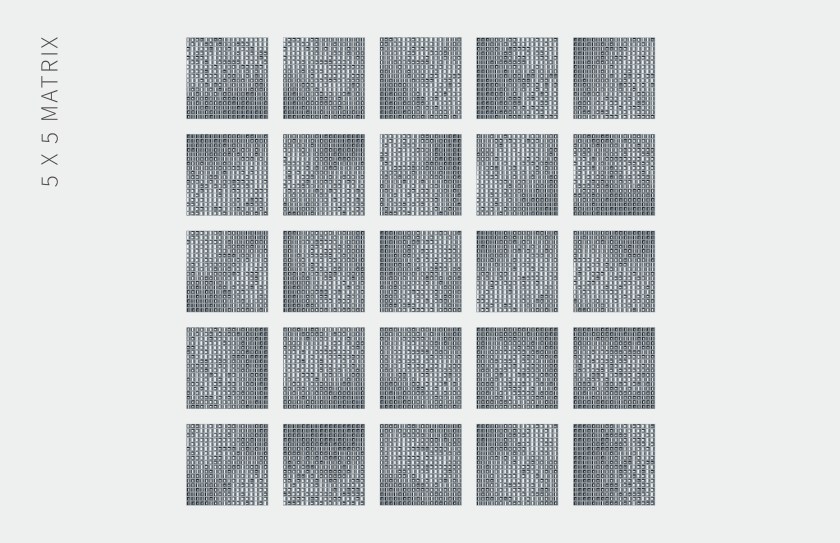
PARAMETERS
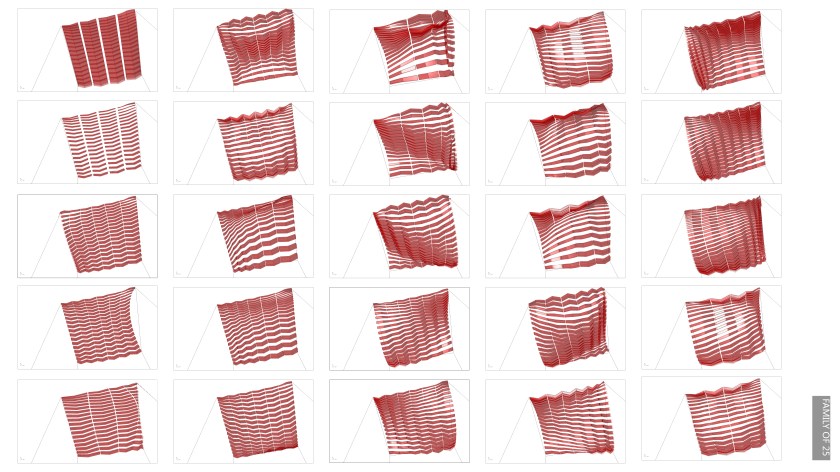

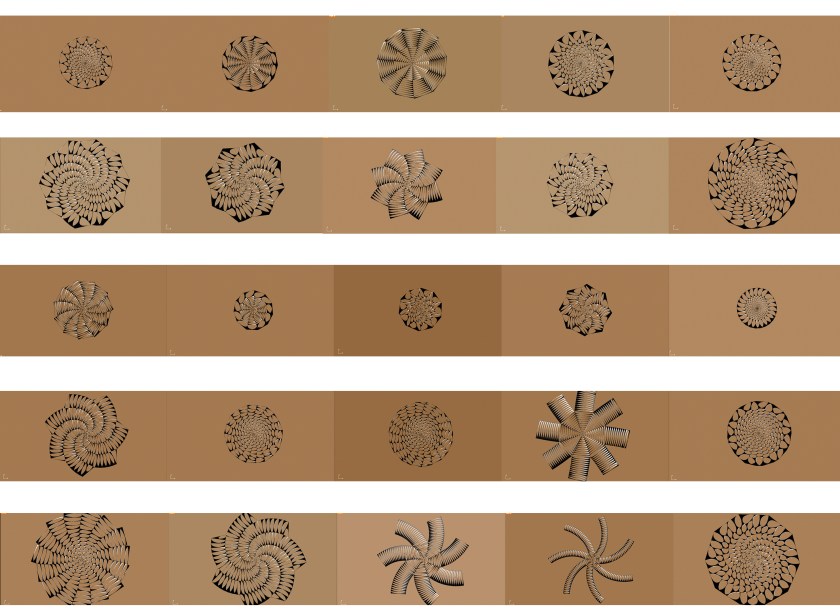
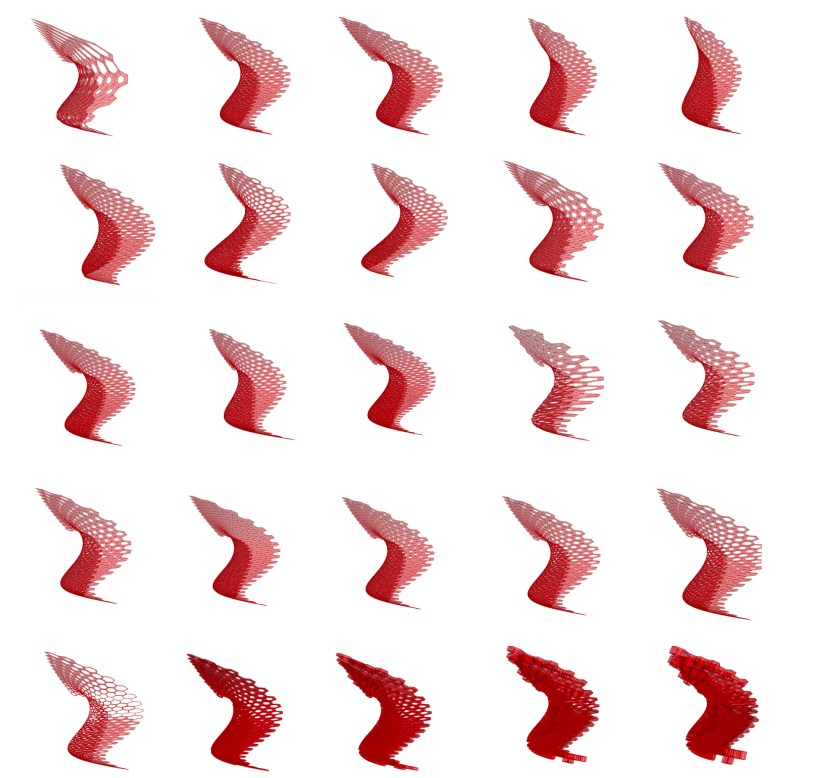
This is the gif of the family of 25. And below are the 6 functions.
ROTATE

FLOAT

SHAKE

WAVE

STRETCH

SQUEEZE


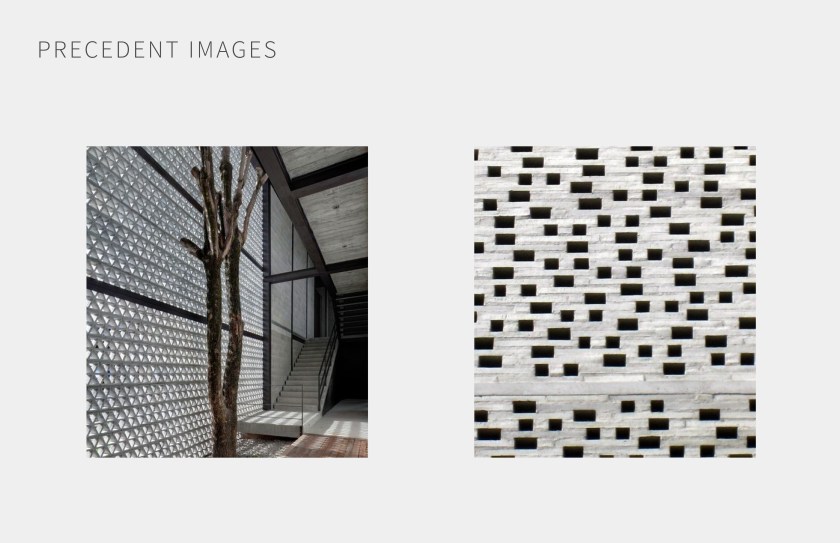
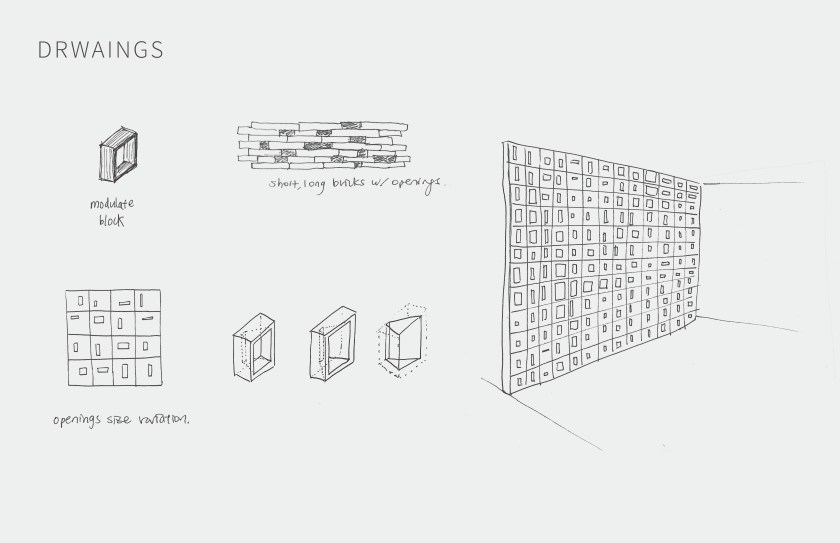
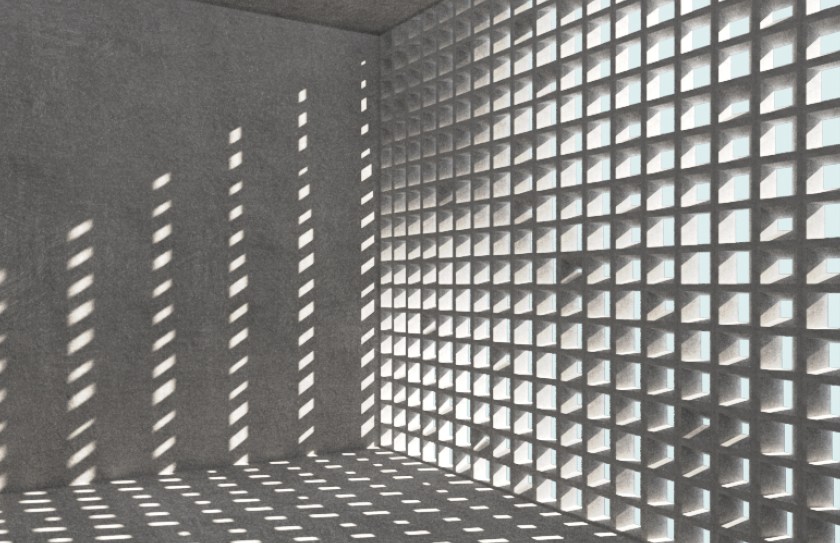
For this 2D interior project, I have developed a wall system that interacts with daylight and the interior space. The wall system is intended to be a screen that let light penetrates through to create patterns of light and shadow. The different angled faces of the wall would also subtly create different shades. The wall has seemingly random and rectangular apertures that brings some lives into space. It is made of made of modular sizes of blocks, which compensated the randomness of the apertures and sets a uniform frame to the system.
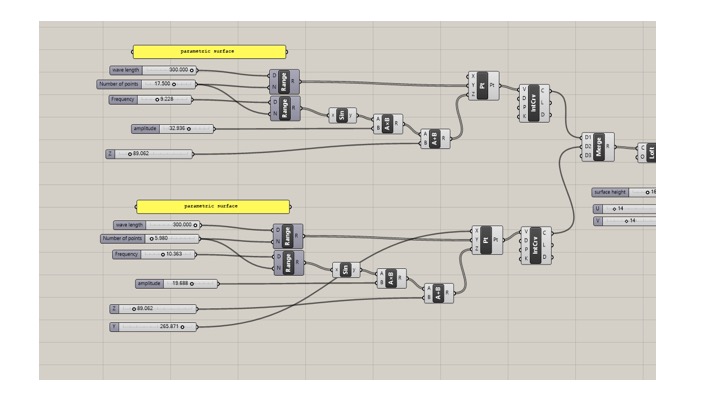
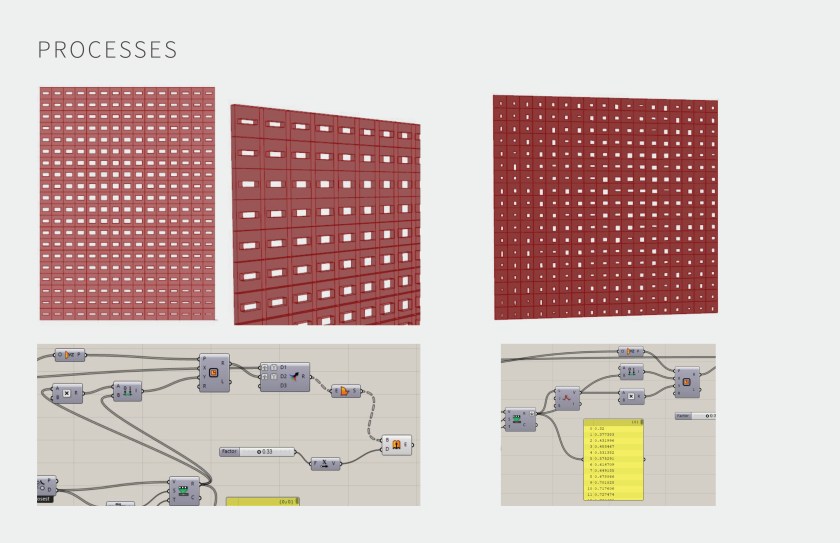
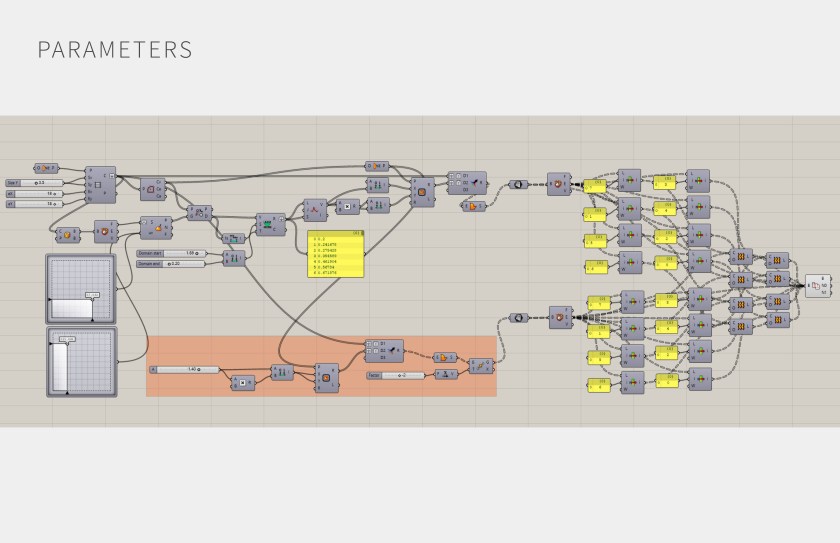
To design the wall system, I first created a rectangular grid. I united the whole grid as a surface and provide input for setting its surface centers. The input is the attraction points that are one of the determinants of the general sizes of apertures. I then set up a domain and remapped the numbers from the center of each rectangle to provide input values for the specific sizes of apertures. Since I wanted the apertures to be more vertical, I constructed another domain so that the value runs from negative to positive, making the aperture expanding both sides from the center. I also added a jitter function to shuffle the sizes of apertures a bit to create a more organic look. The second rectangles in the grids are combined with the grid to create surfaces with openings. I repeated this process and created another panel of surfaces with uniform apertures. At last, I pull the lists of individual edges, matching them accordingly, to loft the surfaces between the two panels to create volume and angled faces between apertures.
Throughout the process of making, I have better understood the logic of visual programming and how objects are formed. They also have information to be extracted and used towards other functions. The project allowed me to comprehend visually of how each component is a tool for creating, retrieving or changing parameters. I would like to further work on the ideas behind inputs so that objects respond to specific ideas or issues.


Design Explorer Link
http://tt-acm.github.io/DesignExplorer/
Get Data:
https://drive.google.com/open?id=1-DlgY7NxcMrqW7lTdOYmVgbHlR92KZMC

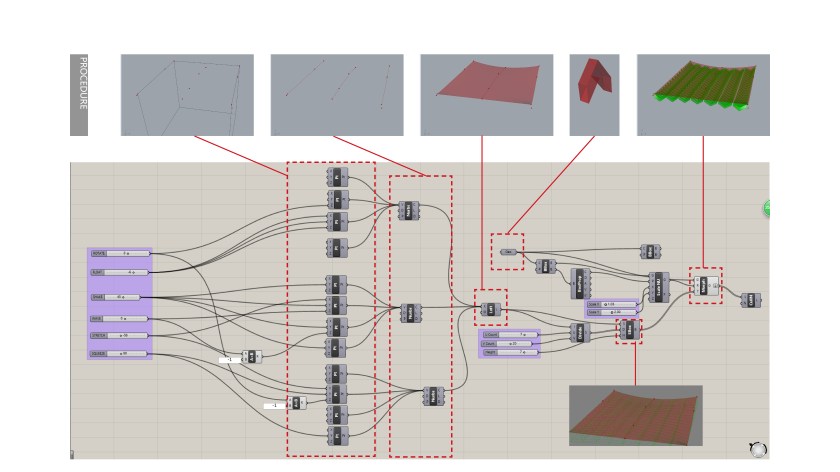
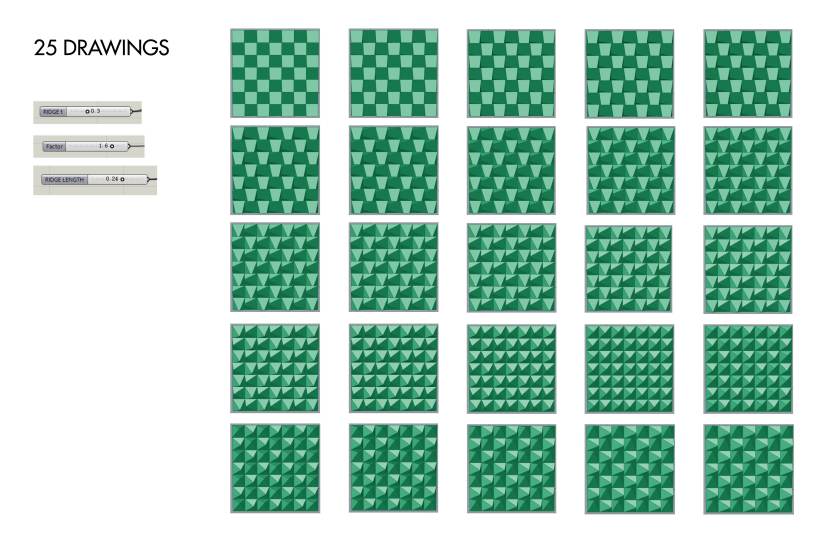
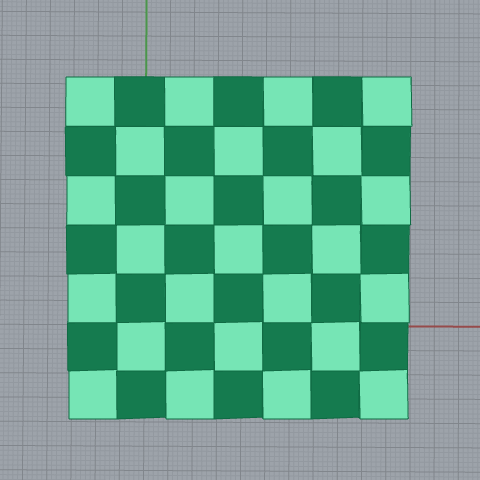
I try to use a single unit as a geometry shape and fit it into surface bounding box to create a regular curve facade. In this case, you can change the pattern by changing the length,height and depth.


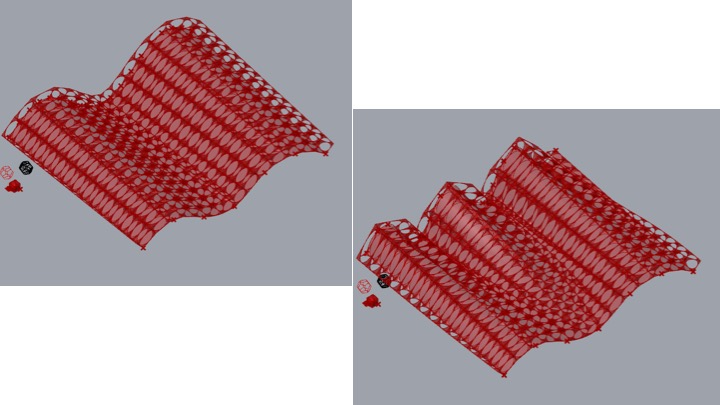
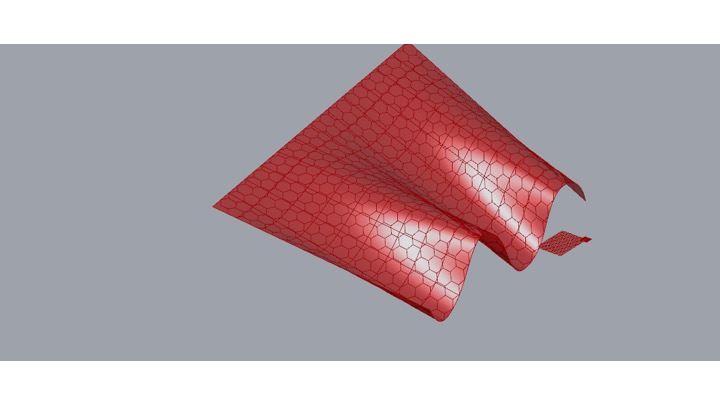
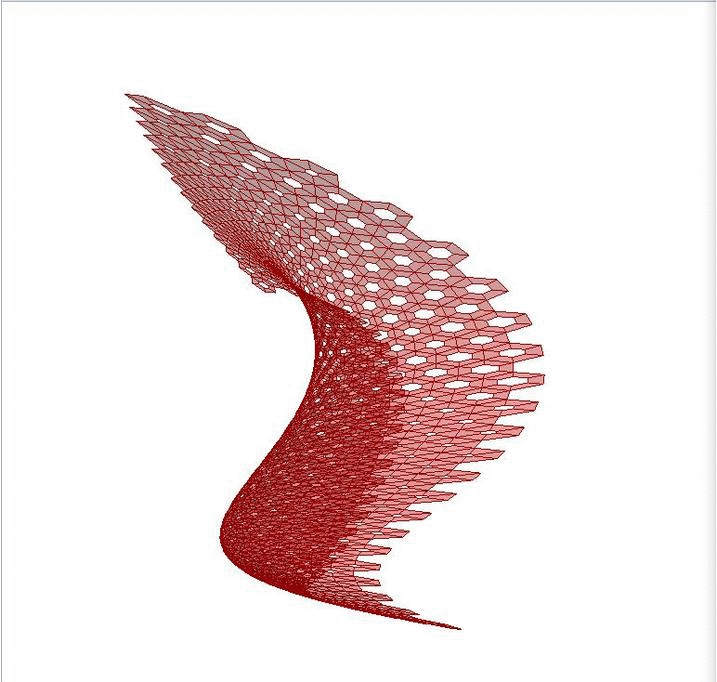
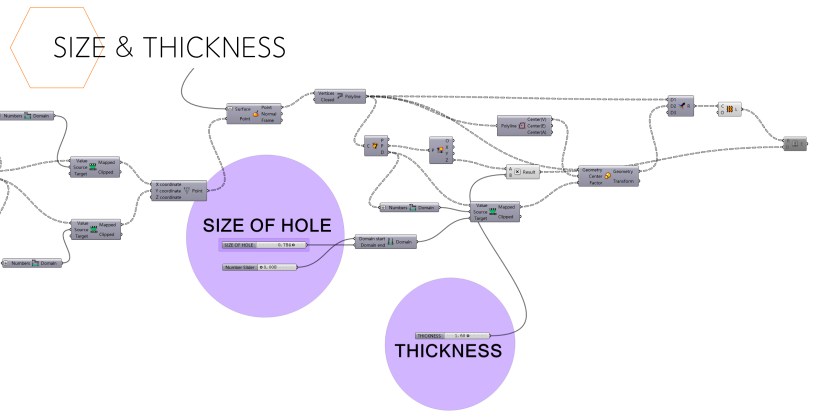
This is the first practice of parametric. My 2D interior is about the relationships. The first relationship is about hexagon and surface. The second one is about hole and curvature and the third one is thickness and curvature, so I got four variable quantities, which are surface changing, size & numbers of hexagon, size of holes and thickness of every pieces.
For the curved surface, I divide the control points in to four groups which control different parts of surface, so you can control the surface through changing these four elements. However, how to put hexagon on the surface is a very difficult step. In grasshopper, I use discontinuity and deconstruct vector to achieve that, so if you want to change the number and size of the hexagon on the surface, you can just change the grid.
For the size of hole and thickness I use planar to look for the centers of every hexagons and to find the curvature of centers, and use it to become the variable quantity of holes and thickness. Then I use remap to control the size of hole and use multiplication to control the thickness.
I use these 4 variable quantities to control the final works, but I still have a question about the thickness and vector. The extrude comes from the front and back. I know it may because of the curvatures, which are plus or minus. I was wondering if there is a way to make them all plus?
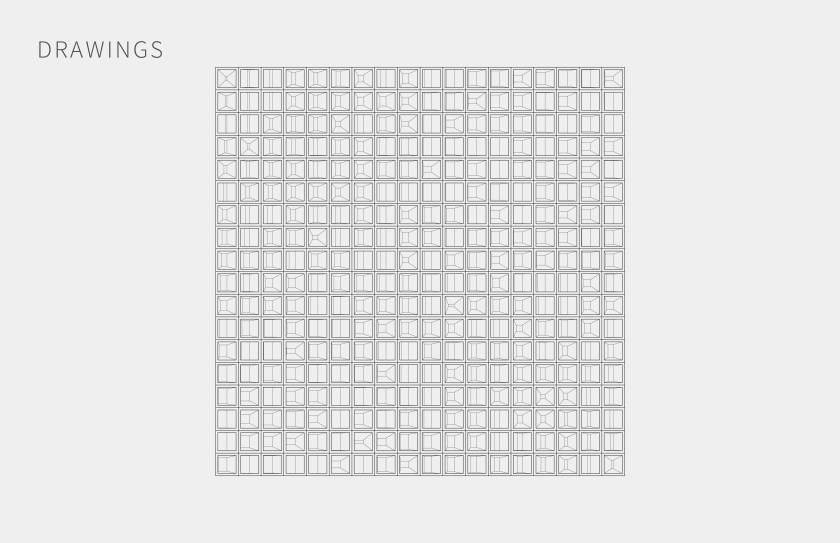
PRECEDENT DRAWINGS


EXTENSION DRAWINGS


2D interior Presentation_ Jiahan Yu
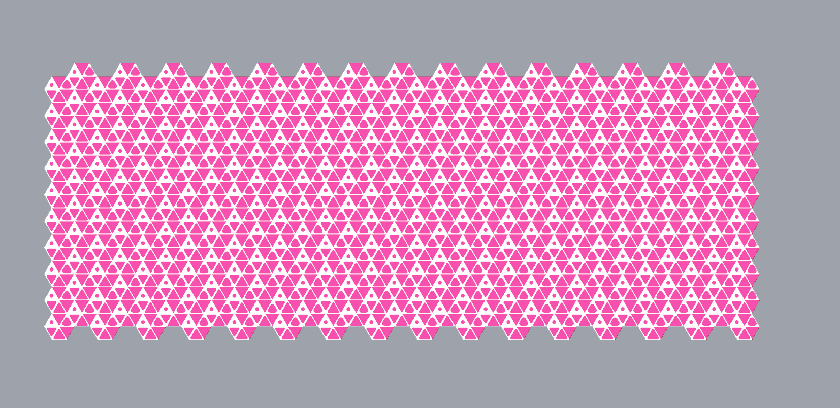
I try to use grasshopper to build a various hexagon patterns. I separate a hexagon into pieces and give order to them. Changing the colors and orders of them.


You must be logged in to post a comment.