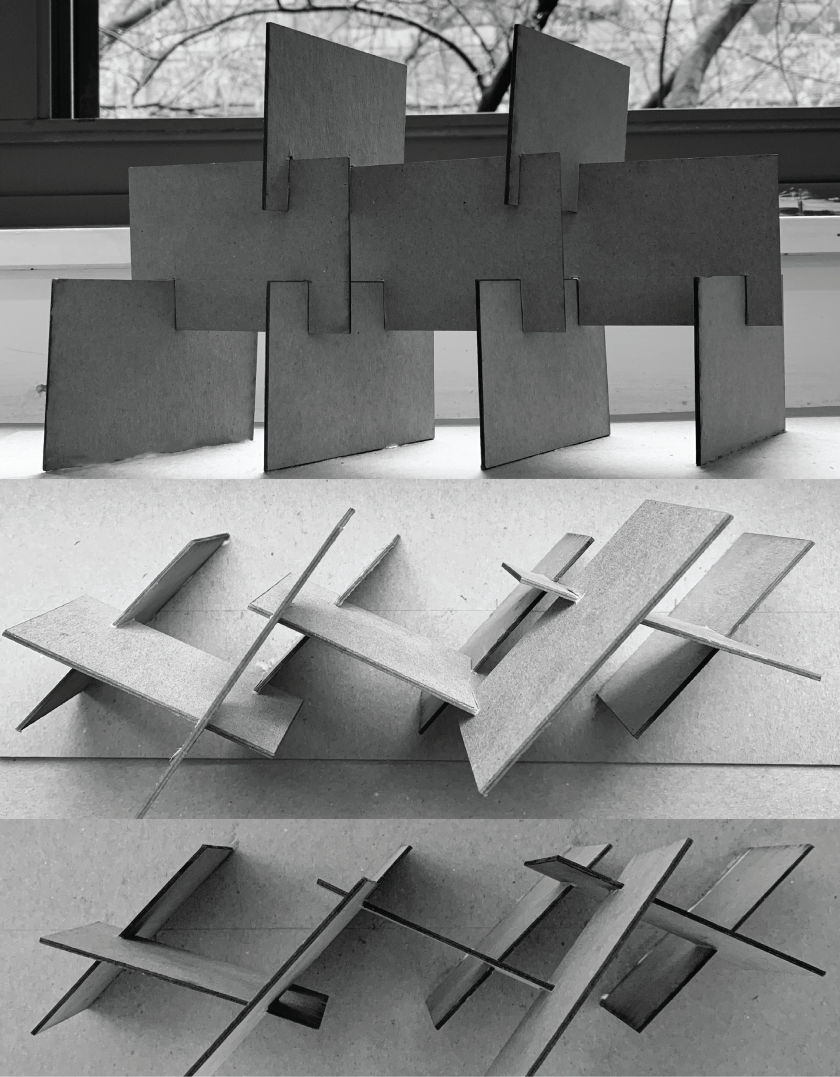
There is The testing model of our boundary design.
There is The testing model of our boundary design.
We attempted the notch the various elements together and they seem to be working fairly well in terms of staying together individually . The main concern now is whether or not the entire screen will be able to stay together should it be on a larger scale. 
The screen itself has no visible problems the main problem now will be notching everything together because most of the pieces look very similar.
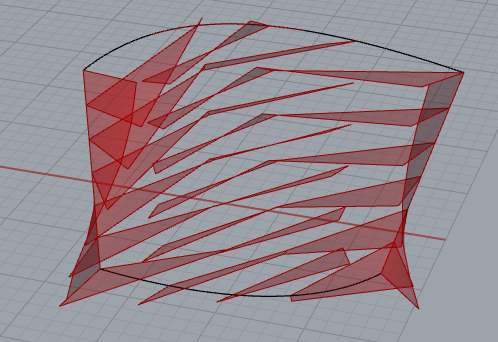


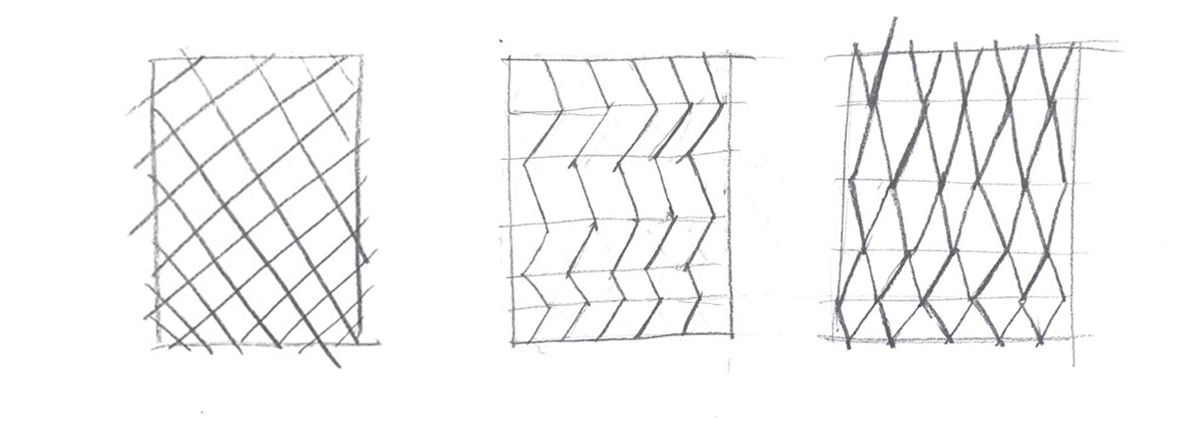
The idea of this kids’ boundary design is to design a boundary with the diamond shapes. The original idea is to form the boundary by crossing several diagonals lines.

First version Revised version
However, in the first version of the boundary, I finally choose Tric as the basic shape to form the whole thing. 
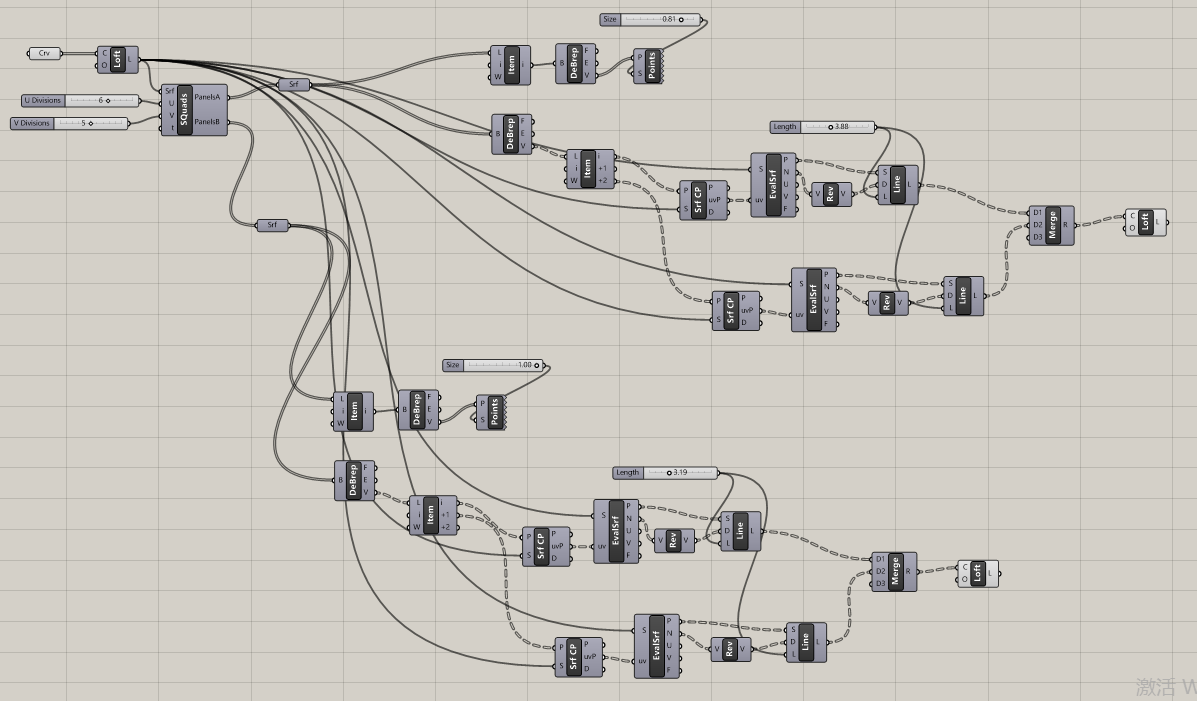
After building the boundary, I change the shape of the panel to diamond. Also, use LOFT demand to change the shape of each piece into the curve.
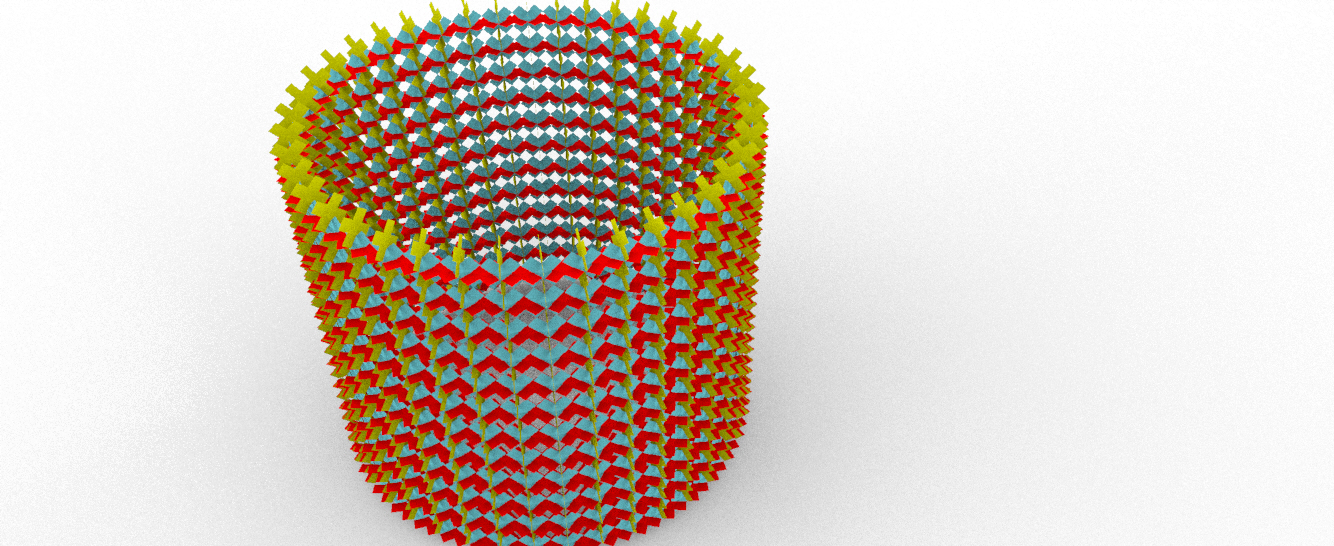
During the process of making the boundary, I revise my design to a diamond boundary with a change of panel’s size from bottom to top.
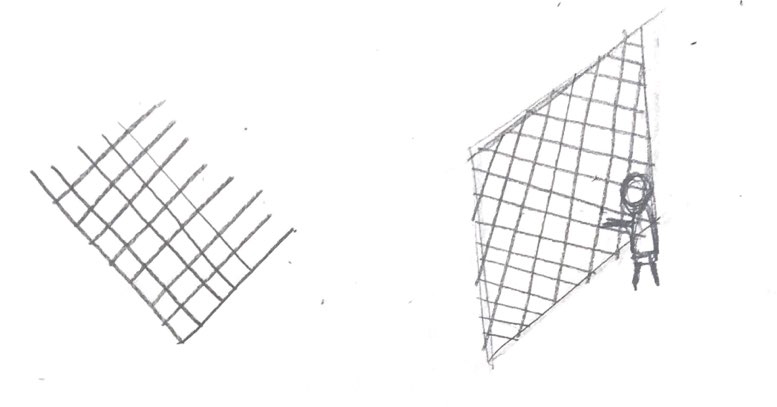
Draft
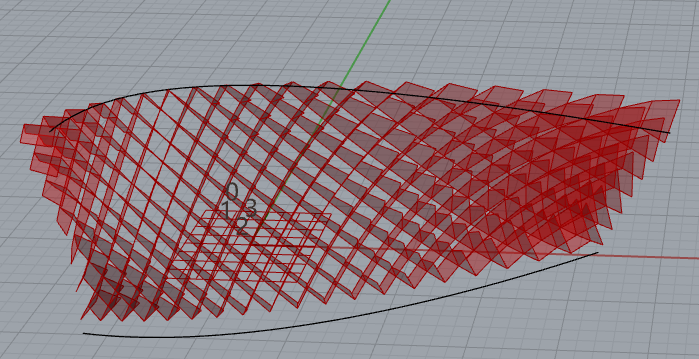
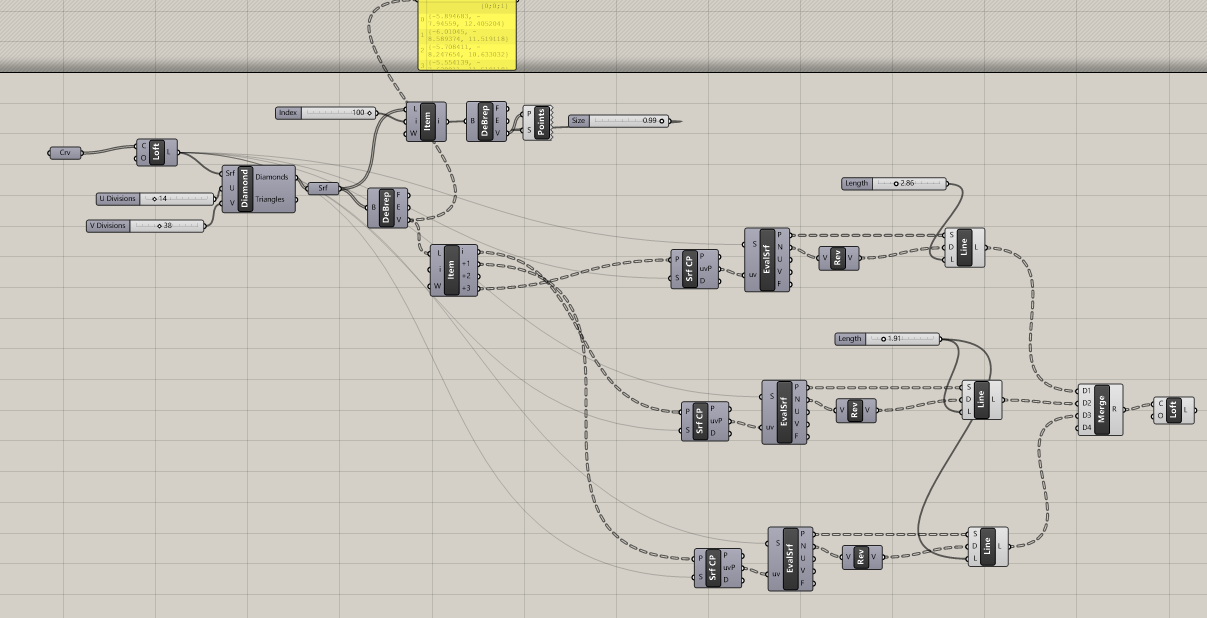
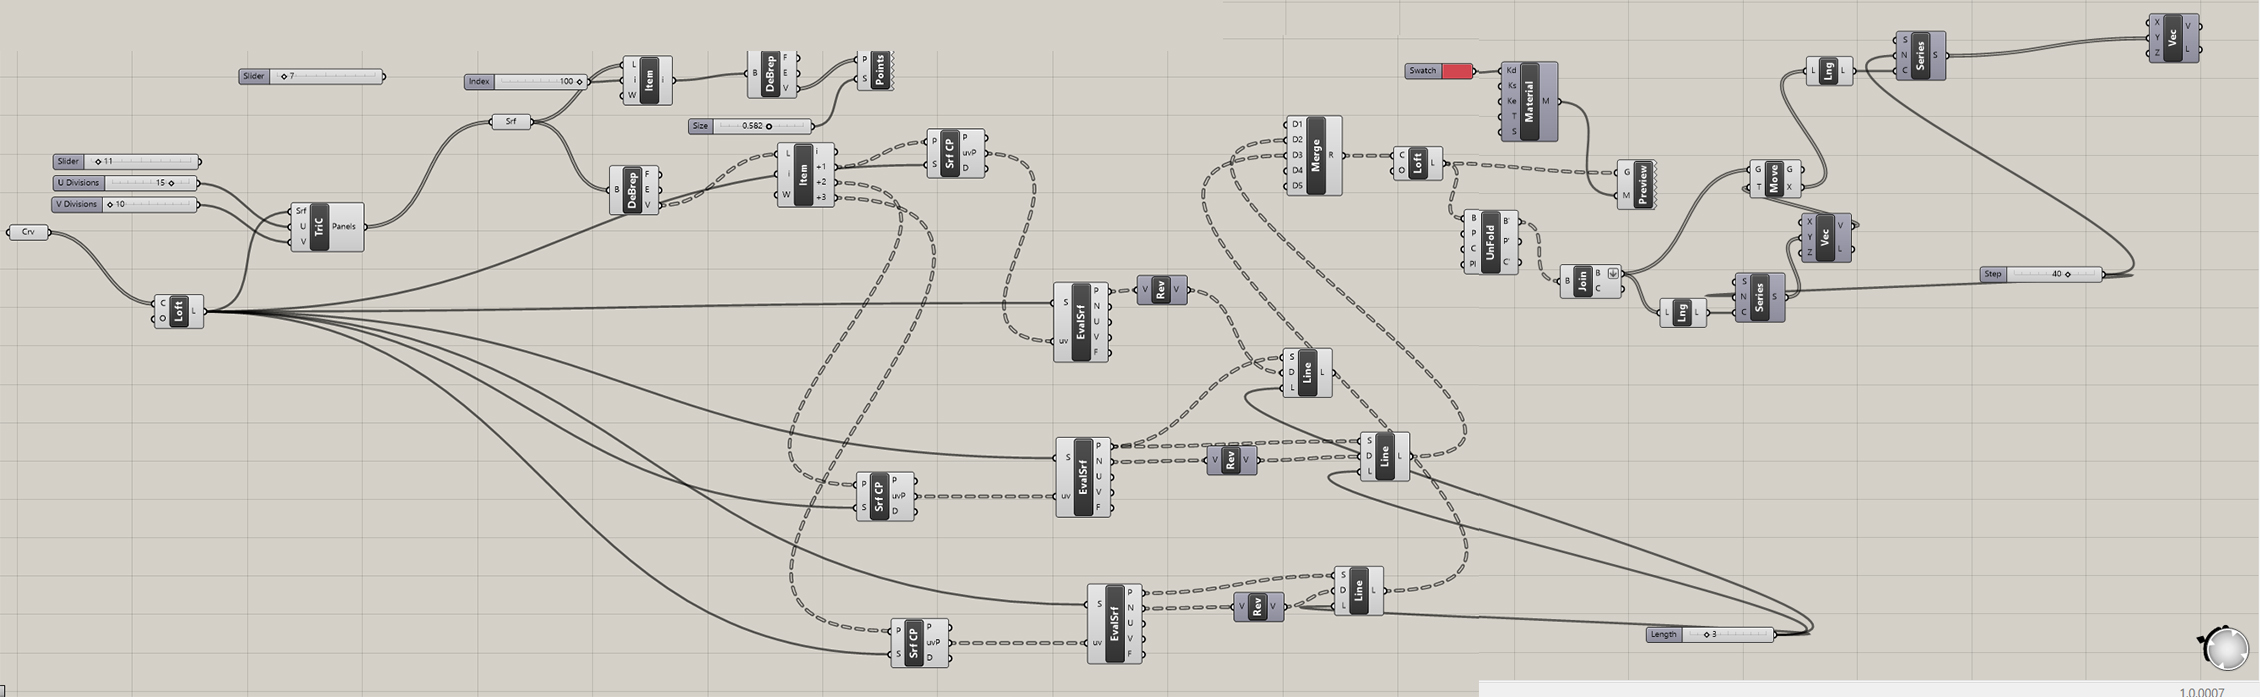
Divide the rows and columns on the surface. Then dived the points on these lines. Move the points and make them cross by each. After that, connect the line of these points.


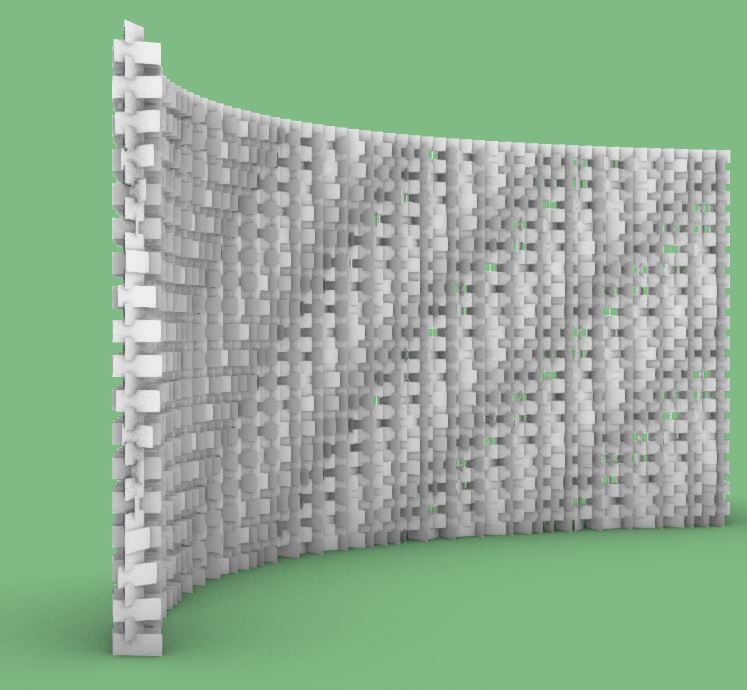
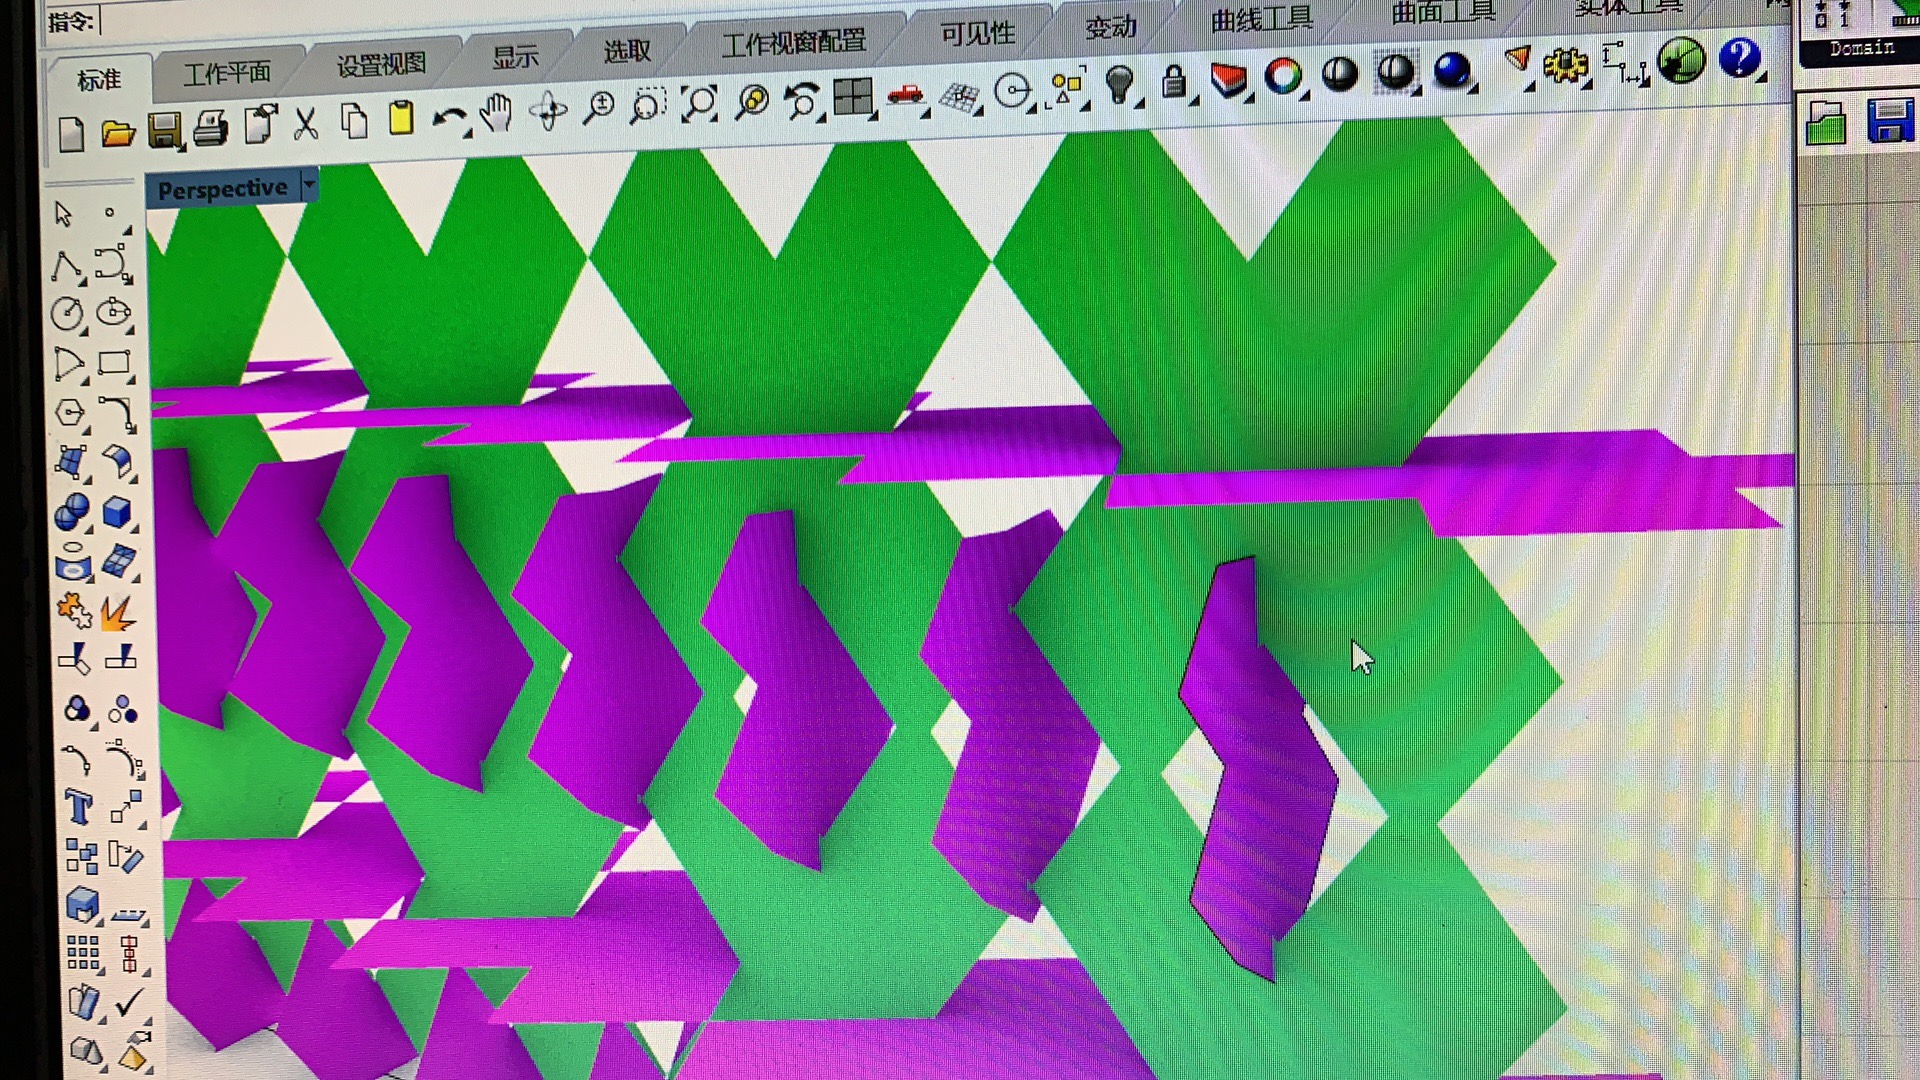
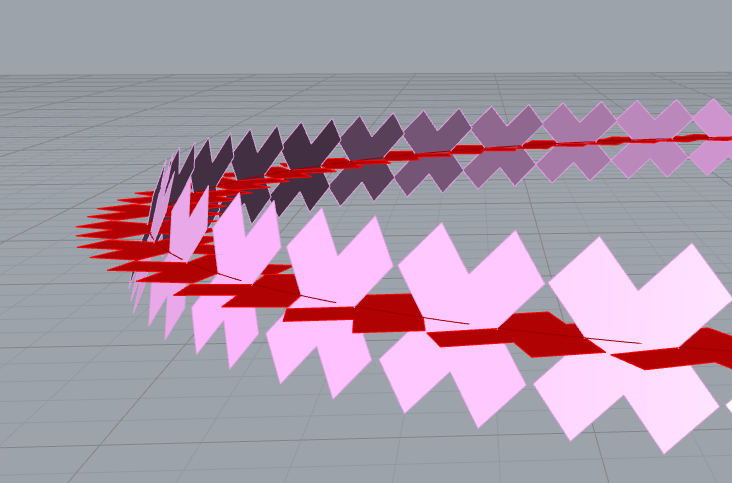
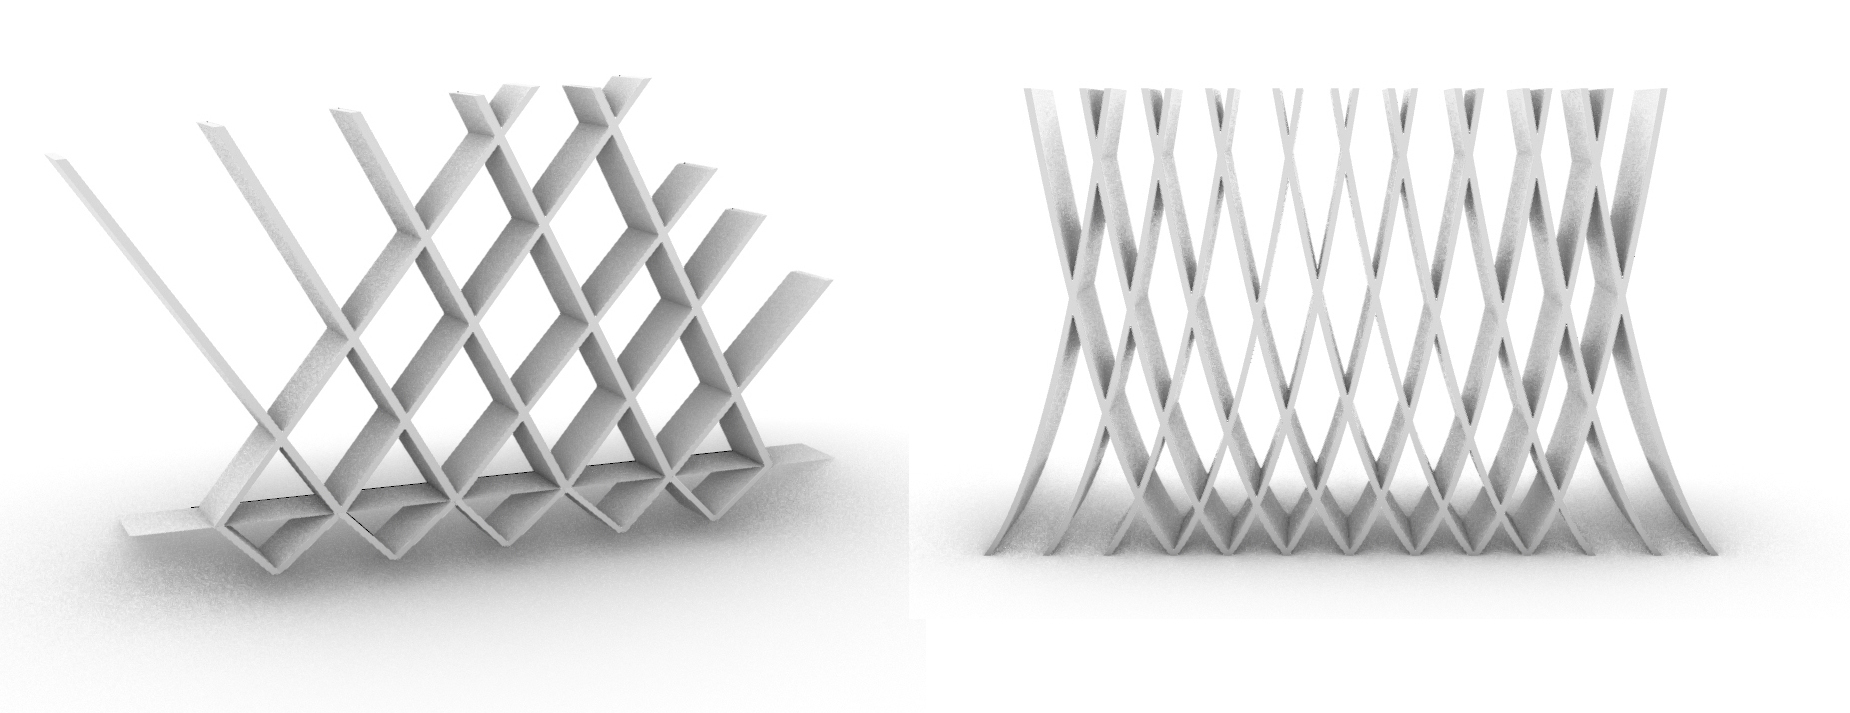
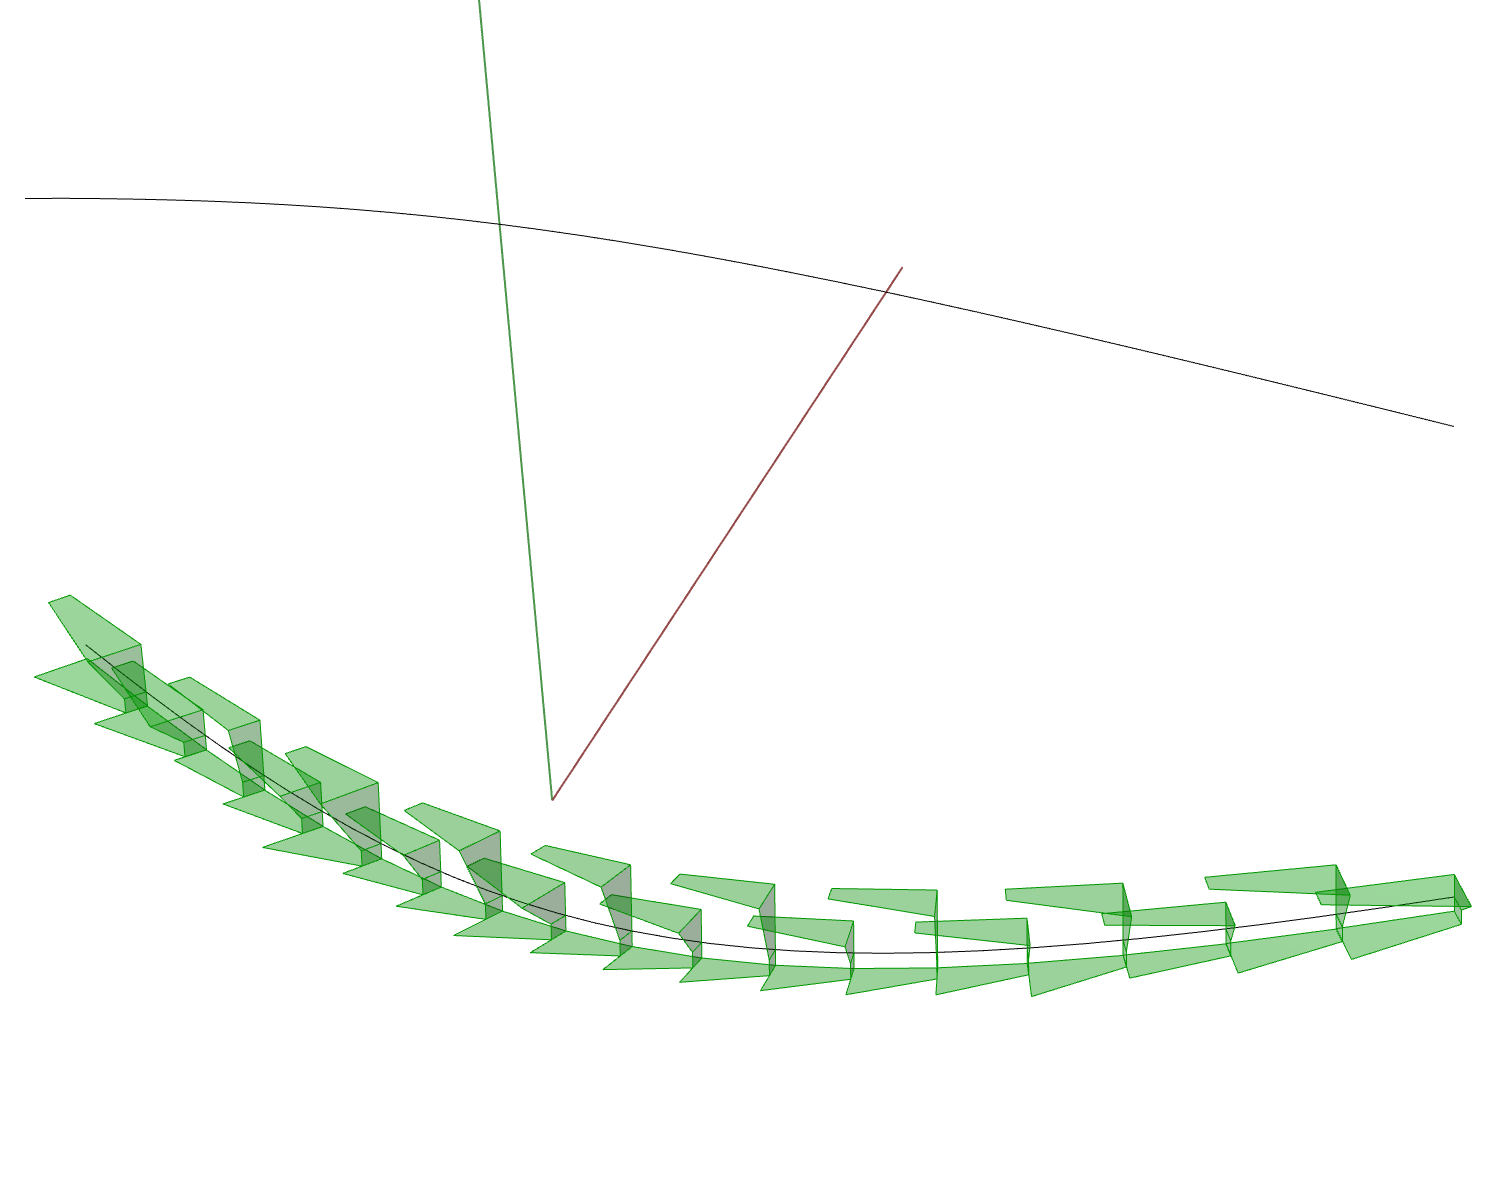
This week, instead of just doing a straight partition, this new version has a curved structure, and the rotation of individual units is now following a gradient, creating a wave-like pattern, these features largely increase the multidimensionality of the screen.


")


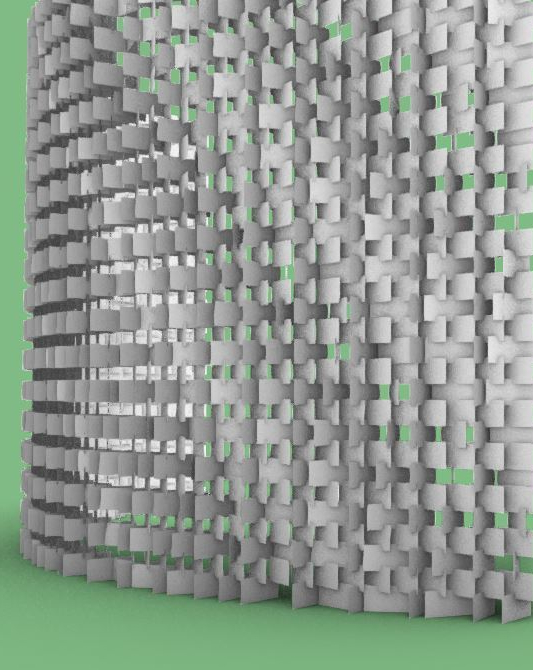
For this week, I tried to add other adjustable factors. In this version, odd numbered row and the even numbered row can have different density, but that causes more difficulty in building a structurally workable design and other unexpected problems in dispatch command, so I still need further testing.


Initial attempts and examples at creating a double star shape. The flat image was created but the main problem last week was that I could not get this shape to become 3D. However, the points are easily adjustable.
")
")
")
")
")
")
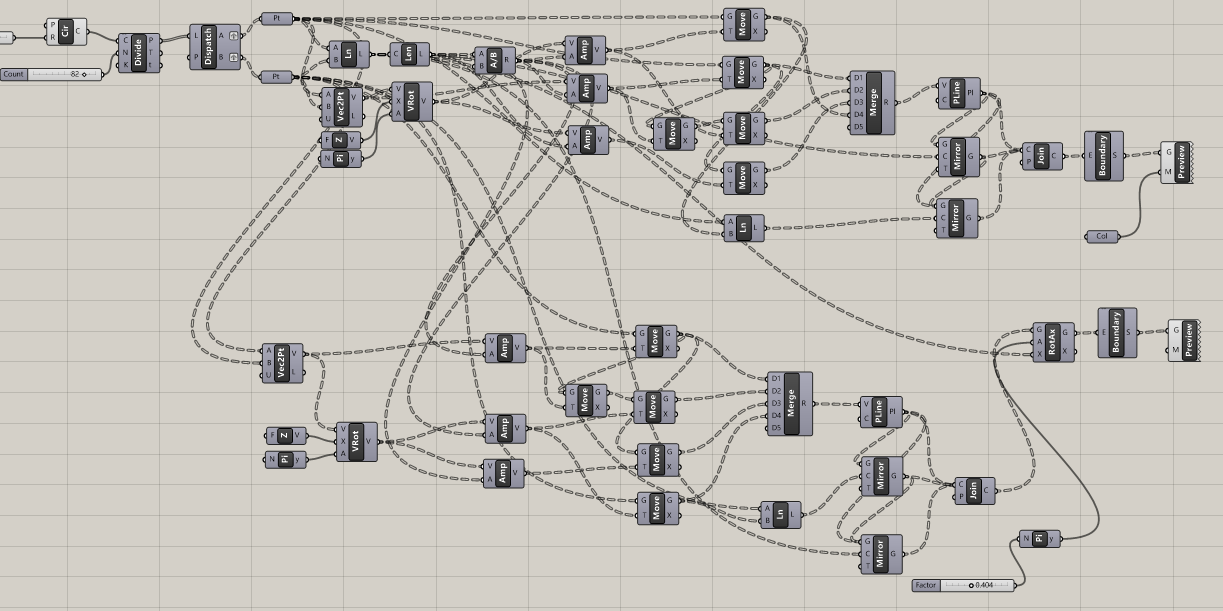
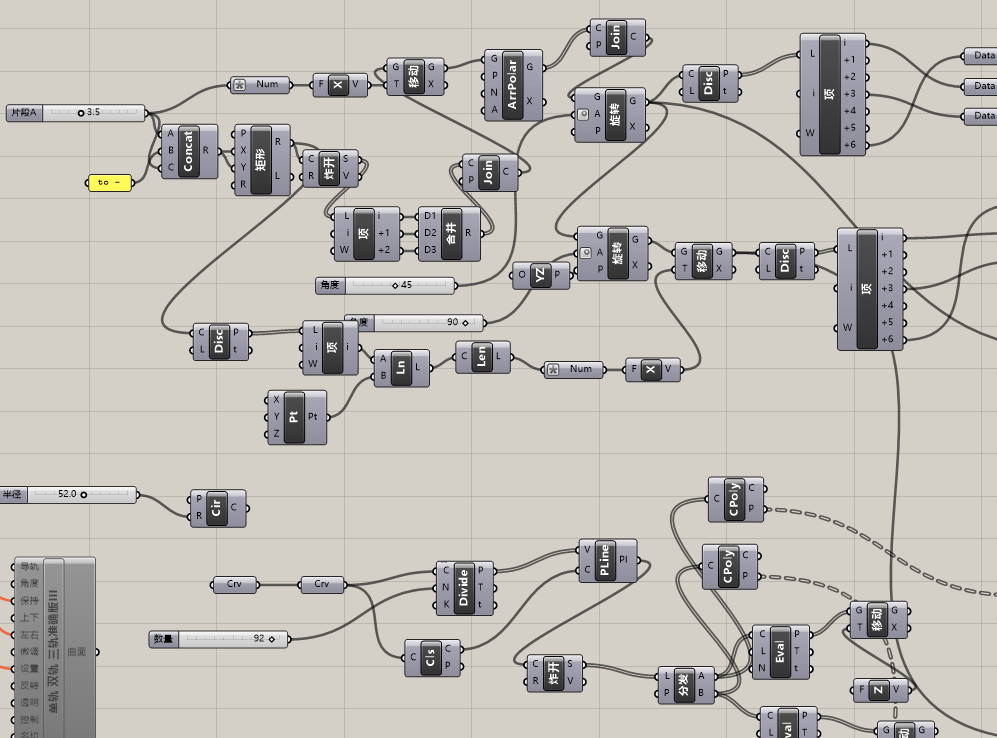
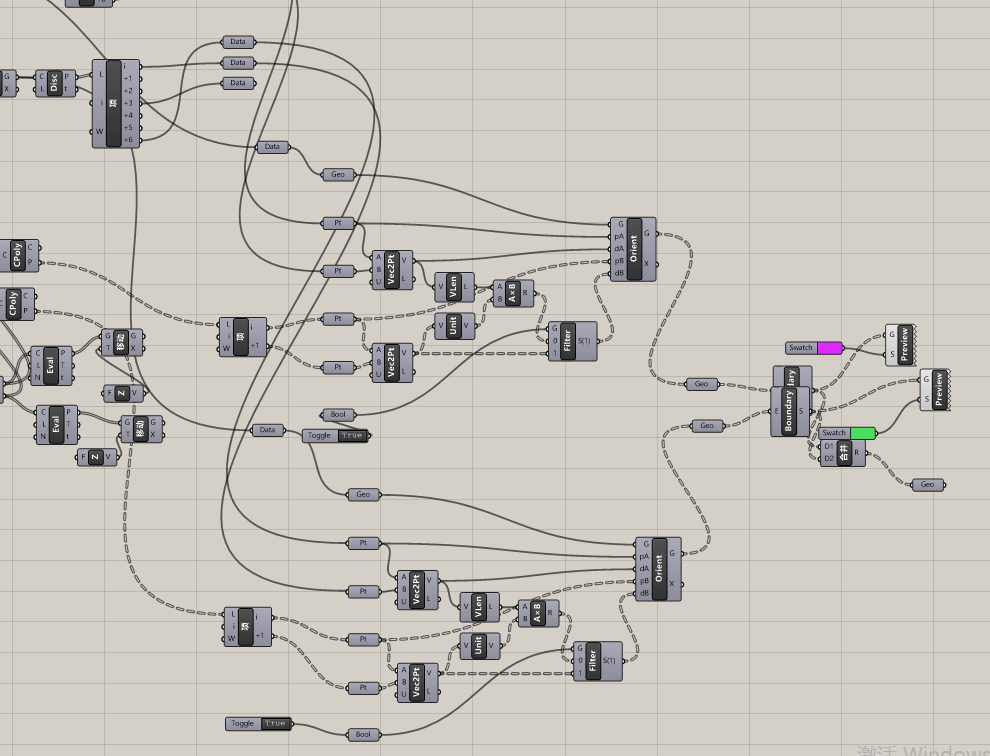
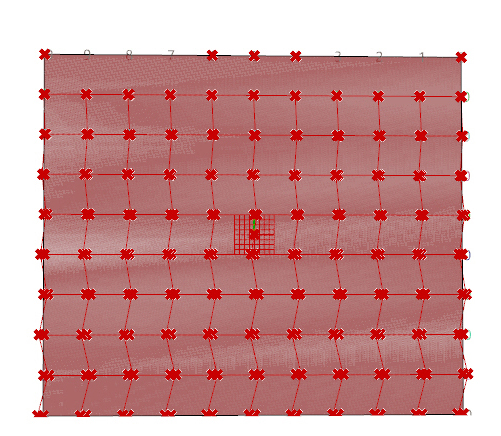
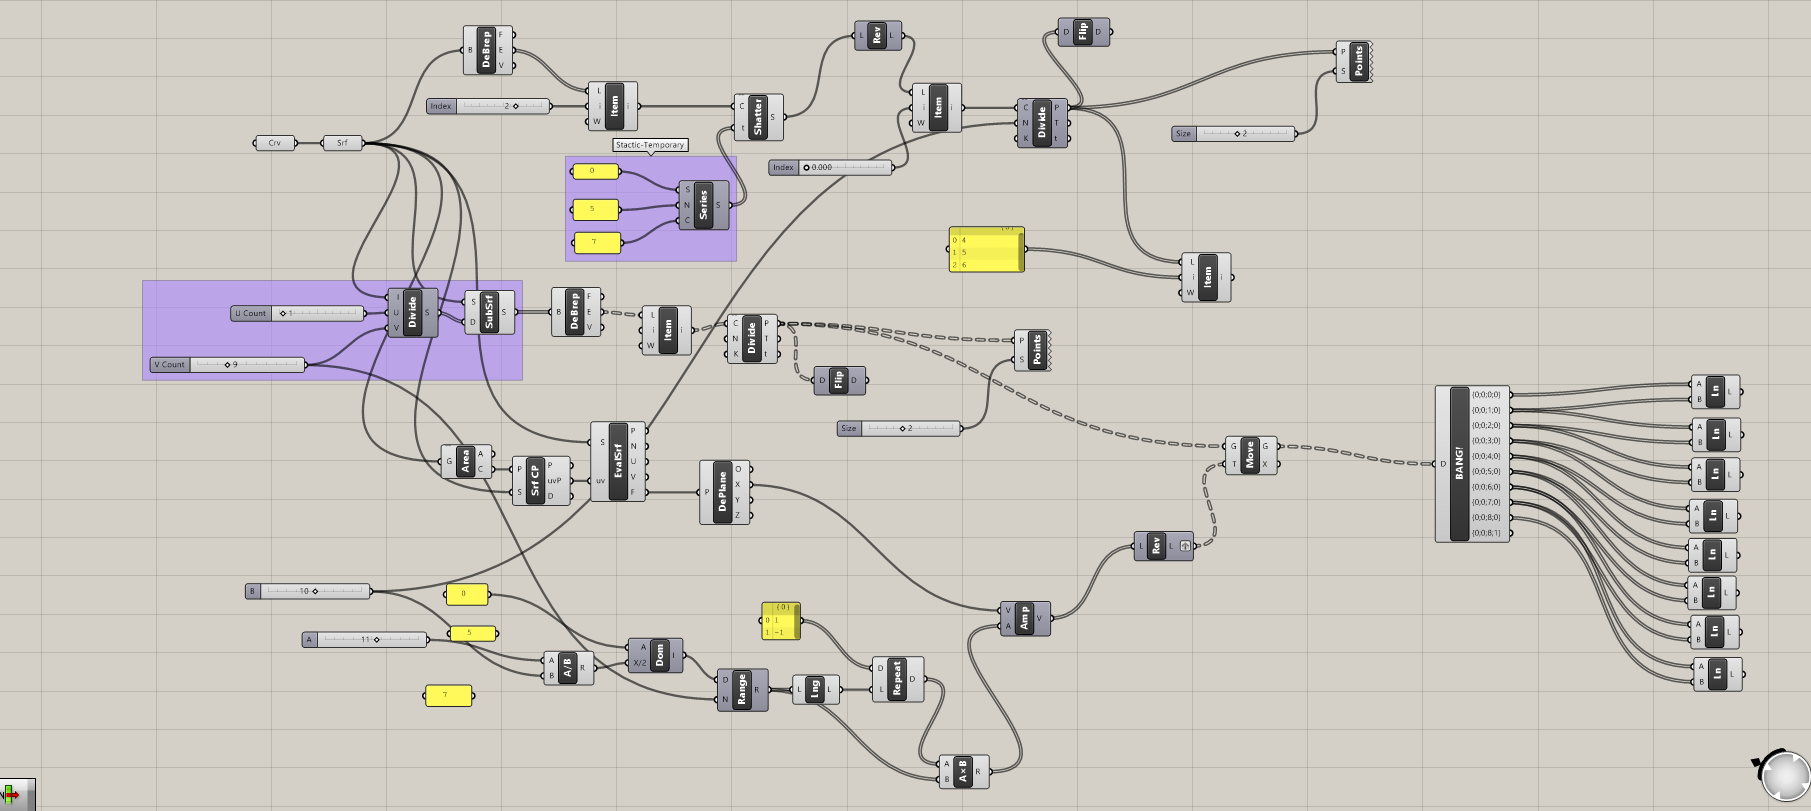
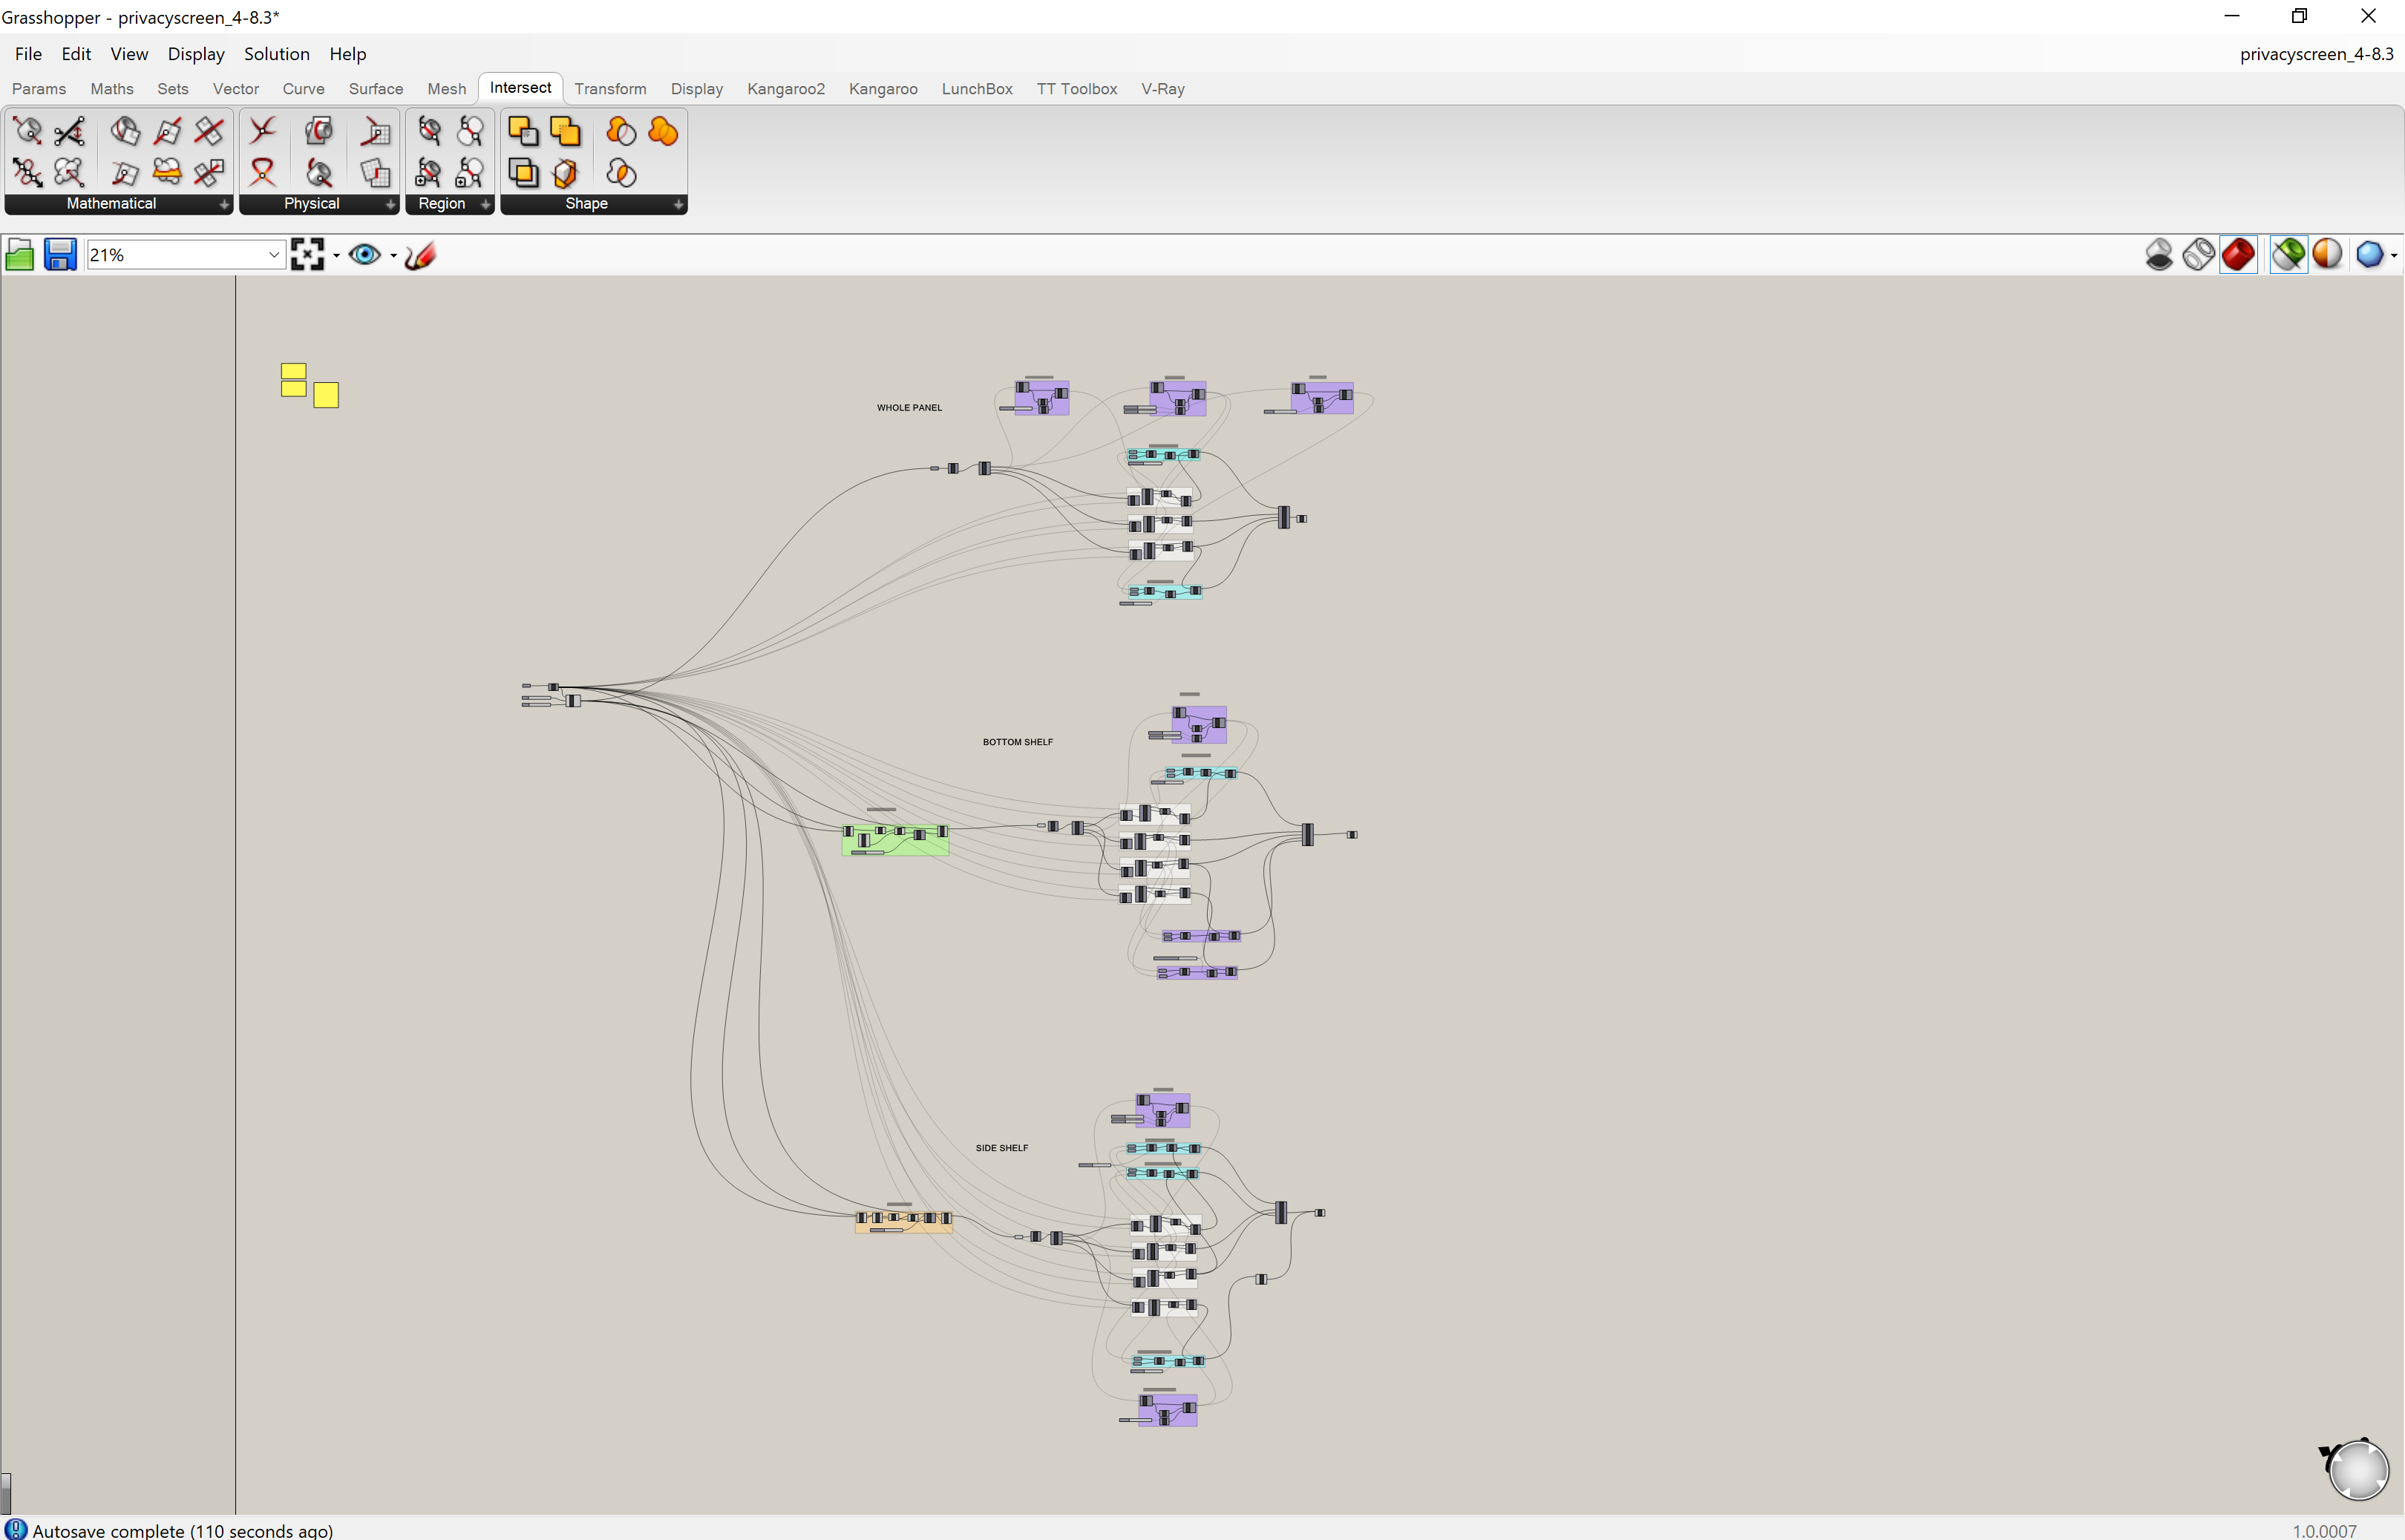
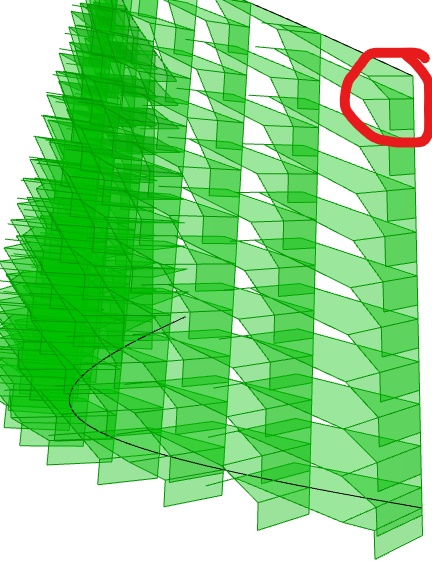
This week the main focus is now on creating a 3D curved screen. Instead of setting the points on a flat surface a data tree method is used. The highlighted areas are the adjustable elements allowing there to be different variations of the wall.

Original Star Design (Changeable settings are all at 0.5 and 1)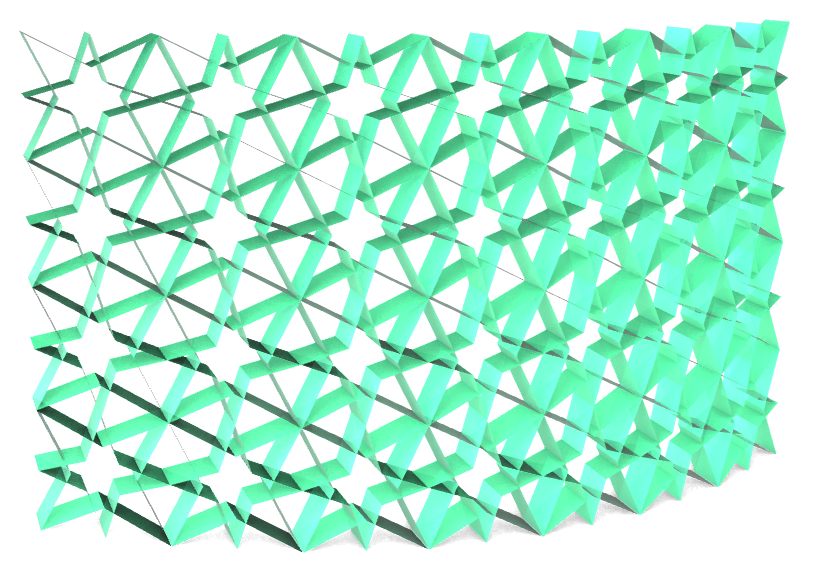
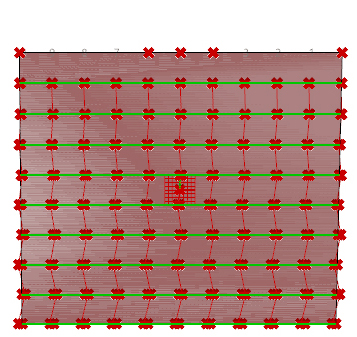
Variations of the Design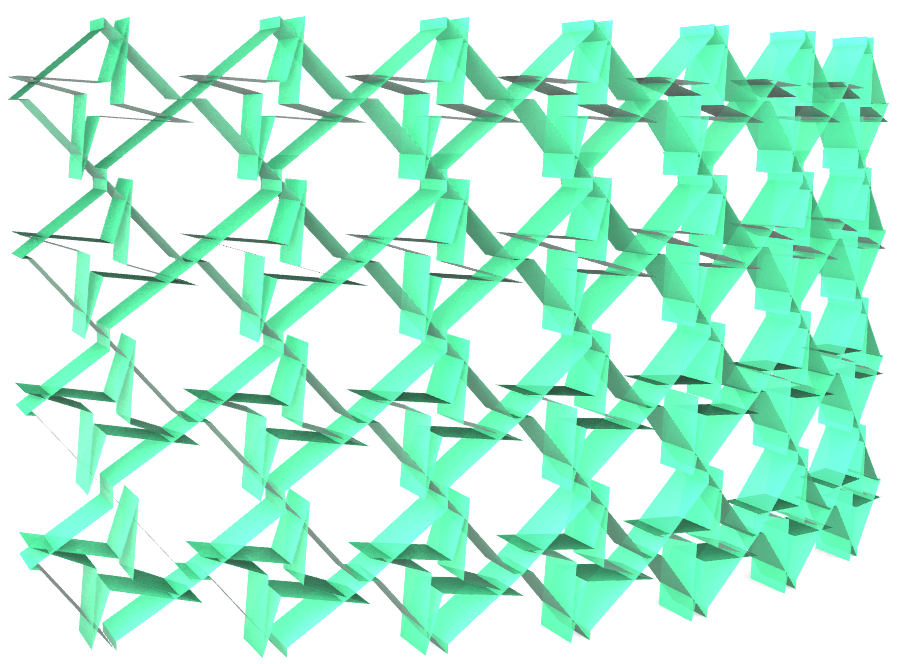


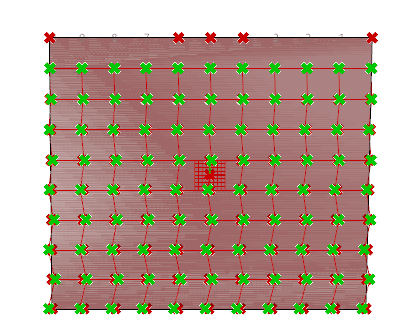
Potential Future Variations
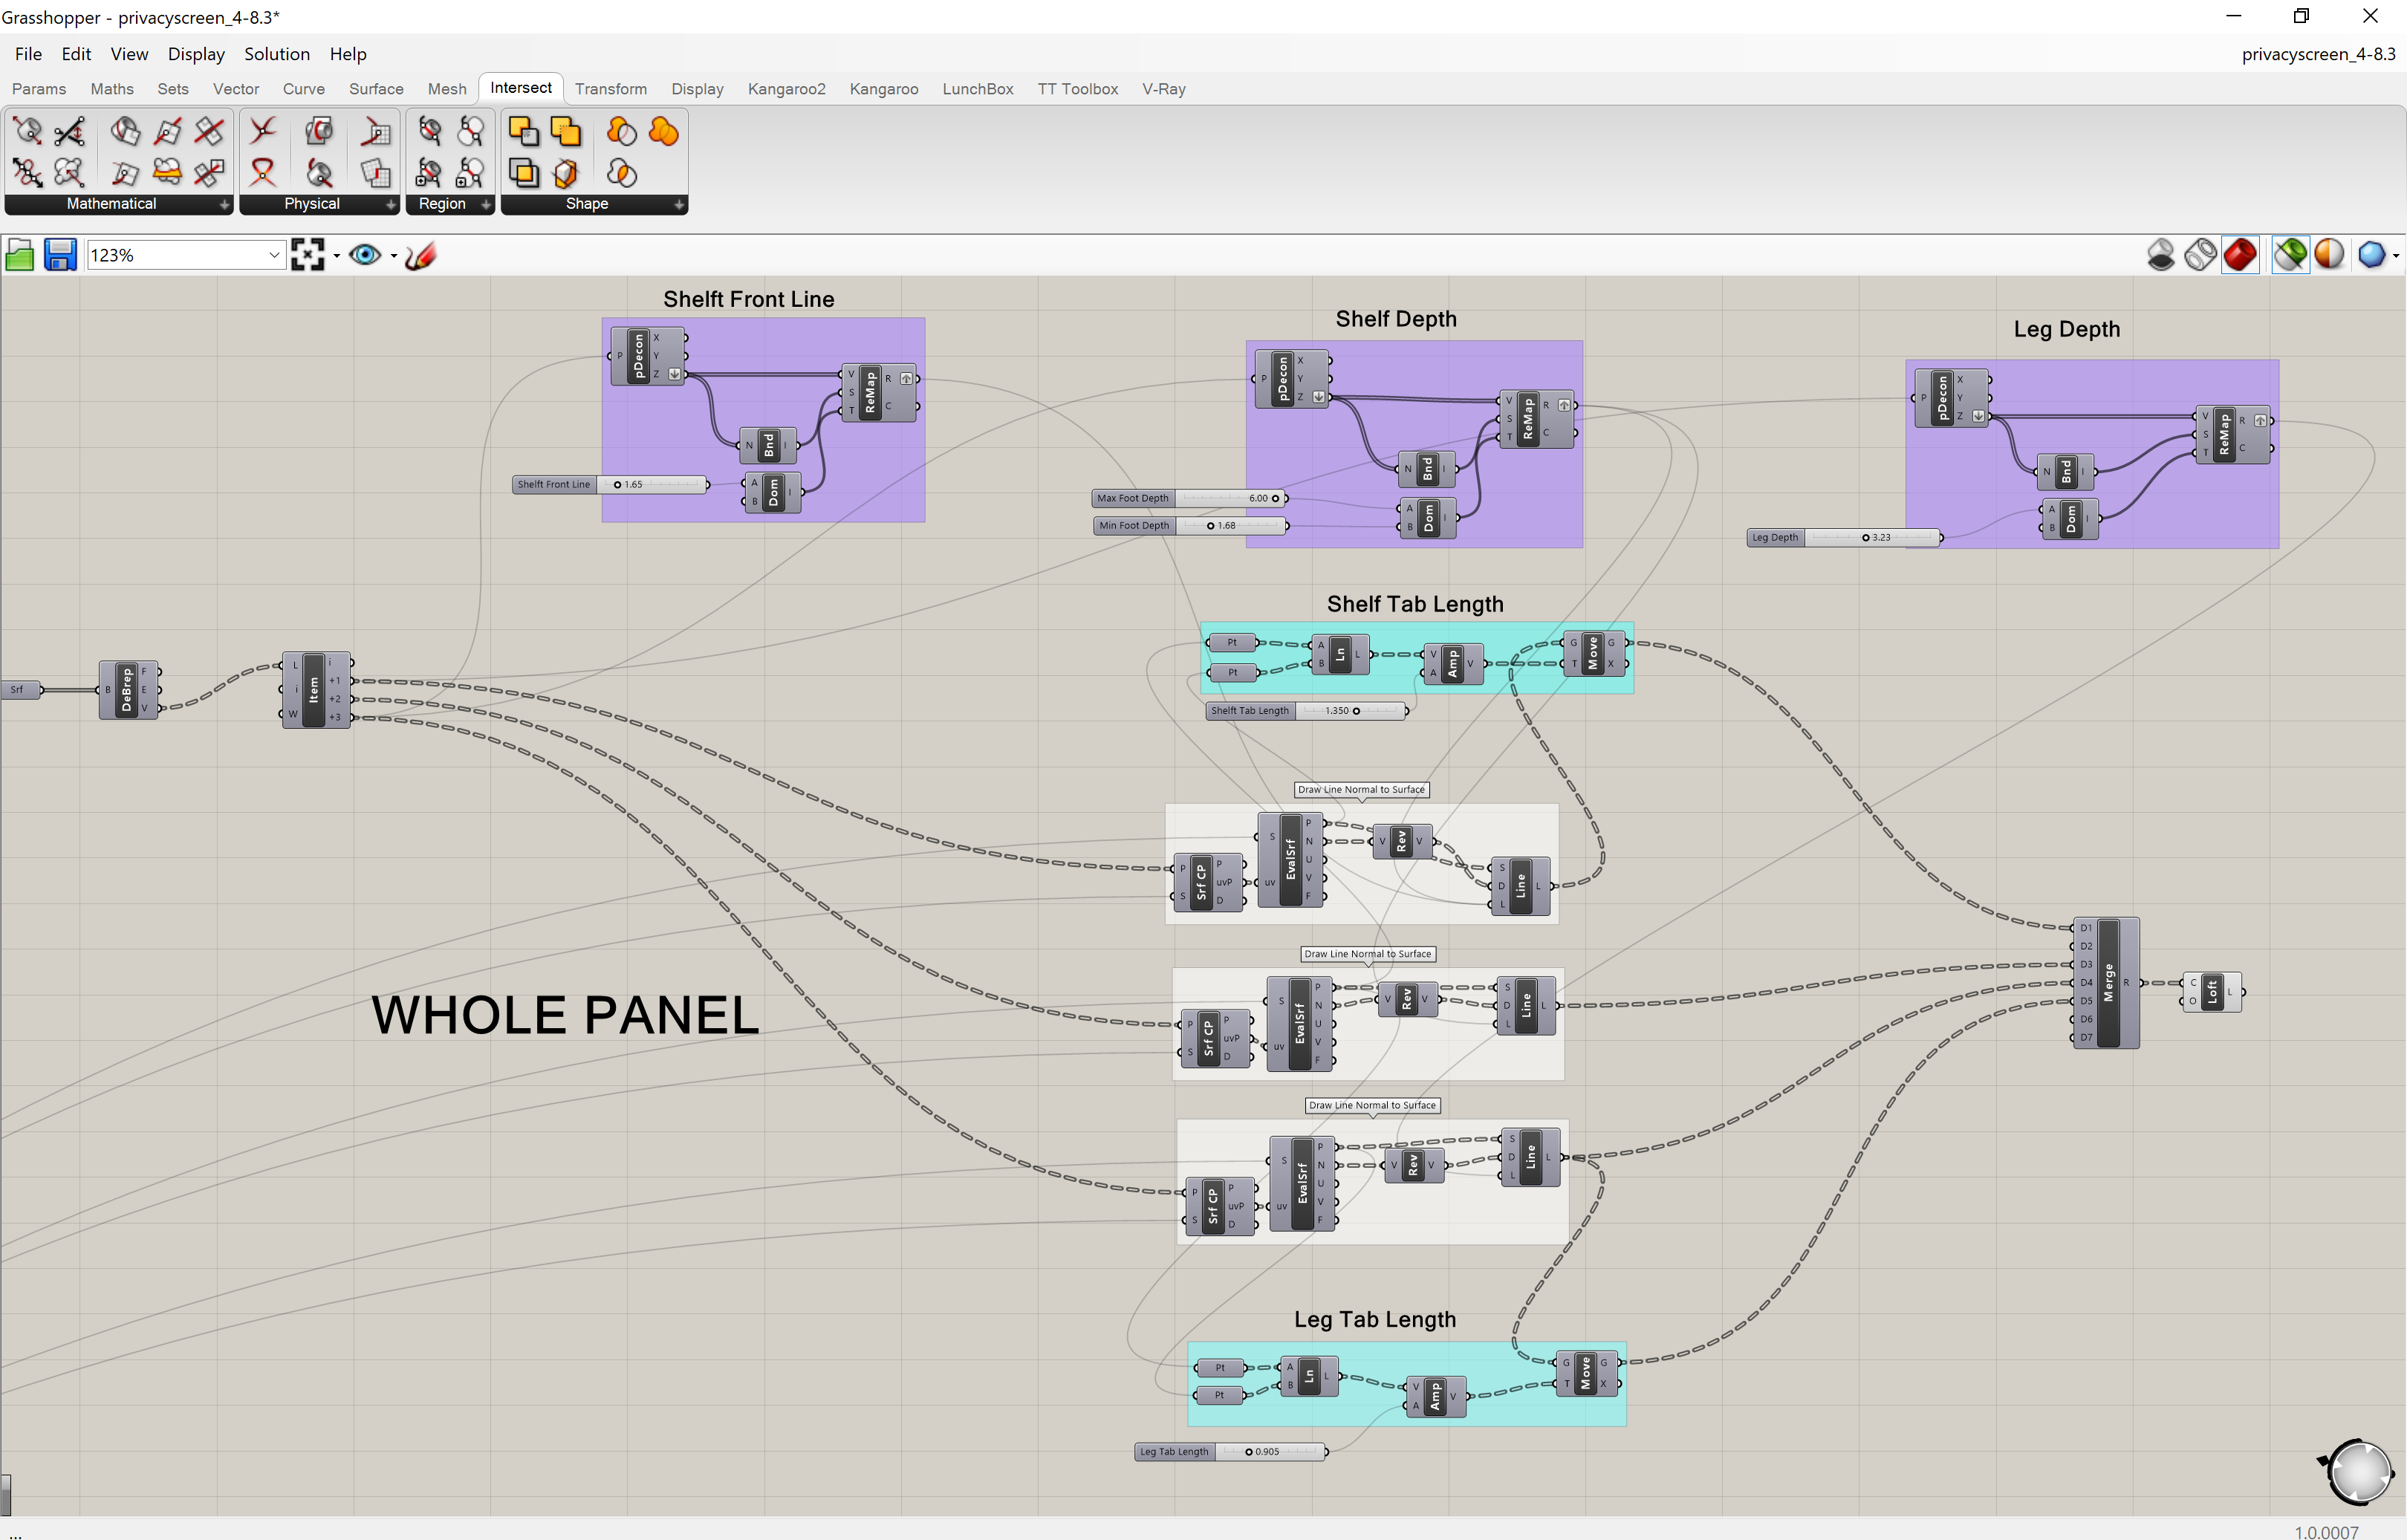
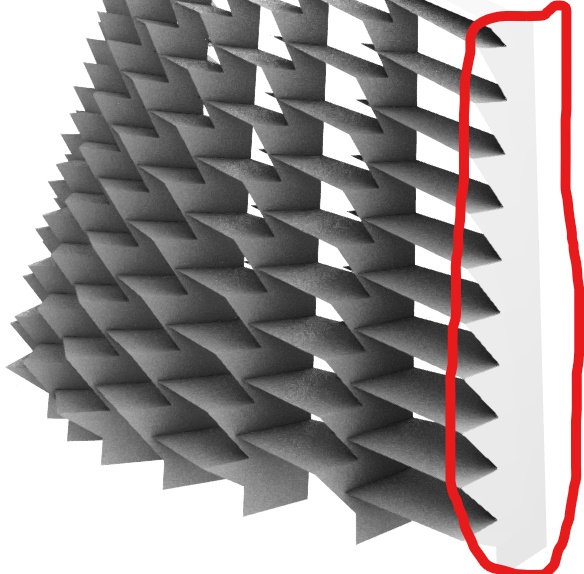
This design probably will not be used this time but could potentially be able to make the wall more 3D in future designs. The highlighted area is the controls used to create the effect.

You must be logged in to post a comment.